
Quick Project: Design A Wall-Mounted Christmas Tree
With Christmas just a month away, many are looking for ideas for a way to celebrate the festive season without taking up too much space, and this minimalists wall-mounted Christmas tree is just the thing.
21/11/2020

If you don't have space in your living room for a live or faux Christmas tree, this wall-mounted Christmas tree takes up hardly any space yet provides plenty of space underneath for a huge pile of Christmas presents. With this minimalist idea, there will be plenty of room for kids and adults alike to have space to unwrap Christmas gifts.
Even if you already have a Christmas tree, this wall-mounted tree would add even more festive flair to your home decorating for the holidays. Perhaps mount it close to your front door, so that it is the first thing guests see when walking into your home. Or mount it outdoors in a garden room or on a patio.
YOU WILL NEED:
Thin pine or hardwood strips
Faux or real pine or fir branches (or substitute with sprigs of rosemary or eucalyptus)
Double-sided mounting tape
TOOLS:
Heavy-duty stapler or Bosch Tacker
Handsaw, mitre box and backsaw or jigsaw
Tape measure and pencil
OPTIONAL: Laser cross-line level
HERE'S HOW:
1. First you need to cut the wood strips to length. We started with a 1 metre length at the bottom of the tree and a 10cm strip at the top of the tree. The [8] strips in-between were each cut 10cm shorter from the bottom of the tree to the top. This gives the wall-mounted tree a gradual shape that defines the actual shape of a Christmas tree. Measure and mark all the wood strips for cutting.
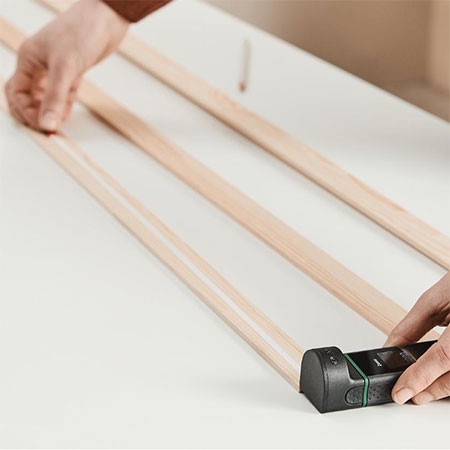
2. To cut the [10] strips, you can use a handsaw, mitre box and backsaw, jigsaw or whatever saw you prefer to use. Cut all the wood strips to the measured length.

3. Take the time to sand the rough, cut edges nice and smooth

4. Use a heavy-duty stapler or Bosch Tacker to fasten the faux or real sprigs of greenery to the wooden strips. Make sure that the sprigs overlap and fill up any blank spaces along the length of the strip.

5. Use a tape measure or laser measure to determine the centre of the strips and mark the location on each of the wooden pieces.

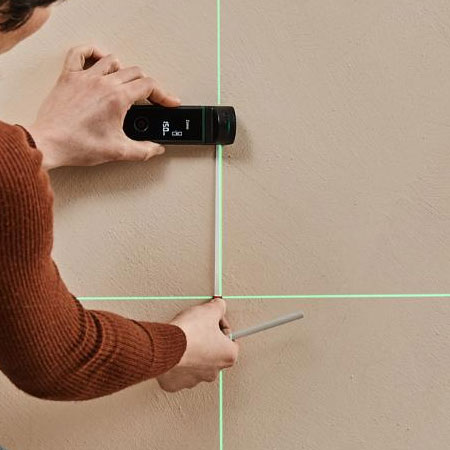
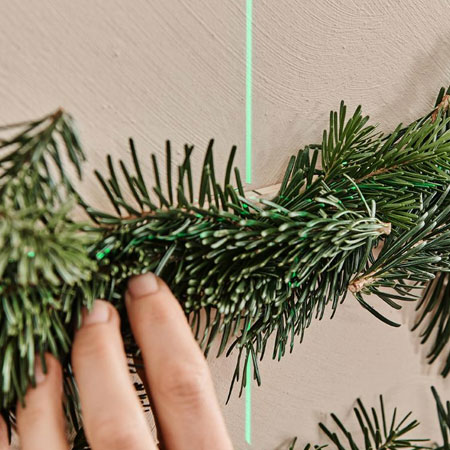
6. Use a tape measure or laser measure - and optionally a cross-line laser - to mark the locations for mounting the wooden strips onto a wall.
7. Use double-sided mounting tape to secure the wall-mounted tree onto the wall.
GOOD TO KNOW: When you remove the tree after Christmas, apply a quick squirt of WD-40 to any areas where it is difficult to remove the double-sided table.
Decorating the wall-mounted Christmas tree
With the tree safety mounted onto the wall, you can now start adding your tree decorations, baubles and tinsel.

all about diy