Upcycling: Make Wooden Lids for Tins
When you have vintage tins or biscuit tins, making a wooden lid for these means you can use them after the biscuits are gone!
25/10/2020
I have a passion for collecting old tins and cans and always save biscuit tins for Christmas gifts that come in tins. If you also enjoy this or have some tins lying around at home and not being used, here's how to make wooden lids for the tins so that you can use them again and again after all the biscuits have been eaten!
YOU WILL NEED:
Biscuit tin or similar
Laminated pine, saligna, meranti or your choice of hardwood
Leather belt
13mm and 3.5 x 30mm screws
Oil, sealer or varnish to protect the finished lid
TOOLS:
Drill / Driver plus assorted bits
Multi or orbital sander plus 180-grit sanding pad
25mm Forstner bit
Tape measure and pencil
Clamps
HERE'S HOW:
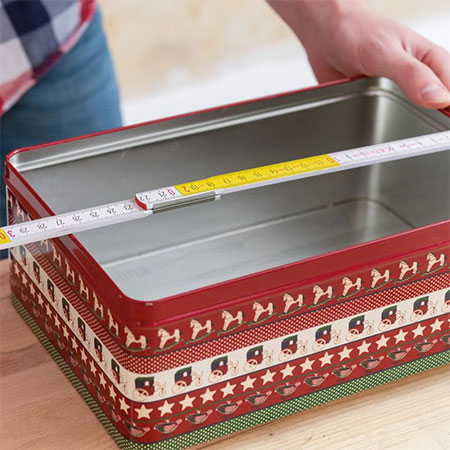
1. Measure the dimensions of the tin. Accurately measure the length and width of the inside opening at the top of the tin.
2. Transfer the measurements of the opening onto your piece of wood, making sure to round-off the corners if your tin has these. The lid for the tin consists of [2] boards, one smaller than the other. Once you have cut the first board, cut the second slightly larger or place the tin upside down on the board and draw the outline that is to be cut out for the larger lid section that will sit on top of the tin.
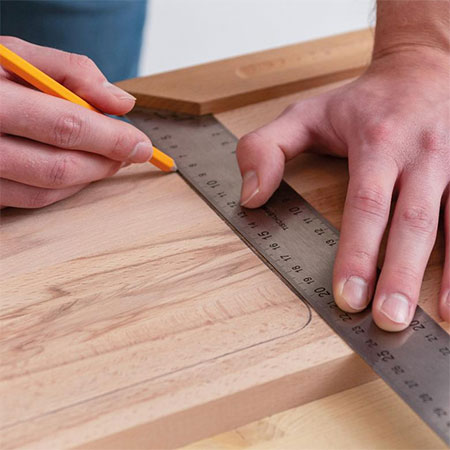
3. Use your jigsaw or cutting saw to cut on the OUTSIDE of the drawn line. Remember that the jigsaw blade is 2mm thick and if you cut inside the line your lid won't fit snugly onto the tin.
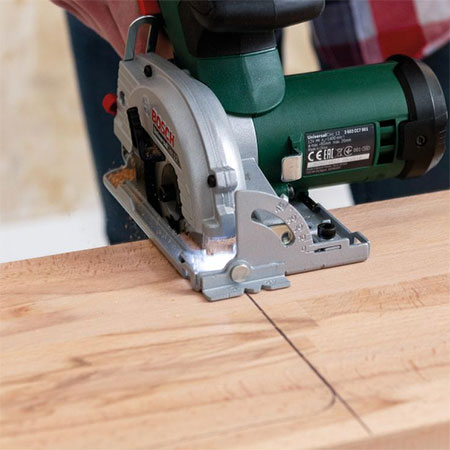
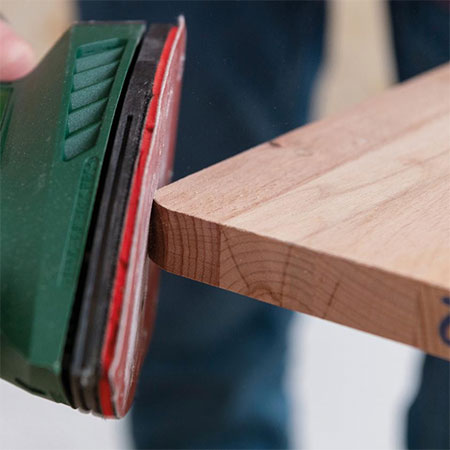
4. After cutting, use a multi or orbital sander to smooth the cut edges.
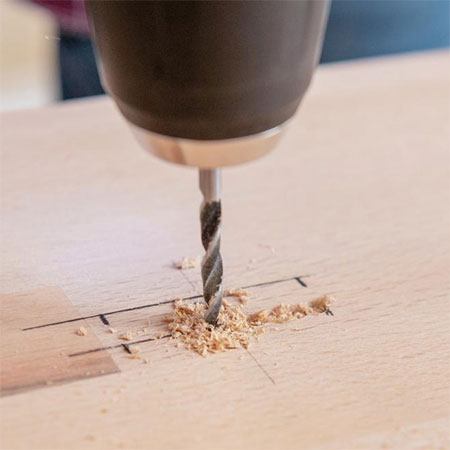
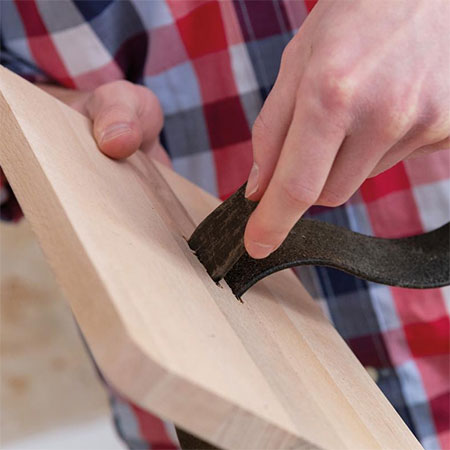
5. On the larger board, mark the centre of the wooden piece and cut [2] slots 3mm away from the centre mark. The slots should be as long as the leather belt is wide, as the belt will be the handle for the lid.
Draw [2] lines 3mm away from the centre mark and drill a slot along these lines. The length of the [2] lines is equal to the width of the leather belt you are recycling to make the handle.
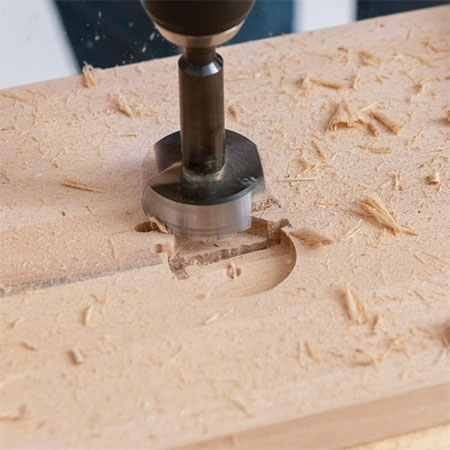
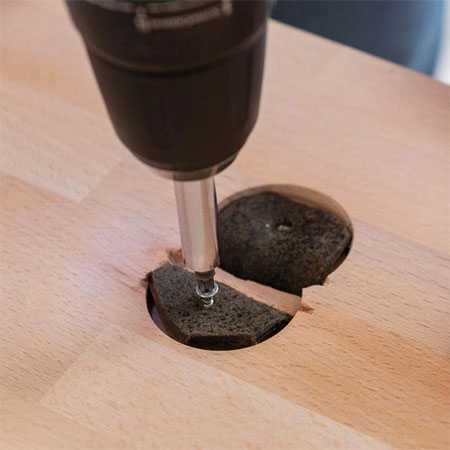
6. Still on the larger of the board, turn upside down and use a 25mm Forstner or MAD bit to drill to a depth of 4mm. In the image below, you can see where the [2] slots were drilled for the leather belt to be inserted.
7. Cut off the ends of the belt so that you can thread through the [2] slots drilled into the top.
8. Trim off any excess and secure the leather belt to the underside of the top, after pressing these into the drilled out section, and secure with 13mm screws.
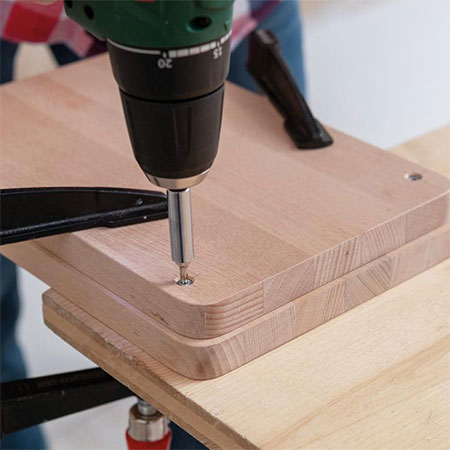
9. Now you can secure the smaller piece to the underside of the larger piece with screws. Pre-drill and countersink these holes for a neat finish.
Finishing
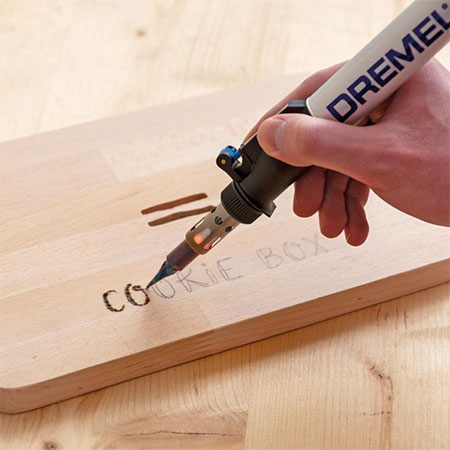
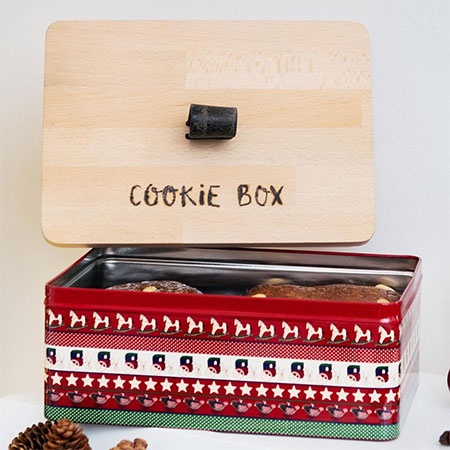
Your wooden lid is now finished. If you want to add a design or wording, you can. Use a Dremel VersaFlame for woodburning, make a stencil if you want to paint, or draw a freehand design.
Apply a suitable finish to the wooden lid to protect the wood.