
Upcycle Food Jars to Make an Advent Calendar
This is a project that mom or dad and the kids can get together to upcycle glass or transparent plastic food jars into a colourful advent calendar.
10/12/2020
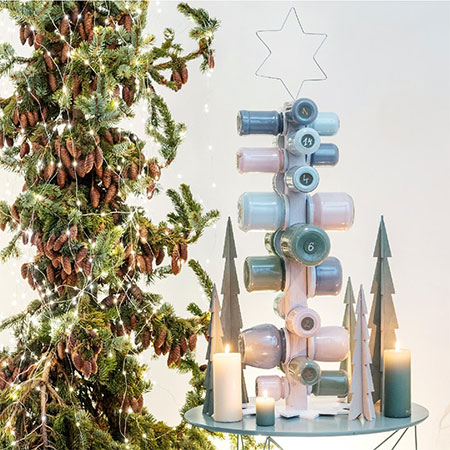
If you and your family like to set up an advent calendar for Christmas, this creative and colourful - and quite quirky - advent calendar is made by upcycling glass or transparent plastic food jars and coating them with paint. It's the type of project where mom or dad and the kids can get together to make the various components while recycling glass or transparent plastic food jars instead of throwing them out.
You will find that many food goods are packed in either glass or transparent plastic containers and there are plenty of ways to upcycle these for various craft projects for the home. In this project, you can turn them into an advent calendar.
YOU WILL NEED:
Scrap pieces of wood or board for the star shapes
1 of 44 x 44 x 700mm PAR pine
65mm cut screw [1]
16mm screws
Glass or transparent food jars washed and dried
Acrylic craft paint and foam paint roller
White or coloured stickers, or make your own and glue them on
Length of string and [1] panel pin or small nail
ALL YOU NEED FOR A DIY CHRISTMAS THIS YEAR!

TOOLS:
Drill / Driver plus assorted bits
Jigsaw and clean-cut blade
Multi-sander plus 120-grit sanding pad or medium sanding sponge
Clamps
Tape measure and pencil
Safety gear
HERE'S HOW:
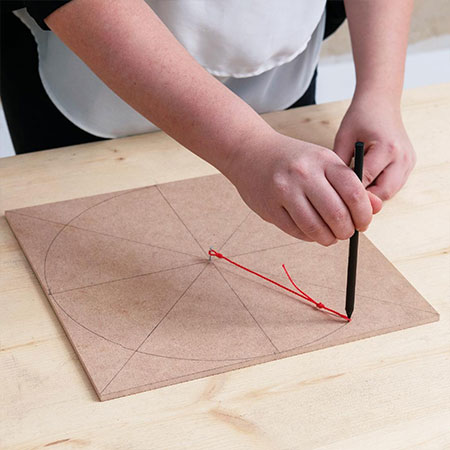
1. At the base of the advent calendar are 2 Christmas stars. These not only add to the finished decoration, but they also serve as supports for the raised display. You can use any material for the stars be it pine, SupaWood or plywood.
2. To cut out the star shapes, find the centre of the board and hammer in a panel pin. Attach a length of string to the panel pin and a pencil to draw out a perfect circle and then adding diagonal lines to be able to draw the star shapes.

3. Clamp the board to your workbench and cut out the [2] star shapes with a jigsaw. You will need to remove and re-clamp to cut out the entire shape.
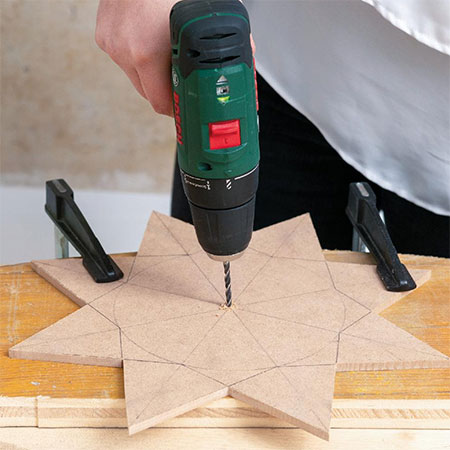
4. Drill a hole in the exact centre of the [2] star shapes. Place a piece of scrap wood underneath where you will be drilling to protect your worktop and also prevent splitting or chipping on the back side of your board.
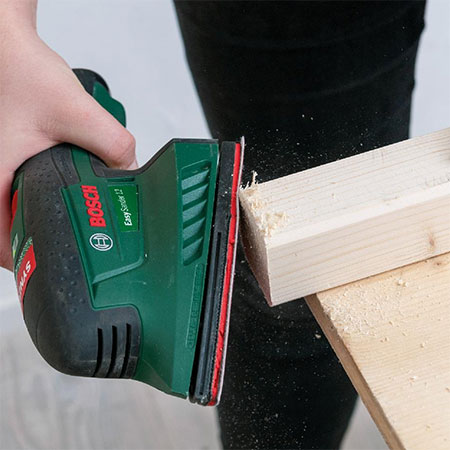
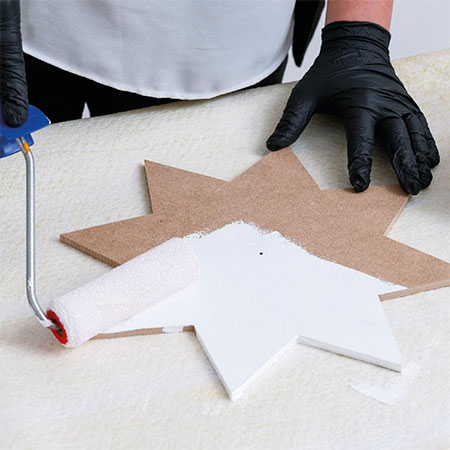
5. Sand all the pieces smooth before painting. Wipe off any dust.
6. Using a foam paint roller, apply two coats of white acrylic craft paint onto the 700mm length of PAR pine and the [2] star shapes. It's a good idea to put down some newspaper or a drop cloth to protect your work surface.
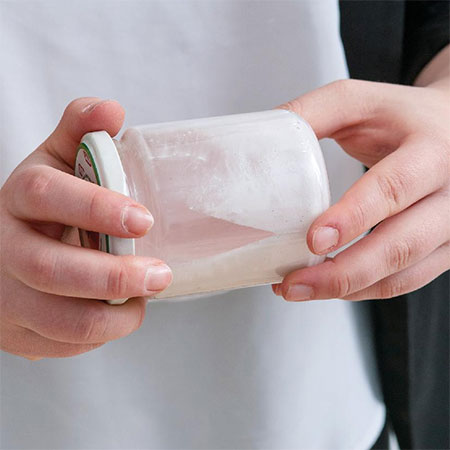
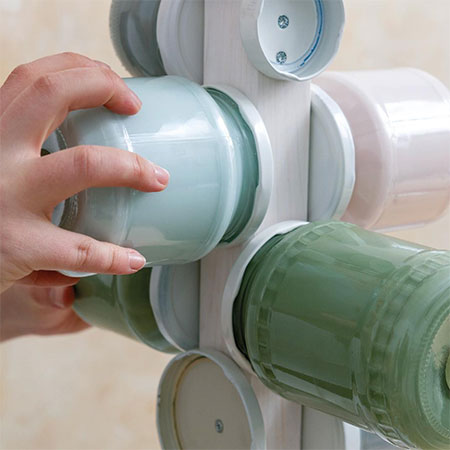
7. To add colour to the glass or transparent plastic food jars, pour acrylic craft paint into the clean, dry jars and roll these around until coated with paint. You don't want the paint to be too runny or it won't stick to the sides of the jar. DO put the lid back on the container to prevent mess. Once coated with paint, put these aside to let the paint dry overnight. If necessary, repeat the process to add more colour or to fill missing gaps.
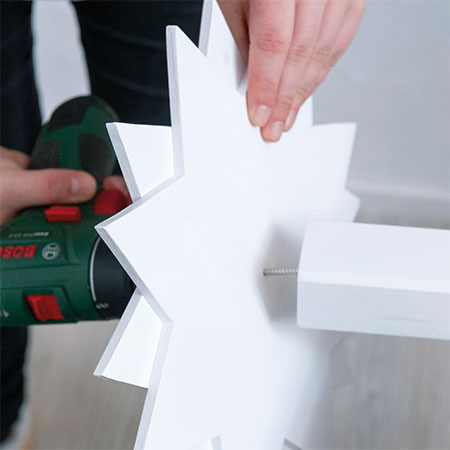
8. Use the 65mm screw to secure the [2] star bases on the end of the 700mm length of PAR pine.
9. To secure the food jars onto the PAR pine, use [2] 16mm screws per lid. Have a good idea of where you want to mount the food jars and allow enough spacing to accommodate for the size of the jars since they probably won't all be the same size.
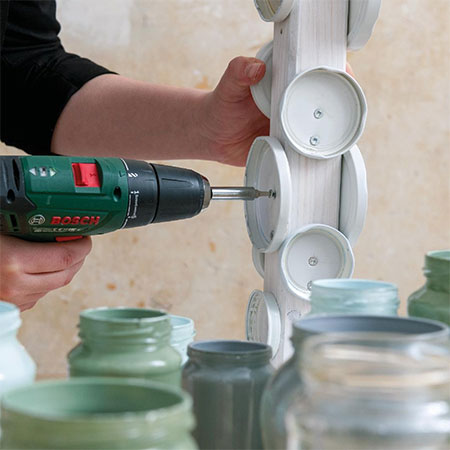
10. Screw the painted jars onto the secured lids.
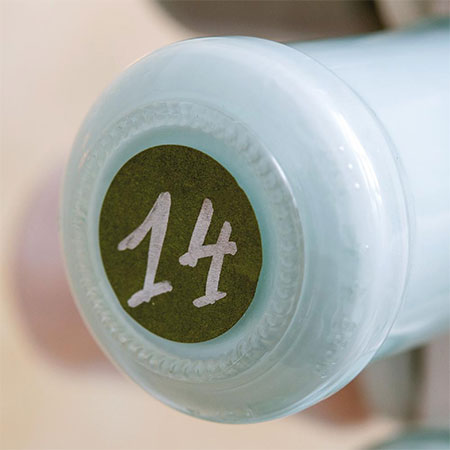
11. Now all that is left to do is to number the jars with stickers and you're done! If you wish, you can fill each jar with little surprises that the kids can enjoy.
all about diy