
Reclaimed Wood Table
If you love taking something old and turning it into a beautiful, practical piece of furniture, then this reclaimed wood dining table is a project you will enjoy.
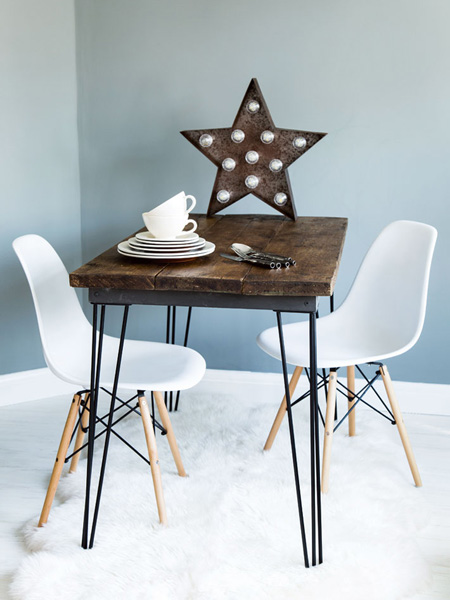
This cosy dining table is made using reclaimed pallet wood or flooring planks, or any reclaimed wood for that matter. The older the wood the better. You can custom-build the table to any size, depending on the wood you have to work with, to make a table that comfortably sits 4 or more.
YOU WILL NEED:
Reclaimed timber planks
Pine 44 x 44mm x 2.4 metre
Wood glue
Steel angle brackets [8]
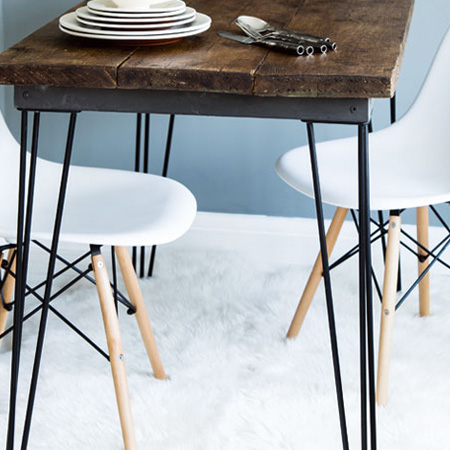
Hairpin legs and screws
TOOLS:
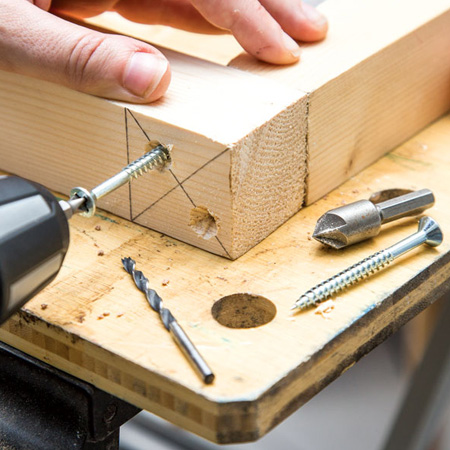
Drill / Driver plus assorted bits
Countersink bit
Orbital Sander plus 120- and 240-grit sandpaper
Saw - handsaw, jigsaw or table saw
Bar clamps - or make your own
Tape measure and pencil
Buy everything you need for this project at Builders Warehouse
HERE'S HOW:
If you are using pallet wood or reclaimed wood for this project, take a look at our tips for working with pallets.
1. To make the table top, choose the best boards (flat and straight), trim to length and then use wood glue to create the width required. Clamp and leave overnight.
2. The table top will sit on a frame consisting of 44 x 44mm pine. Cut two sides and three lengths - the size will be determined by the size of the table and the frame will be mounted 50mm in from the edge of the table top. Join the sides and [2] lengths to create a square or rectangular frame. Countersink each pilot hole to get a smooth finish. Fit and screw the last length down the centre of the square or rectangle to strengthen the table.
GOOD TO KNOW: Before attaching the top to the frame, sand and stain / seal / paint in your desired finish.
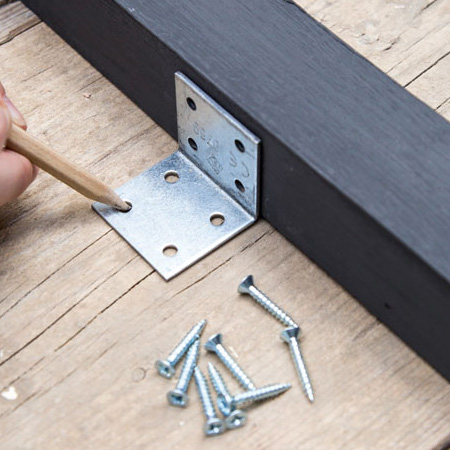
3. Use steel angle brackets - 2 on each side - to screw the frame to the underside of the tabletop.
4. Attach the legs to the support frame - or attach them to the tabletop for a lower table height.
5. Finish off the tabletop with Woodoc Gel Stain, or tinted Woodoc 5, 10 or 20 Interior Sealer, or apply Woodoc Antique Wax over the top of the stain. Buff to a satin sheen with a soft cloth.
GOOD TO KNOW: Wax will fill up wood grain and gaps. Apply regularly to ensure maximum protection.
yourhomemagazine.co.uk