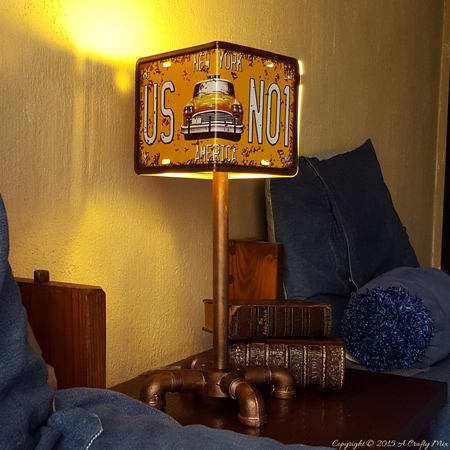
DIY vintage-style bedside lamp
This vintage-style bedside lamp is made using mock licence plates, PVC fittings and galvanised pipe and accessories. What a wonderful finishing touch for a boy's bedroom.
acraftymix.com
This amazing project is brought to you by a crafty mix. This local website has a wide selection of craft and DIY projects specifically for local readers, with items you can buy at your local Builders or hardware store. The licence plates were sourced at China Mall, but you should be able to find at disount stores or shop online at sites like www.gumtree.co.za
YOU WILL NEED:
To make the lamp shade:
2 license plates (bought at China Mall)
4 steel angle brackets
8 Pop rivets and a rivet gun (or RiveDrill from Tork Craft)*
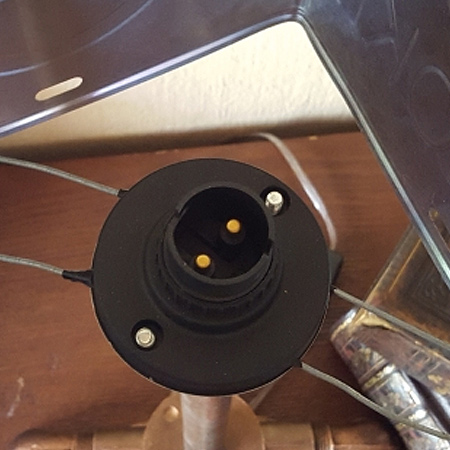
Plastic lamp holder (with solid base plate)
Galvanized wire and long-nose pliers
Insulation tape
To make the lamp base:
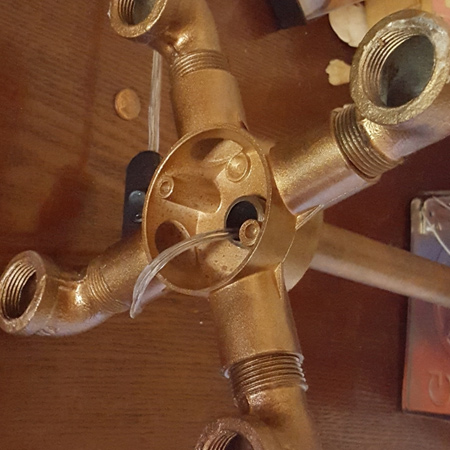
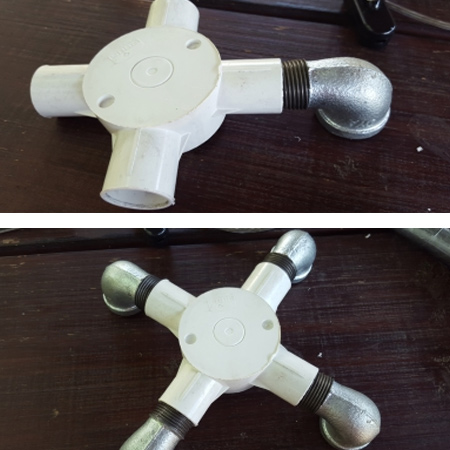
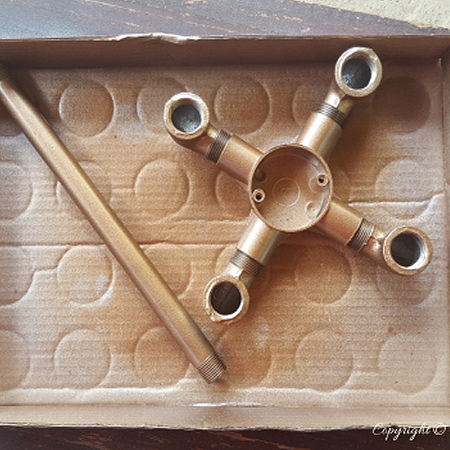
1 4-way PVC box (25 mm)
4 90-degree galvanized plumbing elbows (20 mm)
1 galvanized pipe (20 mm) and hex nut
20mm spade bit and drill / driver
Electrical wire, 2-core, plug and light switch
Rust-Oleum Universal spray paint
*If you don't have a riveter you can use epoxy glue to secure the brackets to the licence plates.
Buy everything you need for this project at your local Builders Warehouse.
HERE'S HOW:
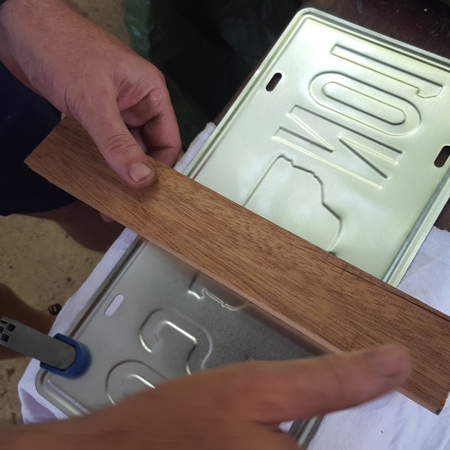
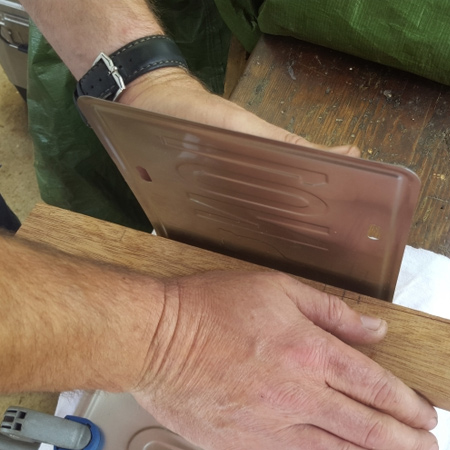
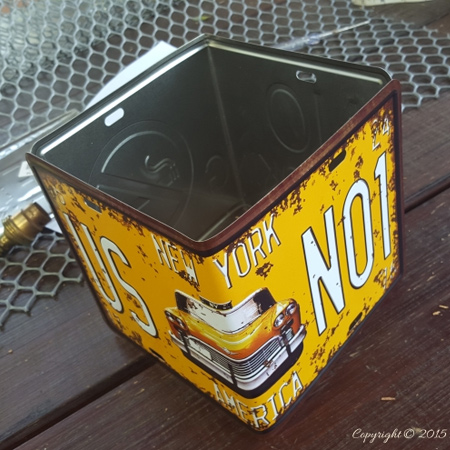
1. To make the lamp shade, measure the horizontal half way mark on each license plate and, using a straight piece of wood, carefully bend the license plates on the half way mark so they form a 90-degree angle.
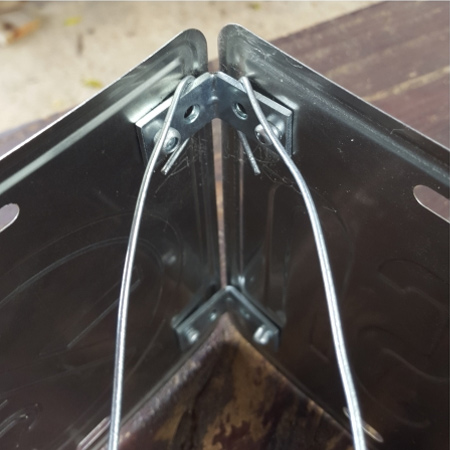
2. Place the license plates together and attach using the brackets and the pop rivets.
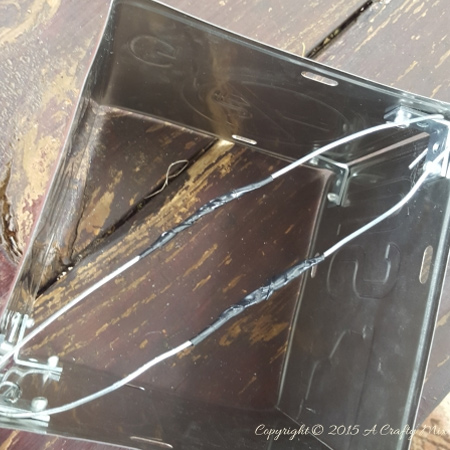
3. Suspend the galvanized wire between the brackets to create a floating frame.
4. The baseplate on the lamp holder was removed to allow the insulated sections of wire to be inserted. The baseplate was then secured back in place.
5. Now it was necessary to put on the thinking cap... how to secure the lamp shade section to the base. The solution was to use a 20mm spade bit to make a hole in the base plate (same diameter as the galvanised pipe).
6. A galvanized nut was secured on top of the pipe, with a fraction of pipe still visible at the top to fit into the drilled hole. The pipe and nut were then glued in place using epoxy glue.
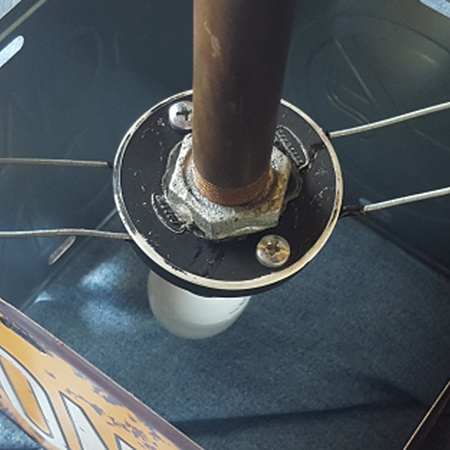
7. The thread on the galvanized elbows are a perfect fit for the PVC box, simply twist them in as tight as they will go.
8. Spray the base and the pipe with Rust-Oleum Universal spray paint. Spray two coats to completely cover all the pieces - front and back - applying light even coats and allowing each coat to dry.
GOOD TO KNOW:
A cardboard box helps protect
your workspace from overspray.
9. Gently tap out the centre piece in the PVC box and twist the galvanised pipe into the hole – it should fit perfectly.
10. Thread the electrical cord through the bottom of the pipe and attach to the lamp holder. Wire on a plug, fit an optional on/off clicker, add a CFL bulb and and you’re good to go.