
Make A Jewellery Holder For Mother's Day
This jewellery holder is a great mother's day gift or make one for yourself to organise all your necklaces, bracelets and rings.
28/04/2021
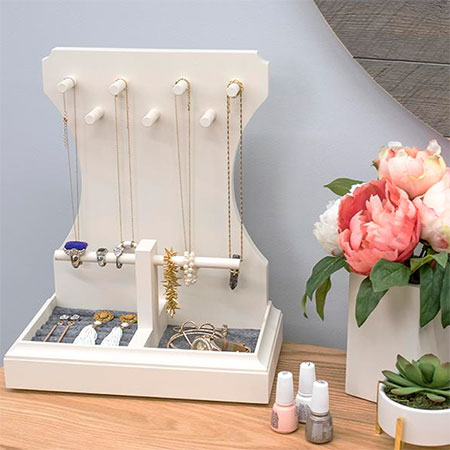
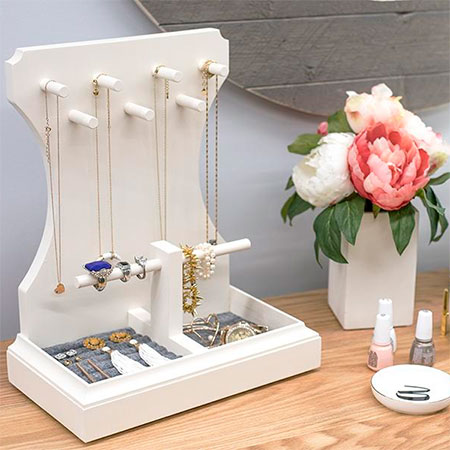
Keeping all your jewellery organised can be a mission if you have lots, but this easy to make jewellery hold is just the thing. You can make this jewellery holder as a gift for Mother's Day or you can make it for yourself. It is designed so that it can accommodate necklaces, bracelets and rings and you can easily customise the design if you want to make a larger one.
The back and base sections of the jewellery holder are made using 16mm SupaWood, but you can substitute this with any other material. We chose SupaWood for this project because it is easy to paint and gives a smooth finish. If you use pine or other wood, be sure to apply a primer before painting.
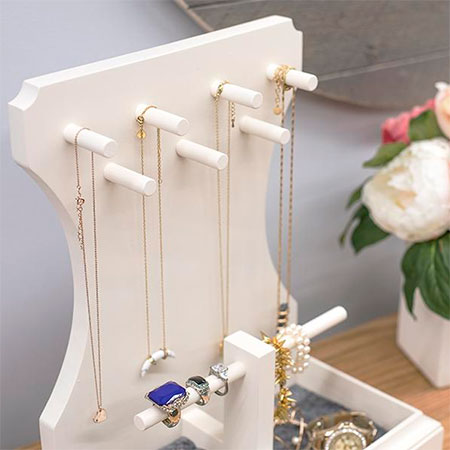
All the holders for necklaces, rings or bracelets are made from a pine dowel while the tray at the bottom of the holder is made by covering corrugated cardboard with felt and trimmed around the outside with pine or hard polystyrene moulding or skirting - so easy.
YOU WILL NEED:
2 of 16 x 140 x 380mm - Back
1 of 16 x 140 x 280mm - Bottom
2 of 16 x 38 x 160mm - Side Edging
1 of 16 x 38 x 318mm - Front Edging
1 of 16 x 38 x 140mm - Tall Divider (cut to fit)
2 of 16 x 38 x 50mm - Short Divider (cut to fit)
1 of 12mm-dia. x 228mm dowel - Centre Post
7 of 12mm-dia. x 64mm dowel - Back Post
1 of Pine moulding/trim, 1800mm (cut to fit)
4 of 6 x 16 x 38mm - Feet
Wood glue
32mm pocket-hole screws
120- and 240-grit sandpaper
Felt for bottom tray
Scraps of cardboard for bottom tray
Paint and tools to finish
TOOLS:
Drill/Driver plus assorted bits
25mm Spade or MAD bit
Kreg Pocket-hole Jig
Clamps
Tape measure and pencil
Safety gear

HERE'S HOW:
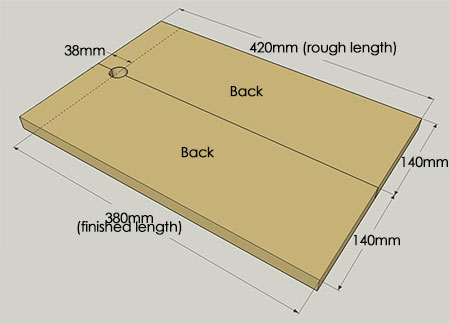
Step 1
Cut the backs to a longer rough length to allow for adding decorative detail on both back sections. Drill a 25mm diameter hole at the top as shown below. Trim to finished length.
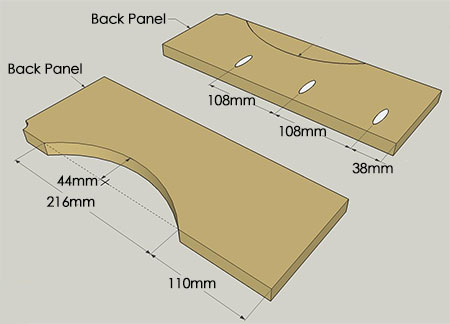
Step 2
Flip over the back sections so that you can mark for cutting out the curved design and then drill pocket-holes as indicated below. Cut out the curved shapes using a jigsaw and then join the back sections together using wood glue and screws. Make sure to immediately wipe away any wood glue that oozes out.
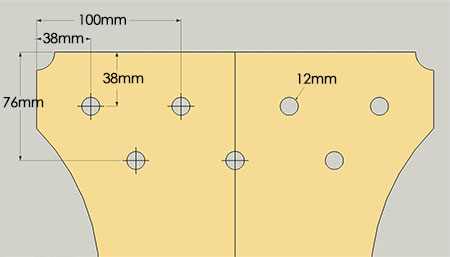
Step 3
Mark and drill at the locations indicated in the diagram below. The 12mm-diameter holes are for the dowels that will hold longer pieces of jewellery.
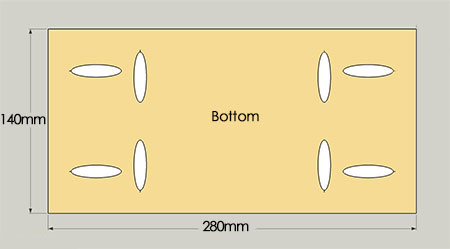
Step 4
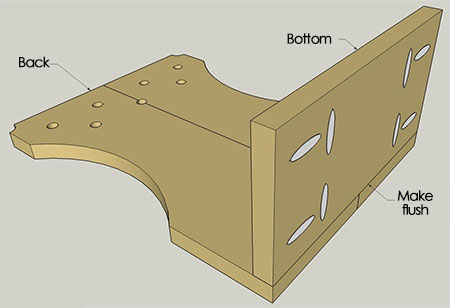
On the bottom section, drill [8] pocket-holes as shown below. These will allow for mounting the base to the backs, side and front edging.
Step 5
Join the bottom to the back with wood glue and screws, making sure that the bottom edges are flush.
Step 6
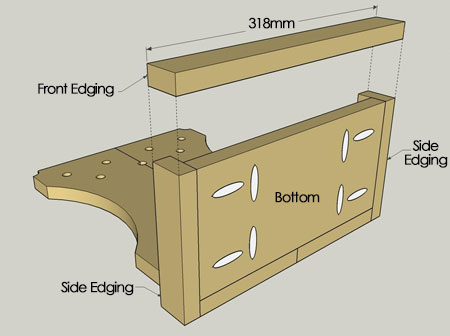
Attach the side edgings and front edging using wood glue and screws. Once again, make sure the bottom edges are flush. Clamps come in handy to hold everything in position while you drive in the screws.
Step 7
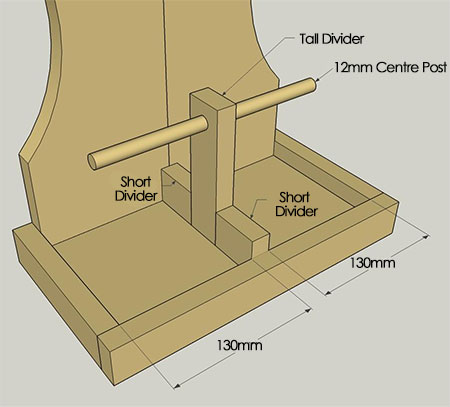
Cut or trim the tall and short dividers to fit into the base. Drill a 12mm-hole in the middle of the centre post to allow for fitting the long dowel that holds rings or bracelets. Insert the 12mm-diameter centre post before gluing the dividers in place and leaving overnight.
Step 8
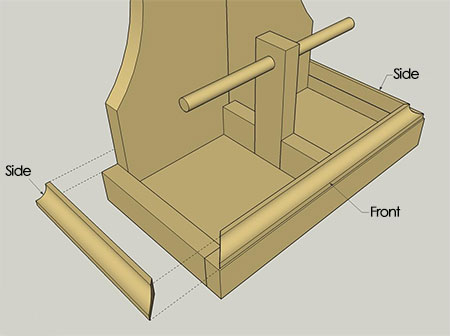
Cut the pine moulding/trim to fit and glue to the side and front edgings.
Step 9
Use wood glue to secure feet to the base.

FINISHING
Sand and paint the completed assembly. You can use spray paint or acrylic paint to finish off the jewellery holder.
Make the ring divider by covering cardboard strips with felt and use felt to finish off one side of the bottom tray. You can use wood glue to secure the felt in place.