
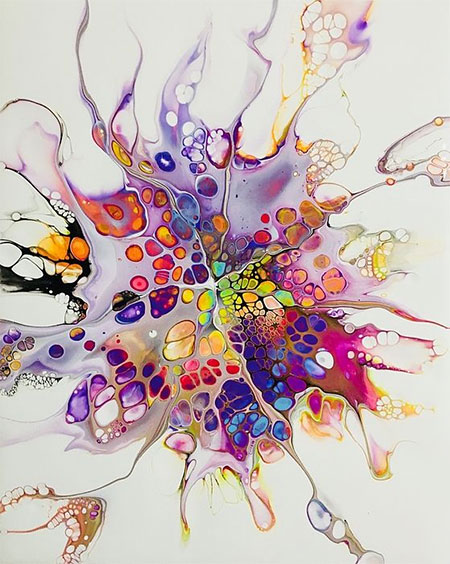
Acrylic Pouring Introduction
In this article we introduce you to the absolute basics of acrylic pouring and what you need.
29/02/2020
https://pinterest.com - 545991154823345948/?nic_v1=1apYrMyEQkHCq40Hlva%2BZK2F6%2BgoShItVQEKJ9Goaha7EjVyvgALyrx%2B%2BrcNwG6OIT
Acrylic Pouring is an art form in which acrylic paint is made liquid and then poured onto a painting surface. In this blog article I would like to introduce you to the absolute basics of pouring and what you need.
Preparing the canvas
If you have a well-tensioned canvas and don't feel like priming, you can skip this step and go straight to setup. If you are a beginner and try pouring for the first time, a good cell result is also possible without tensioning and priming. But if you want to give away your artwork, pour large canvases and keep them for a long time, I recommend that you prepare your canvas beforehand.
Clamping
How can I tell that my canvas is not well stretched? Especially with larger canvases the problem can occur that the fabric feels loose and especially in the middle of the canvas it can sag a little. This is very problematic for Acrylic Pouring, because otherwise the paint runs into a puddle inside and can destroy beautiful cells.
My tip: briefly spray the back wall with a little bit of water (plant sprayer) and the fibres will contract again and the canvas has more tension.
Priming
Many canvases are already primed. Nevertheless, so-called holes can occur during the pouring and it looks as if the paint does not stick evenly to the canvas. Therefore I recommend to prime the painting surfaces with 1-2 layers of gesso according to the instructions. This usually means to apply Gesso evenly with a large brush and let it dry for about 24 hours. (At least overnight)
The Setup
Acrylic Pouring is one of the painting techniques that requires some preparation time and afterwards also cleaning time. This also means that you can't just do it in between. To make the build-up worthwhile, you should have 3-4 canvases ready when you first try it out.
The canvas lies well aligned on 4 cups in the collection tray so that the excess paint can run down the sides. The alignment is important so that the canvas can be put down to be heated by a burner, but the paint cannot disappear to one side. All materials should be close at hand. Also, not far away from you, there should be some foil spread out so that you can lay your finished artwork out to dry. Very important here is also the level. The underground should be well aligned, otherwise the pictures still change very much in the drying phase. The chosen place should also be dust-free and protected from accidental contact, as the pictures need about 2 days to dry out.
Starting with pouring
If your workplace is well prepared we can start mixing the paint right away. Do not forget to put on your gloves and wear old clothes or an apron. Start with 3-4 different colours and fill the acrylic paint into your cup first.
For 3-4 colours you will also need 3-4 cups, because the colours are first mixed one by one with medium and then tipped into a cup.
Depending on how big your canvas is, you should adjust your color mixtures. If my canvas is about 15 x 15 cm, I need about a 3/4 cup full of different colors. So it is enough to mix the colours individually in smaller cups to not have too much surplus.
In a mixing ratio of about 1:1 I fill my single cups full with color and medium. (The ratio varies a bit, because the acrylic colors have different consistencies.
If you should work with Acrylic Inks like I do, you can mix the colors about 1:4 or 1:5. (1 part ink and 4 parts medium) If the color is not pigmented enough, just add more ink.
Now mix the ink and medium well with the stirrer.
Test the consistency of your mixture. Ideally the colour-pouring mixture should flow from the stirrer like warm honey. If it does not, you can slowly add a few drops of distilled water or just a little more of the Colour-Pouring Medium until the desired consistency is achieved.
Now add 3-4 drops or 2-3 squirts of silicone oil to your paint and stir again. But this time more slowly and carefully.
Take an unused cup and layer the different colours on top of each other according to your wishes. If you like, you can also spray the cup with silicone oil beforehand, so that the paint slides out of the cup better.
Now comes the decisive and exciting moment. Take your canvas and place it with the cotton side on your cup. Press both well together and tip over the cup with the canvas. Wait about 5 seconds and lift the cup off the canvas.
Ideally you can already see that some cells are forming. Either you can use the burner BEFORE panning or you can first panning your painting until all corners are covered with paint and then burn over the paint to create more cells. Burning should really only be very short!
Voila. Your first Acrylic Pouring painting is finished. Leave your painting to dry for at least 2 days. Afterwards you can seal your picture to make it more "durable". You can use acrylic lacquer or resin (casting resin).
I would like to point out that I have only described ONE way how you can create your pouring picture. There are still many variations and techniques to get great results. If you want to learn more Acrylic Pouring techniques, check out the fluid-painting.com Tutorials to learn them all.
Questions that are often asked:
Why do cells develop at all?
Physics. In fact, paints consist of pigments and binding agents. Pigments of the different colours have a different weight. There are light and heavy pigments. If you mix the colors together, there are pigments that sink down due to their weight and some that want to rise. We then see this "battle of pigments" as cells on our works.
So not only the brand of the acrylic paint has an effect on the cell formation, but also the pigments within a colour series. It can happen that a cadmium yellow causes fewer cells than a magenta. Here we have to try it out again.
Can Acrylic Pouring also be more sustainable?
Instead of plastic cups you can also use paper cups or disposable glasses. Acrylic paints belong in the hazardous waste and therefore please do not wash the disposable glasses over the sink, but wipe them out and dispose of them accordingly.
What happens to the excess paint that
collects in the tub?
That's entirely up to
you. You can also dump the paint thinly onto a
foil and after drying you will get Acrylic Skin
and can make cool DIYs. You can also simply
press a small canvas into the paint and get a
new Pouring picture. There are no limits to your
creativity if you do not want to dispose of it.