
Add A Mosaic Splash To Your Indoor Garden
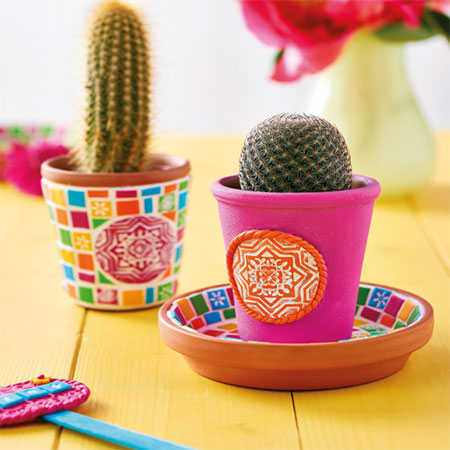
With Fimo clay, you can be as creative as you want, and these colourful faux mosaic plant pots and trays will add a splash of colour to a coffee table or kitchen herb garden on a windowsill.
21/02/2021
Starting a kitchen herb garden is the perfect way to have fresh herbs growing on a windowsill where you can pick them fresh for adding to meals and salads. And of course, you will want to set up a pretty and colourful display of herbs - to bring life and character to a kitchen. Or you could simply dress up plain pots to make an interesting and vibrant display for your coffee table.
Search for 'Fimo Polymer Clay' on your favourite search engine to find local suppliers in your region.
In this feature, we provide step-by-step instructions for transforming plain terracotta pots and drip trays into colourful faux mosaic indoor garden accessories that will bring colour into any room in the home. Choose colours that complement your existing colour scheme, or decorate a set of plant pots to set up a splash of colour in a bland or boring bathroom.
YOU WILL NEED:
Terracotta plant pot and drip tray
Fimo polymer clay, pink, yellow, green, blue
Contact adhesive
Embellishments alphabet,
Scalpel or craft knife
Tissue blade
Mosaic adhesive/grout
Ice cream sticks
Acrylic craft paint, white
Paper kitchen towels
HERE'S HOW:
• To make the mosaic tiles
1. Follow the instructions on the pack if you have never used Fimo clay before. There are also plenty of YouTube tutorial videos that will guide you step-by-step through the process of using Fimo polymer clay for the first time.
2. Starting with pink polymer clay, condition and make it into a rectangular shape that is approximately 3mm thick and 5cm x 9cm in size.
3. Use the tissue blade to cut the large square into 1cm squares for the faux mosaic patterns. You should also cut some of the 1cm squares in half. Repeat the above steps with yellow and green polymer clay.
GOOD TO KNOW: Use a stamp or embossing tools to add a decorative design to a few green and pink mosaic squares.
4. Cut out a 4cm diameter circle for the centre of the drip tray and the plant pot. The thickness should be 3mm. You can press any design into the surface of the clay, including lace or paper doilies for an interesting design. Bake all the cut pieces as per the instructions on the pack and then leave them to cool.
5. For the pieces that have an embedding design, use a slightly damp kitchen towel to rub over these with white acrylic paint. Leave for a minute and remove with a dry kitchen towel. This will leave the white paint in the pressed designs.
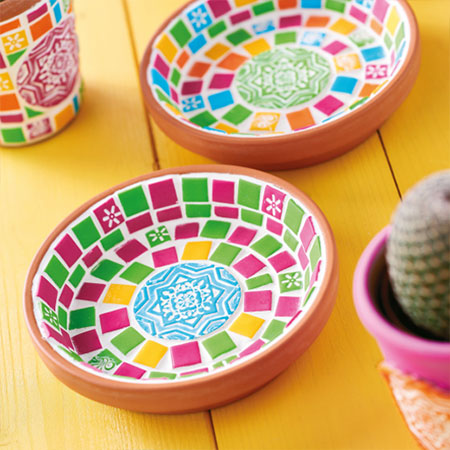
• To decorate the drip tray
1. Apply a small amount of mosaic adhesive to the back of the centre circular design for the drip tray and plant pot. Press onto the drip tray, making sure it is placing in the exact centre of the tray. Repeat this process to add the faux mosaic squares around the centrepiece. Alternate the colours as you continue adding square mosaic pieces.
2. Leave this to dry overnight and then you can fill any gaps with adhesive/grout. Make sure to fill any/all gaps. Let the adhesive/grout dry for 30 minutes before using a damp kitchen towel to remove any excess. Let this dry completely and then buff with a dry kitchen cloth

• To make the plant name tags
1. Using the pink polymer clay, condition this and roll out into a 3mm thick sheet. Cut out [2] oval shapes, as shown above, and emboss this with texture or design.
2. Apply contact adhesive to the back of both oval pieces, as well as to the top front and back of an ice cream stick and glue the pieces together.
3. Use blue clay to make the letters. Roll out a 3mm thick sheet and use alphabet stamps - or do freehand - for the herb names. Take a slightly damp kitchen towel to rub over these with white acrylic paint. Leave for a minute and remove with a dry kitchen towel. This will leave the white paint in the pressed designs.
4. Use contact adhesive to attach the letters to the front of the ovals and any other embellishments.