
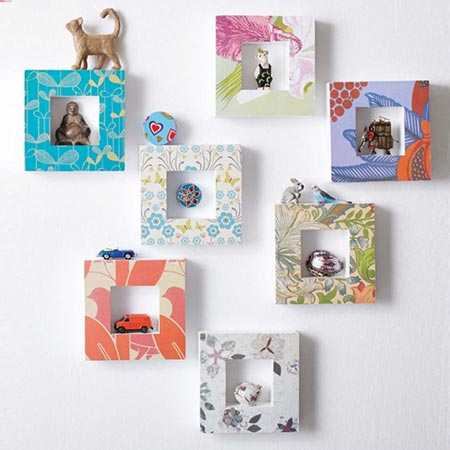
Make your own Box Shelves
Use pallet wood or pine to make these miniature box shelves that are perfect for displaying decor and trinkets.
issuu.com/olja75/docs/r3l0vedjuly2015
You can use pine planks or reclaimed wood pallets to make these super-easy box shelves. Apart from cutting to length, these box shelves don't require any fancy tools.
YOU WILL NEED:
Pine planks or pallet wood
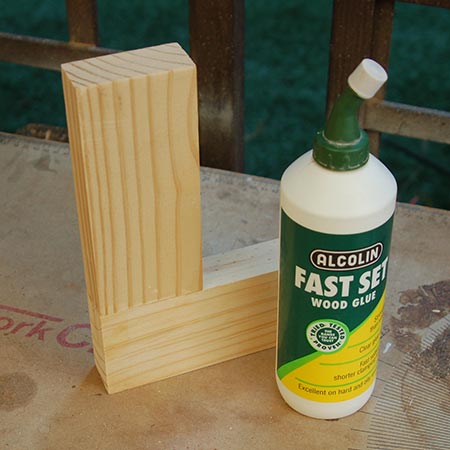
Wood glue
Sander plus 120-grit sandpaper
Wrapping, wallpaper offcuts or scrapbooking paper
Scissors or craft knife and cutting mat
Quick clamps [2] or strap clamp
Tape measure / ruler and pencil
HERE'S HOW:
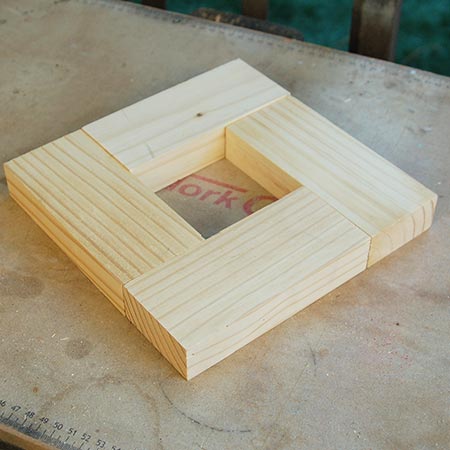
1. Cut the blocks to length. Our blocks are 32 x 69mm pine cut to 160mm length. Sand any rough edges.
GOOD TO KNOW: If using pallet wood, wear gloves and make sure to remove any nails or tacks before you cut.
2. Glue together the blocks as shown. Clamp and leave overnight.
GOOD TO KNOW: If there are differences in the thickness, which is often the case, make sure the front face is flush when gluing together.
3. Sand the completed box all over to smooth.
4. To cut your choice of paper, place the box face down on the paper and mark all round with a pencil. Cut out carefully with a craft knife and cutting mat or scissors.
5. Apply glue evenly to the back of the paper and place on the frame. Smooth out any trapped air bubbles and then leave to dry.
6. As an optional finish, and to protect the box shelf, apply 3 to 4 coats of clear acrylic sealer / ModPodge.
7. To hang on the wall you can mount with double-sided tape or attach a picture hanger at the back.