
Make a Bamboo Headboard
Sometimes I can go on and on about how every bed needs a headboard and this unique headboard is made using bamboo canes in a decorative pattern.
08/08/2021

Bamboo is one of the most sustainable materials on the planet. When harvesting a single plant, even more new shoots appear to fill up the spot. Bamboo is also one of the most durable and tough natural materials and compares with some of the hardest hardwoods out there.
This bamboo headboard is perfect for the head of a bed if you are looking to use more organic materials in your home, plus the fact that it is extremely eco-friendly and natural.
Follow the step-by-step instructions below to make a bamboo headboard for your bed, whatever the size.
YOU WILL NEED:
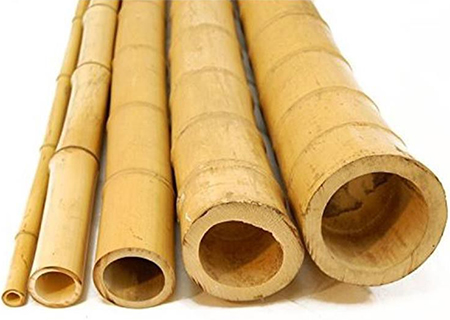
Bamboo canes, approx. 28 of around 16mm diameter x 2 metre lengths
9mm plywood sheet cut to the size of the headboard required
3.5 x 20mm cut screws
Search online for a supplier of bamboo canes in your region.
TOOLS:
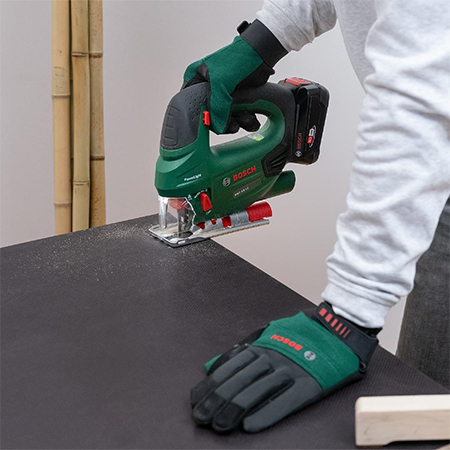
Drill/Driver plus assorted bits
Jigsaw plus jigsaw blade with fine teeth
Multitool
Tape measure and pencil
Clamps
Safety gear
HERE'S HOW:
Step 1
We used black veneered plywood for this project, as it provides a contrast against the bamboo, but you can leave as is (raw) if you prefer.
Determine the centre of the headboard and mark and then proceed to draw a half-circle shape from the centre outwards. The size of the half-circle varies depending on the size of the headboard you are making but make sure it is centrally positioned and even on both sides. If it is out of centre, it will spoil the finished look of the headboard. Put the cut-out half-circle to the side for now - you will use this later on.
When cutting plywood, it is easier to cut smoothly using a jigsaw blade with fine, small teeth. This will reduce chipping around the cut edges.
Step 2
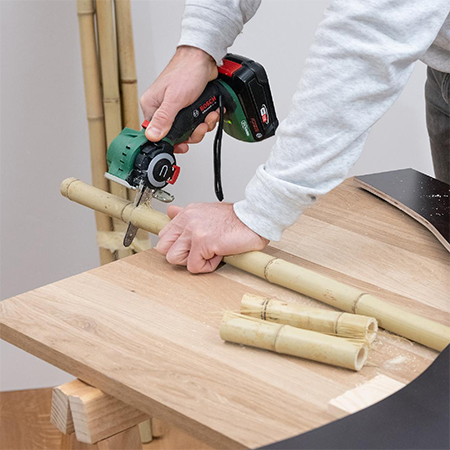
To cut the bamboo canes to the correct length you can use a NanoBlade or MultiTool. Use the backing for the headboard as a guide that allows you to cut the individual bamboo canes to varying lengths to fit across the entire back board. It is better to make the canes a little longer to ensure they won't be too short, and you will be trimming these to the exact length further on.
Step 3
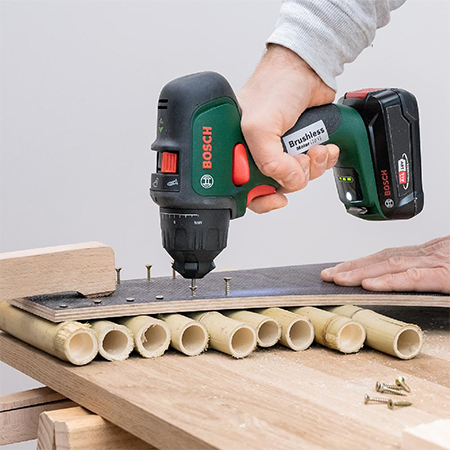
After cutting all the bamboo canes to length, start at one end of the headboard by positioning the bamboo canes along the edge and towards the centre following the half-circle opening. To secure each bamboo cane in place first drill [2] 3mm pilot holes at either end then secure with a cut screw. Repeat this for every bamboo cane added until you complete the entire back of the headboard.
After that, you can repeat the process to secure bamboo canes onto the half-circle cut-out but placing the bamboo canes in the opposite direction - see top image for details.
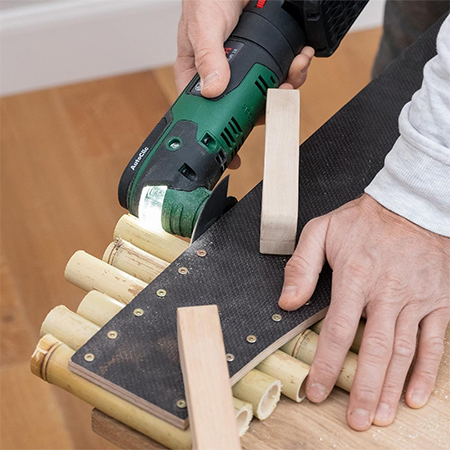
If you own a Dremel MultiTool, you can use this with a diamond cutting disk to cut easily through the hard bamboo canes.
Step 4
After mounting all the bamboo canes on the back and half-circle, use a multitool and cutting disk to trim the edges flush to the edge of the backing board. Make sure the edges are even and flush or use 120-grit sandpaper to smooth and finish off any uneven edges.
all about diy
Step 5
Cut [3] battens from plywood offcuts to secure to the back of the headboard and join the backing board and half-circle cut out together. Secure the battens to the backing board with cut screws along the length.

FINISHING:
You can leave the bamboo as is, or you can apply a tinted varnish over the top if you prefer a glossy finish.
To hang the headboard on a wall, secure keyhole hangers at the back of the headboard. Use [2] keyhole hangers at either side of the back for a single or three-quarter size, [3] keyhole hangers for a double or queen size and [4] keyhole hangers for a king size.