
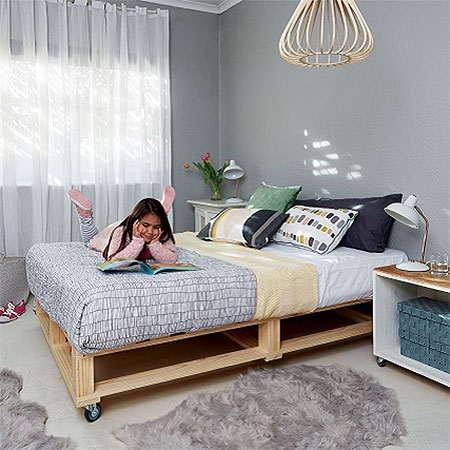
Make a Sturdy Pine Base for Children's Bed
This sturdy pine base is ideal for a young child and offers a unique way to decorate a bedroom for a youngster, plus you can modify the measurements to make the pine base to any size.
20/01/2020
gallo images | home
Kids grow out of their furniture very quickly as they grow, so you don't want to be spending a fortune on furniture that isn't going to last. This sturdy pine bed base is perfect - you can modify the measurements to fit any mattress, and you can even use reclaimed wood if you can get your hands on it.
Builders have a vast selection of PAR pine products that are available at affordable prices and you can buy all the accessories and supplies you need while you're there.
Don't forget to visit our Bedroom Section for more great crafts, DIY projects and design inspiration.
YOU WILL NEED:
1 of 69 x 94 x 1800mm PAR pine cut into 9 blocks of 150mm each - supports
6 of 22 x 94mm x 2400mm PAR pine cut into 6 lengths of 1 870mm each - long base pieces
15 of 22 x 94 x 1800mm PAR pine each cut to 1 370mm - slats
60mm chipboard screws
5 of castor wheels, 2 with brakes
TOOLS:
Drill / Driver plus assorted bits
Orbital or random orbit sander plus 120-grit sanding pads
Clamps, 2
Tape measure and pencil
HERE'S HOW:
Preparation
Sand all the cut pieces before assembly and sand the completed assembly once you're done. Make sure there are no rough edges or splinters.
1. Join together [3] 150mm supports between [2] of1870mm planks. Place one block at each end and one in the middle. You need to repeat this step to make the other two base assemblies.
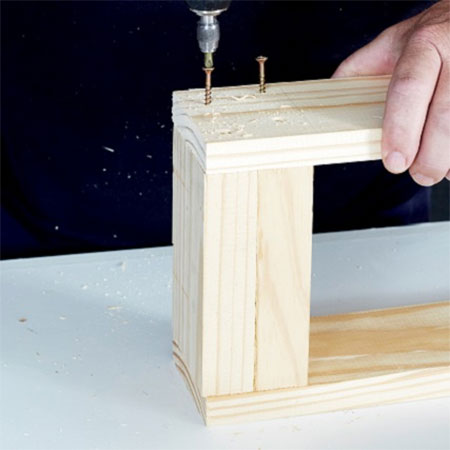
TOP TIP: Drill pilot holes and countersink for all screws beforehand for easy assembly.
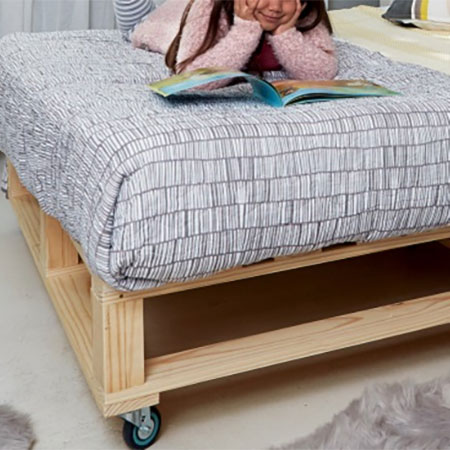
2. Screw [3] 1370mm slats at a right angle to the three base structures at each of the block struts and as shown below. This will form the bottom of the bed base.
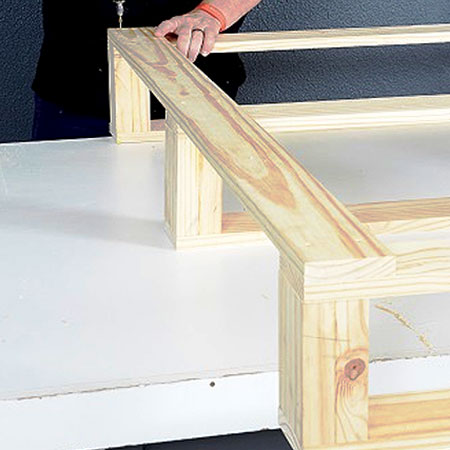
TOP TIP: Use clamps to hold all the pieces firmly in place while you join together.
3. Flip over the base and place the remaining [12] 1370mm slats at a right angle across the top of the bed base.

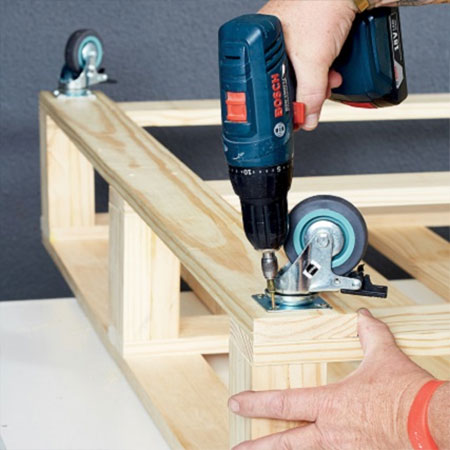
4. Now you can add a castor at each corner, as well as one in the centre of the bed for extra support. It's a good idea to mount the brake castors at the foot of the bed for easy access when you need to move the bed around.
FINISHING
Once the bed base is assembled, you can apply your choice of finish. You can use sealer, varnish or paint to protect the wood base and make it easier to keep clean. Finishing is also recommended as the bed will be for a child and you will want to ensure there will be no splinters or sharp edges and these will be covered by a finish.