
How To Make A House Frame Bed With Storage Cubbies
This plywood and pine house frame bed with storage cubbies is an easy project you can complete over a weekend.
30/05/2021
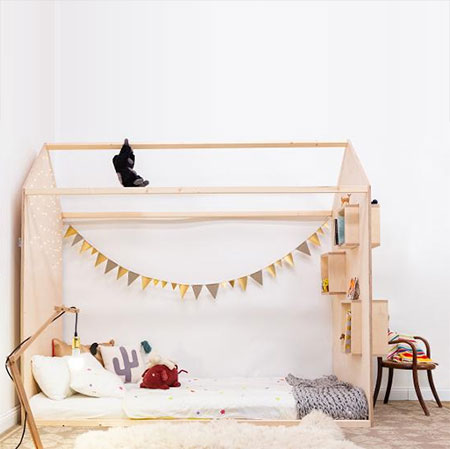
This pretty house frame bed with storage cubbies is perfect for a little girl's bedroom. It's made using plywood and pine that you can purchase at Builders or your favourite timber merchant and is quick and easy to assemble with just a few basic tools. The bed shown here is made using birch veneered plywood and this is the preferred material if you want a nice finish but you can substitute with pine plywood for a more affordable design.
If you would prefer to raise the bed, build up a platform on top of the bottom crosspieces.
There are plenty of suppliers out there who supply various veneered plywood options, just enter veneered plywood in the search bar to find one close to you.
YOU WILL NEED:
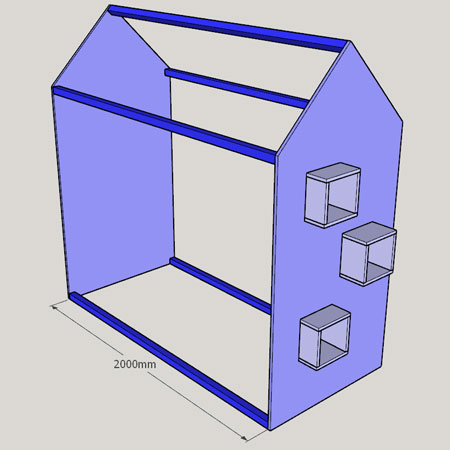
5 of 44 x 44 x 2000mm PAR pine - crosspieces
2 of 18 x 950 x 2000 plywood - bed ends
6 of 18 x 250 x 250mm plywood - cubby top/bottom
6 of 18 x 214 x 250mm plywood - cubby sides
4 x 45mm cut screws
5 x 60mm cut screws
OPTIONAL: Fairy lights, heavy-duty stapler or hot glue gun
TOOLS:
Drill/Driver plus assorted bits
Countersink bit
Orbital Sander plus 120- and 180-grit sanding pads
Clamps
Tape measure and pencil
Safety gear
HERE'S HOW:
Step 1
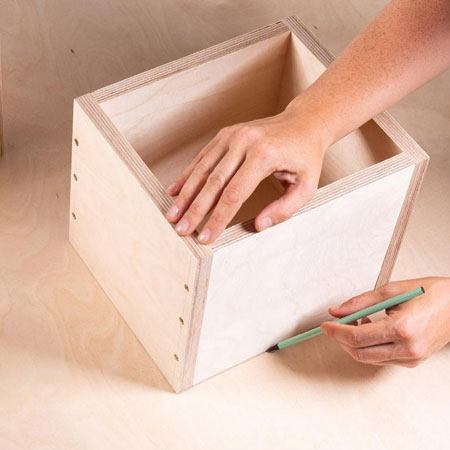
To assemble each of the storage cubbies, first, measure and mark on the top and bottom cubby sections to drill pilot holes for securing these to the cubby sides.
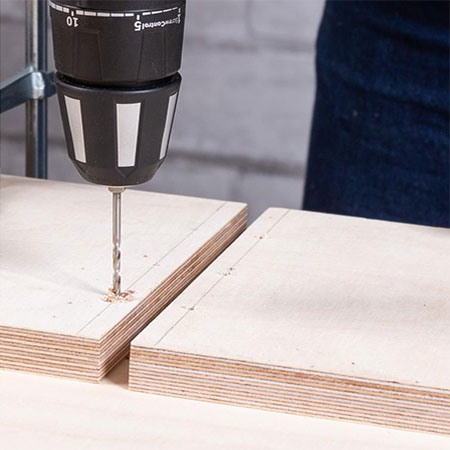
Step 2
Countersink the holes before using 45mm screws to join the cubby parts together.
PREPARING THE BED ENDS
Step 3
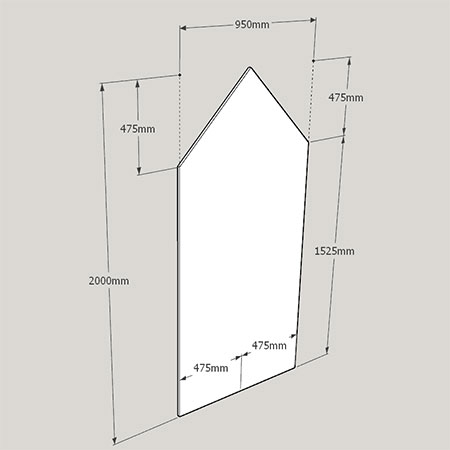
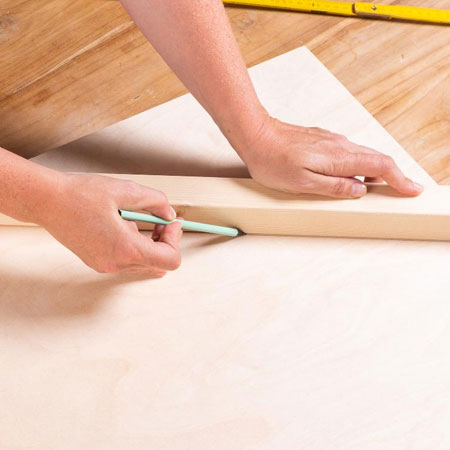
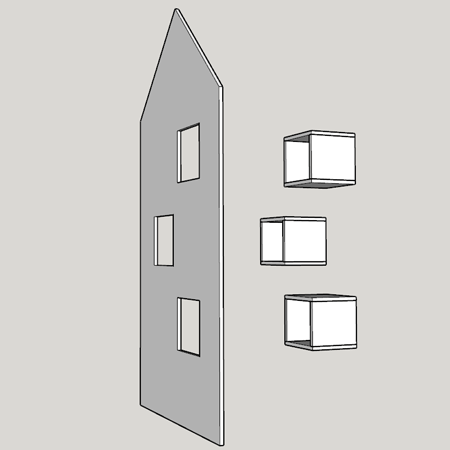
Take note of the measurements shown in the diagrams above and below and transfer these onto the plywood bed ends.

Step 4
Measure and mark for cutting away the corners on the [2] bed ends. Also, measure and mark to cut out the openings to mount the cubbies in one bed end.
Step 5
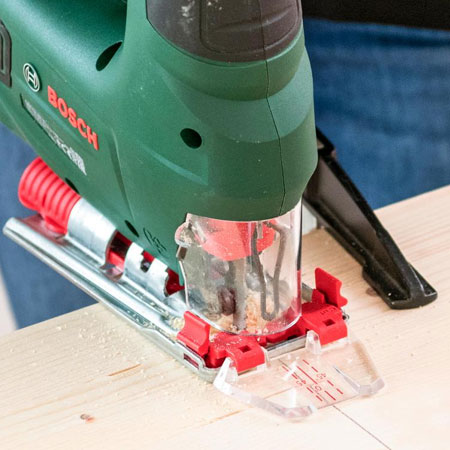
Use your jigsaw to remove the angled sections for the roof shape on both end panels and cut out the openings for the cubbies. Drill 10mm diameter holes in the marked squares to make it easier to insert the jigsaw blade and cut away the material.
Step 6
On one bed end, mark the location for the cubbies. You can follow our measurements or decide on your own arrangement for mounting the cubbies into the cut out openings.
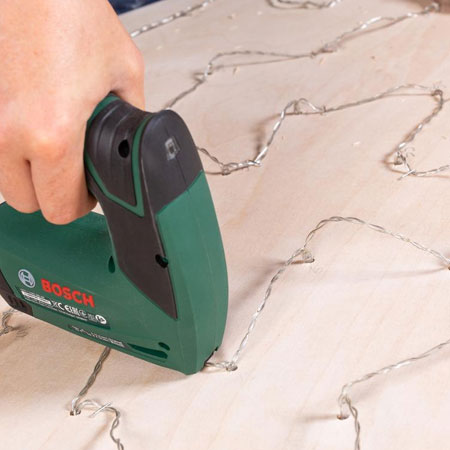
OPTIONAL
For added decoration, you can add fairly lights at the top of the bed ends where they will be out of reach of little fingers. Use a heavy-duty stapler or glue gun to secure the fairly lights to the bed end and make sure the electrical cord is secured out of the way behind the bed end.
Step 7
Measure and mark the location to [2] drill holes for mounting the crosspieces that hold the bed ends in place. The crosspieces are 44 x 44 x 2000mm in length. When marking at the top point on the bed ends, make sure the mark angles into the space (the crosspieces is turned slightly). Also, mark the location for the lower side and bottom crosspieces.

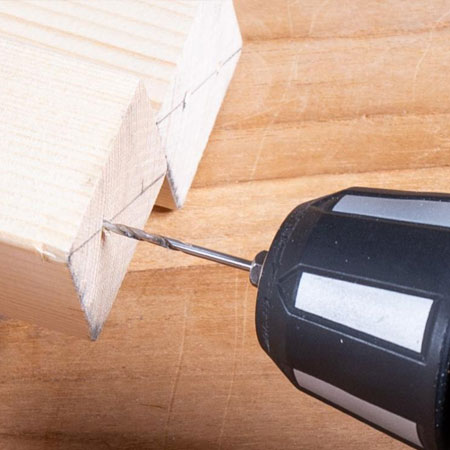
Step 8
Drill countersunk pilots holes in both the bed ends and crosspieces.
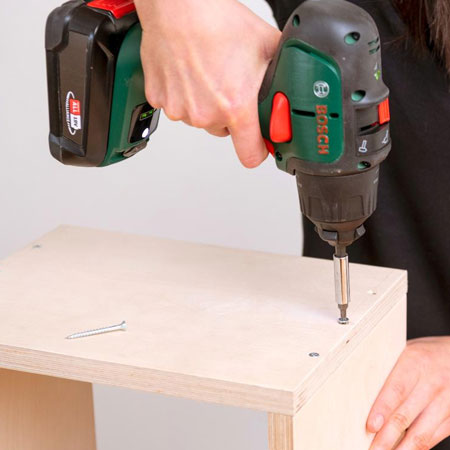
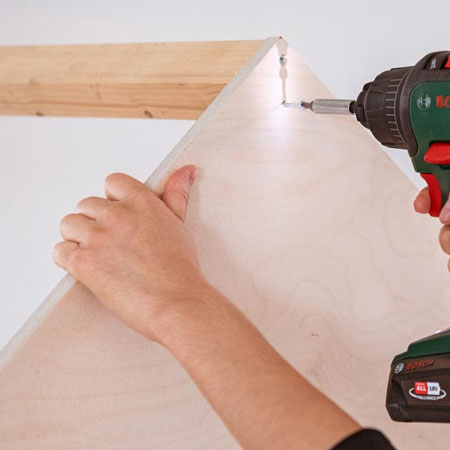
Step 9
To assemble the bed have someone on hand to assist you. Secure the bed ends to the crosspieces using 60mm screws.
all about diy
FINISHING
Sand all the components with 120-grit sanding pads to remove uneven edges and then with 180-grit sanding pads to smooth off the surface. After that, you can apply your choice of finishing or leave as is.