DIY wingback headboard
Making a DIY wingback headboard is not as difficult as you might think and this DIY wingback headboard is upholstered in a dark grey fabric and complemented by shades of yellow and grey accessories.
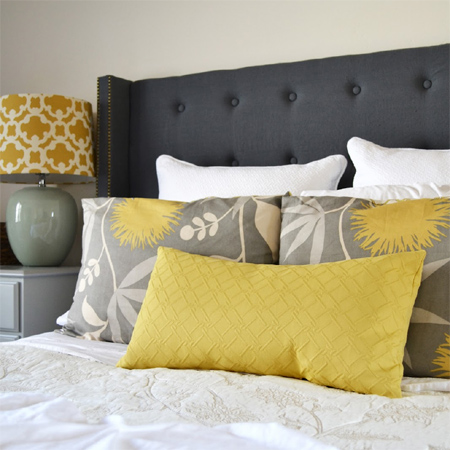
Sarah M Dorsery Designs shows that making a DIY wingback headboard is not as difficult as you might think. This DIY wingback headboard is upholstered in a dark grey fabric and complemented by shades of yellow and grey accessories. Here's how to make a Queen-size wingback headboard.
YOU WILL NEED:
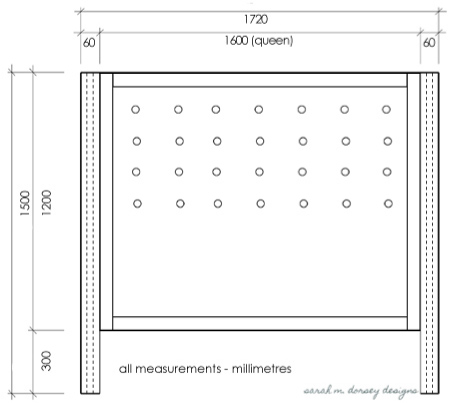
1 of 19mm shutterply or commercial plywood 1200 x 1600mm - back board
4 of 1,8 metre lengths of PAR pine 55mm wide cut to fit back board - back frame
6 of 1,5 metres lengths of laminated pine cut to 200mm W x 1500mm L - wings
3,5 x 35mm wood screws
5 x 75mm wood screws
Self-adhesive spray
2cm-thick foam cut to 1200 x 1600mm
2 metres lightweight batting
3 metres fabric of choice
Upholstery buttons
Nylon line or strong thread
Long tufting or upholstery needle
Upholstery pins
Drill/Driver plus assorted bits
Countersink bit
Tape measure and pencil
Hammer
Staple gun and 6mm staples
HERE'S HOW:
Preparation:
Glue two sets of 200 x 1500mm PAR pine together for the wings. Let the glue dry overnight. Measure and mark at 4 spots along the height and pre-drill 2mm pilot holes and countersink these holes.
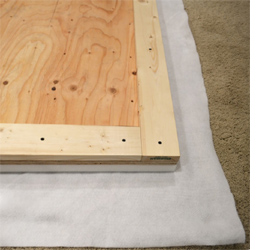
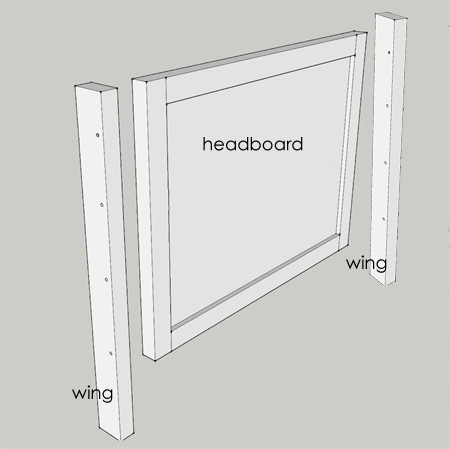
1. Attach the top, bottom and side frames to the back board using 35mm wood screws - as shown left.
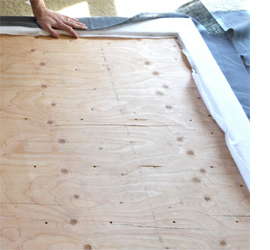
2. Drill 3mm holes in the plywood back board - spaced equally - for tufting.
3. The foam was attached with self-adhesive spray to avoid it slipping while tufting
4. Thin batting was placed over the foam and stapled to the back of the frame.
5. Repeat this process for the fabric, folding under the edges and stapling down to prevent fraying.
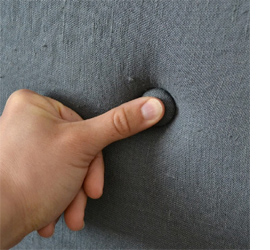
6. The upholstery buttons were covered with matching fabric.
7. Thread the needle with nylon line or doubled-up thread. Push through the back - keeping the needle as straight as possible. Pull through the front and through loop of button before pushing through to the back again.
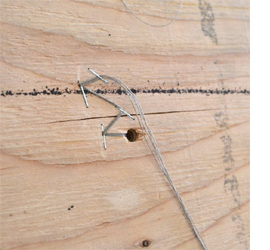
8. At the back, pull the line or thread tightly and use a zig-zag pattern to secure to the back of the board. You need to pull the line or thread as tightly as possible, so that the button on the other side is pulled into the fabric and foam.
9. For the two wings, batting and fabric were cut to cover the wings. The batting and fabric are folded over the top and stapled to the back of the wing on the side between headboard and each wing.
10. With the fabric still loose on the outer side, use 75mm screws to attach the wings to the side frame of the headboard. and then the wing was attached to the headboard.
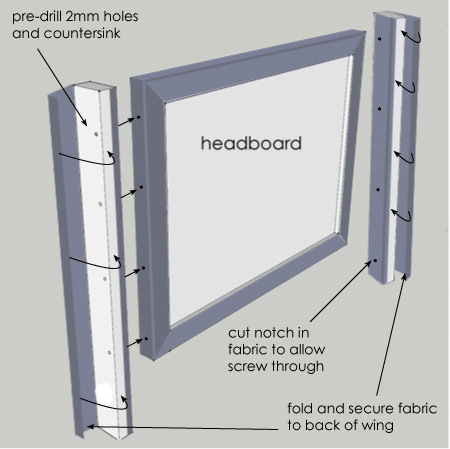
11. Pull the batting and fabric tight around the wing, fold under a hem around the top and edge and staple to the back of the wing.
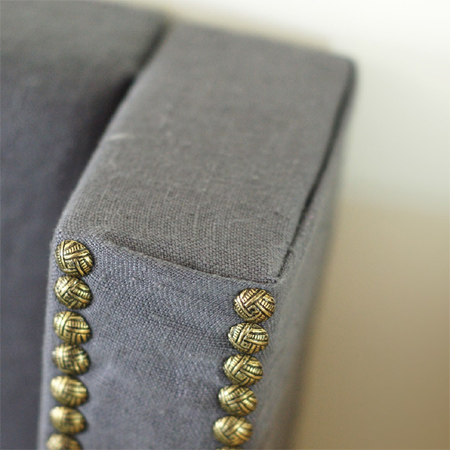
12. Finish off by hammering in upholstery pins or upholstery strips as show below.