A Selection of Easy DIY Bedside Shelf Units
When space is a concern, making your own easy DIY bedside shelf unit is a great solution that saves floor space.
13/09/2021
pinterest.com/pin/14918242506749435/
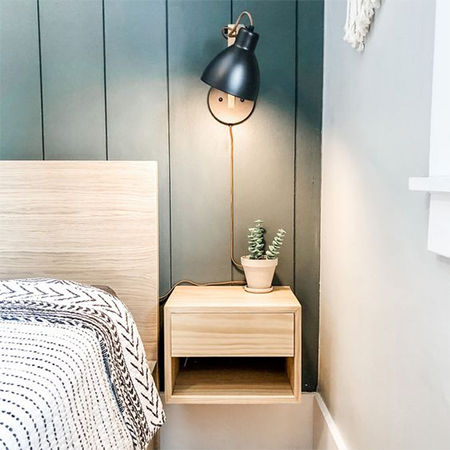
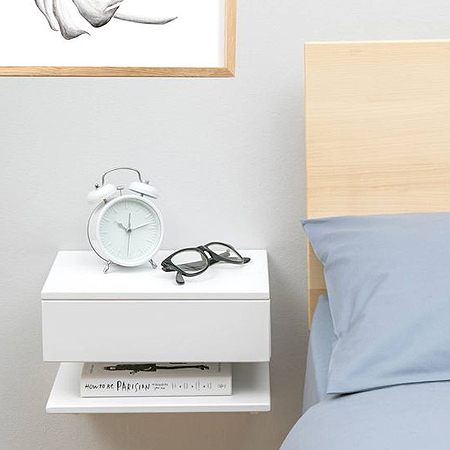
In a compact bedroom, the available floor space can be tight if it doesn't allow for much in the way of freestanding furniture. In this article, we look at some easy DIY projects where you can make a bedside shelf unit that is mounted onto the wall at either side of your bed, and that takes up very little space. Even though these bedside shelves are small and compact, they still provide enough storage for bedtime accessories and a few essentials. See step-by-step instructions at the bottom of this page to make a simple floating bedside shelf unit with drawer.
Everyone in my family enjoys reading, so a small shelf with added storage that is mounted next to the bed provides space for a kindle, paperback or hardcover book, as well as a place to charge your cellphone.
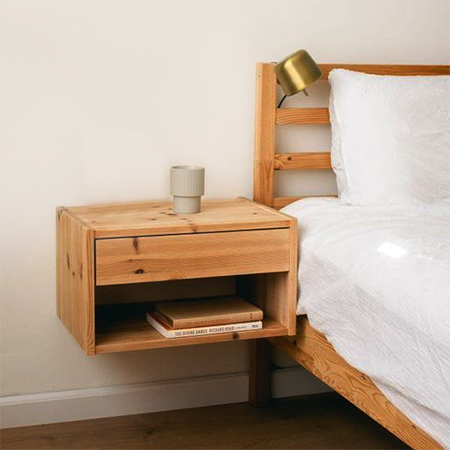
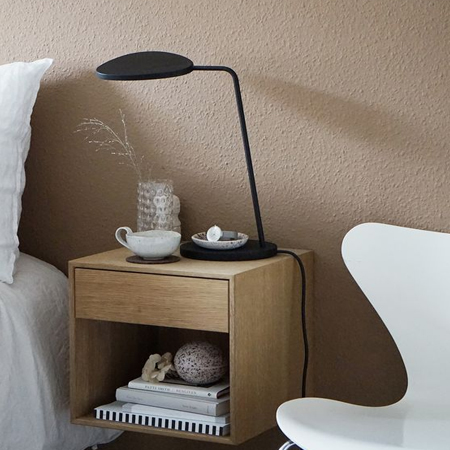
Pine is reasonably affordable and readily available at Builders stores countrywide - and very easy to work with without specialist tools.
pinterest.com/pin/715861303272674355/
Material for the Bedside Shelf Unit
There are plenty of material options to make your easy DIY bedside shelf and it all depends on how much you want to spend. Affordable materials include laminated pine shelving and PAR pine, veneered plywood, SupaWood if you want to paint the finished project, and MelaWood (bisonbord or SupaWood with a laminated finish on both sides). You also have the option to use exotic or indigenous hardwoods to make your bedside shelf.
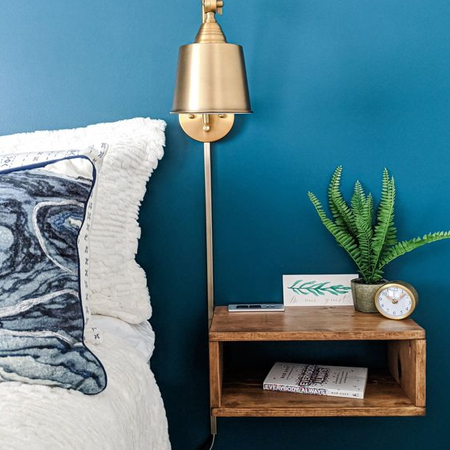
Use a whitewash of water and white paint to the desired consistency to remove the yellow tinge that pine naturally has.
pinterest.com/pin/689050811712014009/
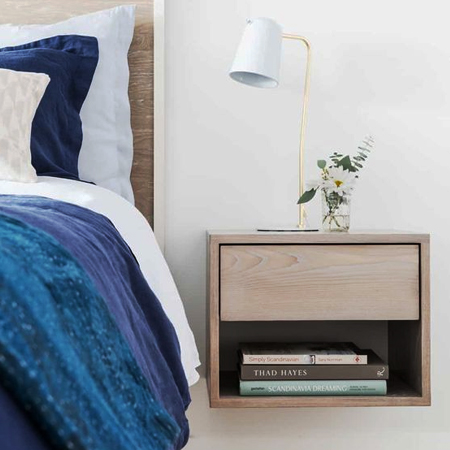
If you prefer a more modern finish for your bedside shelf unit, use SupaWood if you prefer to paint, or choose from a wide selection of MelaWood finishes to match your bedroom decor.
pinterest.com/pin/800374165032884686/
Choose the Perfect Finish
The easiest material to work with would be laminated pine shelving and PAR pine. Don't be put off by the yellow finish on pine, as there are so many ways to disguise this using stain, tinted varnish, whitewash or limewash. I like to use a thin whitewash (water and white paint) to give pine a lighter finish and remove the yellowish tinge. You can vary the amount of water to paint ratio if you prefer an even whiter, lighter finish. You can even apply a chalk paint finish and top sealer if you like this idea.
pinterest.com/pin/137148751141729498/
Size of your Bedside Shelf Unit
The main added benefit of making your own bedside shelf unit is the ability to make it any size you need. If you want a larger shelf area - you can. If you need to add an extra drawer - no problem. Work out what you need for the perfect bedside shelf and then grab your tools and get started.
You will want a bedside shelf or drawer that comes in handy for all your bedtime essentials, and having a floating option means it won't take up any floor space. This DIY bedside shelf is easy enough to make and you could make two for either side of the bed in a couple of hours tops.
Depending on your skill level, you can opt for a simple design like the one shown below, or put your skills to good use by adding a pull-out drawer. It won't be big enough to fit drawer runners, but the drawer is small enough to easily open and close.
pinterest.com/pin/197454764902016742
How to Make a Floating Bedside Shelf Unit
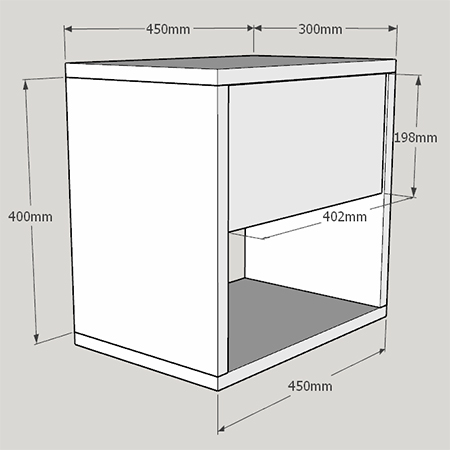
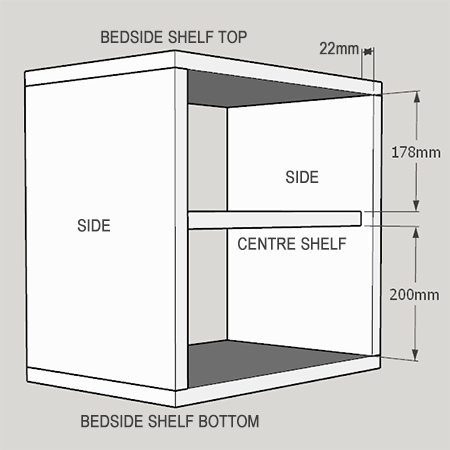
You don't need any special skills or fancy tools to make a floating bedside unit like the ones shown on this page - other than a drill/driver or combi drill and an orbital sander. You can even modify the dimensions below if you want a smaller or larger shelf unit. The measurements are calculated using 22mm thick laminated pine shelving or PAR pine. Any other material thickness and you need to allow for this.
YOU WILL NEED:
2 of 300 x 450mm laminated pine shelving - cabinet top / bottom
2 of 300 x 400mm laminated pine shelving - cabinet sides
1 of 406 x 278mm laminated pine shelving - centre shelf
1 of 402 x 198mm laminated pine shelving - drawer front
2 of 278 x 164mm laminated pine shelving - drawer sides
1 of 338 x 164mm laminated pine shelving - drawer back
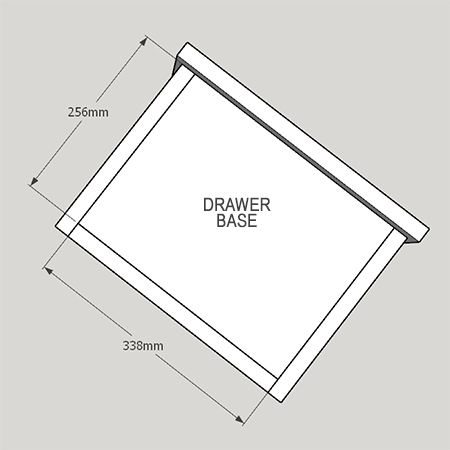
1 of 338 x 256mm laminated pine shelving - drawer base
4 of steel angle braces
Nylon wall plugs and screws
4 x 35mm smooth shank cut screws OR
32mm pocket-hole screws
Wood filler - if not using pocket-hole screws
TOOLS:
Drill/Driver or Combi Drill + assorted bits
OPTIONAL: Kreg Pocket-Hole Jig
Orbital Sander + assorted sanding pads
Clamps + corner clamps
Tape measure and pencil
Safety gear
HERE'S HOW:
Step 1
Assemble the cabinet frame as shown below. To join the pieces, you can use a pocket-hole jig, or you can do simple butt joints. Any screw holes are filled with wood filler, left to dry and then the entire cabinet frame sanded smooth.
Step 2
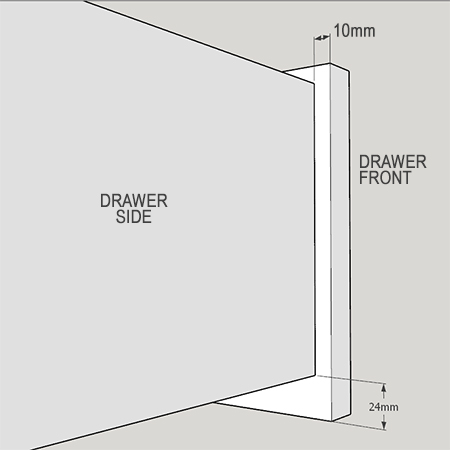
Assemble the drawer as per the diagram below. The best way to start is to attach the sides to the outside of drawer base and then add the drawer back. The drawer front has a 24mm lip at the bottom that will rest against the shelf edge when the drawer is closed. There is a 10mm gap on either side of the drawer front - see diagrams below.
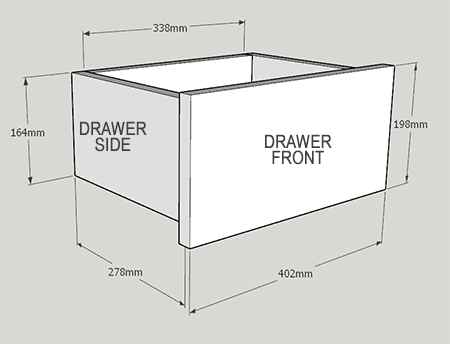
Attach the drawer sides to the base and then add the drawer back. All pieces must be flush along the top and bottom edges.
Allow gaps around the drawer front when mounting the completed drawer assembly.