
Make a modern headboard
Dress up an ordinary bed with an easy-to-build decorative MelaWood headboard.
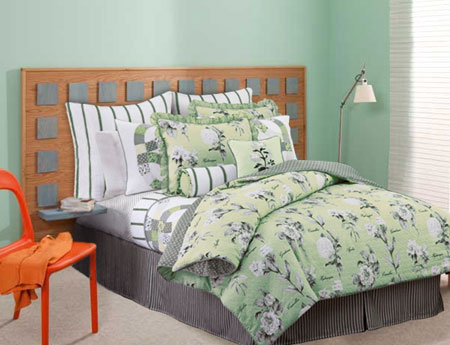
Dress up an plain bed with an easy-to-make decorative MelaWood headboard. The beauty of this project is being able to use MelaWood for the main back section, which means there is far less work to do.
YOU WILL NEED:
MelaWood - cut to the size required*
Pine or Meranti edging trim ( top and side edging)
2 of 20mm x 300mm pine or Meranti (shelves)
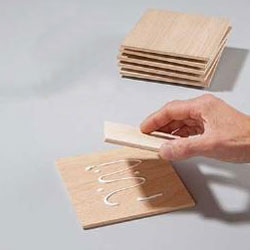
17 of 140 x 140mm squares of 3mm board (painted squares)
17 of 100 x 100mm squares of 3mm board (backing for squares)
Wood glue
30mm wood screws
6mm lag screws and washers
Drill/Driver and asstd drill and screw bits
Contact adhesive
180-grit sandpaper
Acrylic PVA
Polyurethane varnish
Paintbrush
*No measurements are given for the headboard and you can determine your own dimensions to fit the size of your bed.
HERE'S HOW:
1. Position the backing squares on the centre of the decorative squares, secure with wood glue and leave to dry.
2. Use 180-grit sandpaper to smooth and round the edges of the squares and side shelves then apply two coats of acrylic paint. Also apply paint to the two shelves at the same time.
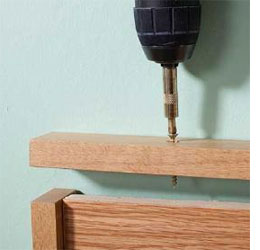
3. On the edging, drill and countersink 2mm pilot holes 400mm apart.
4. Apply wood glue along the surround to position the side edging, securing with wood screws; secure the top. Leave to dry then apply two coats of clear polyurethane varnish.
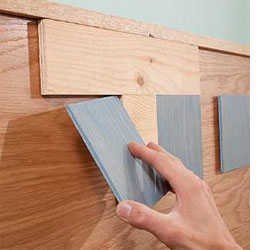
5. To space the squares accurately, make a T-shaped spacing jig by joining two 70mm wide offcuts.
6. Apply wood glue to the back of the squares and position them using the spacing jig.
7. Mark the position of the shelves to drill 8mm clearance holes through the headboard, then 2mm pilot holes into the shelves.
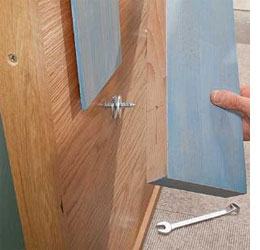
8. Push 6mm lag screws through the headboard, add two washers then tighten the screws and secure the shelves.