
Build a Closet for a Small Bedroom
This might be a small closet, but once you have tackled this project you will realise how simple it is to take this design and make it bigger, perhaps extend the length for a longer, more spacious closet.
This might be a small closet, but once you have tackled this project you will realise how simple it is to take this design and make it bigger, perhaps extend the length for a longer, more spacious closet. Using a board product such as MelaWood allows you to match your existing decor in a light or dark wood finish, or you can use SupaWood and paint it in your choice of colour.
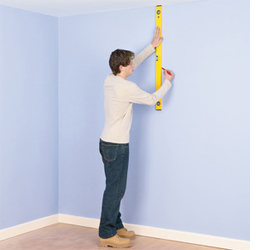
Measure from the corner of the room to where you want the side panel for your cabinet to be. Draw a plumb line on the wall using a spirit level and drawing a line from floor to ceiling.
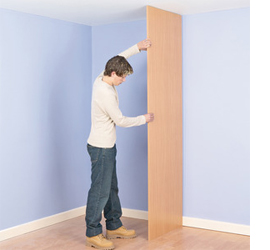
Hold the side panel in place to check that it sits flush with the wall and, if not, you may need to cut the panel to fit. Unfortunately, not many homes have walls that are 100% and minor modifications have to be made.
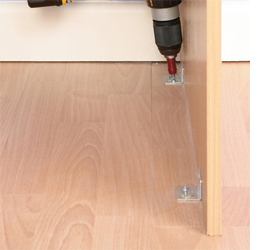
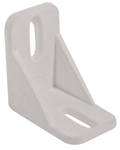
Use a carpenter's square to ensure that the angle between wall and panel is 90 degrees. Use corner brackets to secure the panel to the floor or wall. If drilling into masonry, use wall plugs and screws to secure.
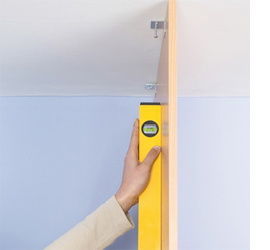
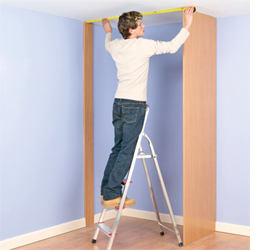
Attach the panel loosely to the ceiling with adjustable corner brackets. You need to ensure that the brackets are screwed into a ceiling batten and not just into the ceiling board. Use a spirit level to check that it is plumb. If necessary, adjust the angle before securing in position.
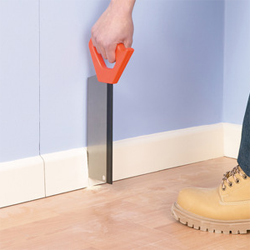
At the opposite side - on the wall - draw a guide line on the wall for the front edge of the closet. The jamb will sit against this line. Cut a section from the skirting to allow the jamb to sit flush against the wall.
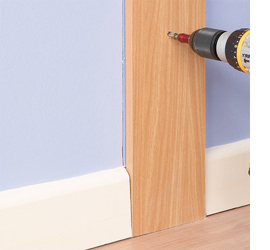
Cut the jamb to size then attach it to the wall with screws. Use a spirit level as you work, to check that the jamb is plumb.
Measure the distance between the inside edges of the side panel and the jamb. Check that the closet is 'square' by measuring at the top and bottom of the opening, and adjust if necessary.
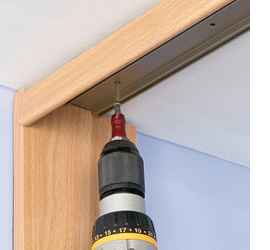
Use a hacksaw to cut the top rail of the sliding door mechanism to fit the opening. Using the manufacturer’s guidelines on positioning, attach the rail to the joists in the ceiling.
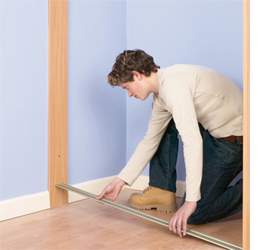
Cut the base rail to length. Position it loosely between the side panel and jamb, but do not attach it at this stage.
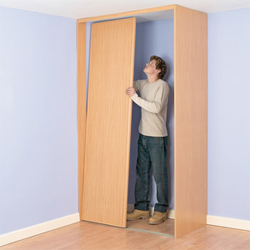
Hang the doors on the runner mechanism, paying close attention to the manufacturer's instructions.
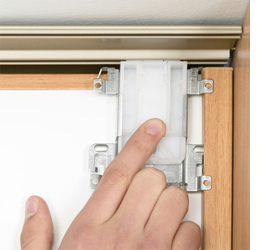
Once the doors are hung, adjust the runners to allow the doors to hang correctly. Note: Not all door hanging systems come with adjustable runners. Check that they operate smoothly. With the doors and rails in the best position for smooth operation.
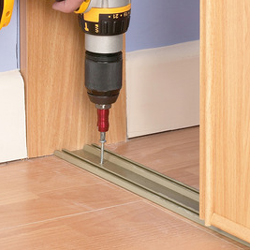
Secure the base rail to the floor. If mounting onto a concrete floor, use wall plug and screws or adjustable anchors to attach the base rail. With the outside frame of the closet securely mounted you can now add shelves or a hanging rail.