
DIY cottage bed for little girl
A client asked me to design and make this gorgeous cottage bed for her little girl. At first I was a bit wary of all the colours, but the end result really looked absolutely amazing.

Original designed by Ashley Furniture (US)
This charming cottage bed is actually quite an easy project to do and you can make the bed in any size you wish.
YOU WILL NEED:
1 of 16mm chipboard cut to 920 x 1900mm - bed base
2 of 16mm SupaWood cut to 100 x 920mm - base top/bottom
2 of 16mm SupaWood cut to 100 x 1932mm - base sides
1 of 16mm SupaWood cut to 952 x 1500mm - headboard back
2 of 16mm SupaWood cut to 1500 x 200mm - headboard sides
1 of 16mm SupaWood cut to 120 x 952mm - shelf
1 of 16mm 16mm SupaWood cut to 920 x 1100mm - footboard back
2 of 16mm SupaWood cut to 200 x 1000mm - footboard sides
1 of 16mm SupaWood cut to 120 x 920mm - shelf
1 of 16mm SupaWood cut to 150 x 920mm - bottom apron
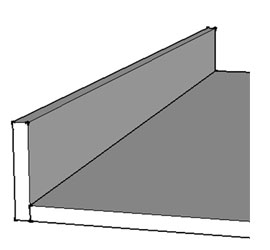
1 of 16mm SupaWood cut to 250 x 920mm - slanted front
1 of 16mm SupaWood cut to 100 x 800mm - centre support
3,5 x 35mm wood screws
Acrylic PVA – matt white
Acrylic PVA – sheen in choice of colours
240-grit sandpaper
Wood filler
TOOLS:
Jigsaw and clean-cut blade
Drill/Driver and assorted bits
Countersink bit
Tape measure and pencil
Ruler
CONTINUES BELOW
HERE'S HOW:
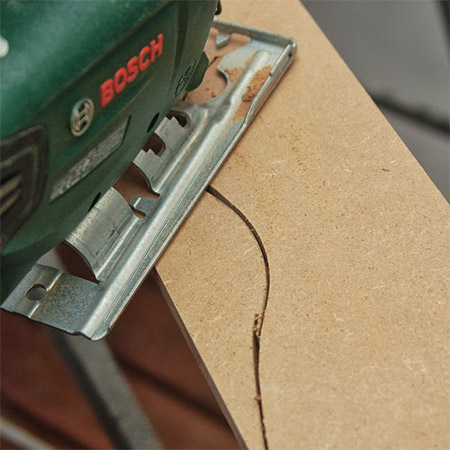
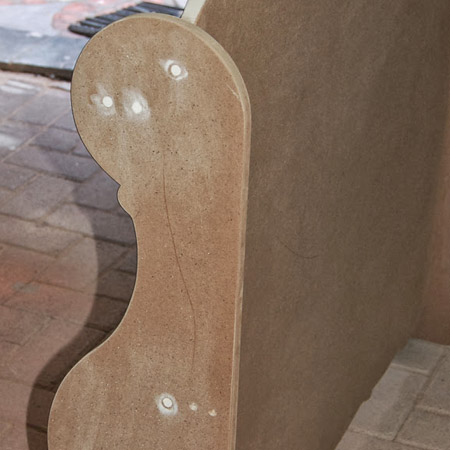
1. Before any assembly takes place you need to cut the sides for the headboard and footboard. Use templates to draw your design onto the board and then cut this out with a jigsaw.
2. The sides for the headboard and footboard, and any shelves, are attached to the sides with 35mm long wood screws. Drill pilot holes and countersink all holes.
3. Fill all screw holes with wood filler and let this dry before sanding smooth with 240-grit sandpaper.
GOOD TO KNOW
If the wood filler cracks, apply another thin layer of wood filler to fill in the cracks and let this dry before sanding.
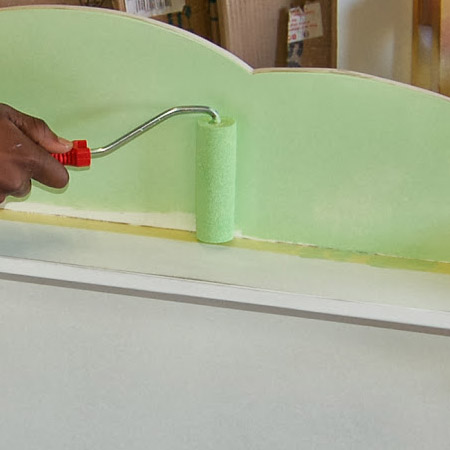
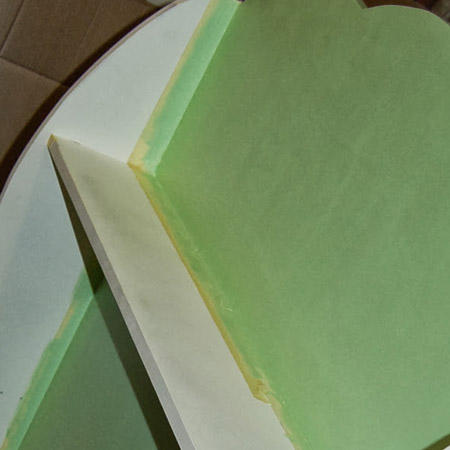
4. Using a foam roller and acrylic matt PVA paint in white, apply a basecoat to the headboard, footboard and side sections. Leave this to dry. Once dry, apply two coats of acrylic sheen PVA paint in your choice of colours. We used acrylic paint for the entire project.
GOOD TO KNOW
Use wide masking tape to mask off the various sections being painted in different colours. It was easier to work with one colour at a time and peel off the tape before completely dry. Let each painted section dry completely before applying masking tape to paint another colour.
Attach the bed frame
1. To make the bed frame place the base board on a flat, level surface. Position the top and bottom sections of the frame against the base board to drill pilot holes and countersink. Use four 3,5 x 35mm wood screws to attach.
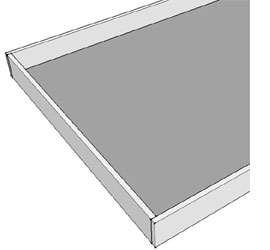
2. Attach the side frames in exactly the same way. Use eight 3,5 x 35mm wood screws to attach.
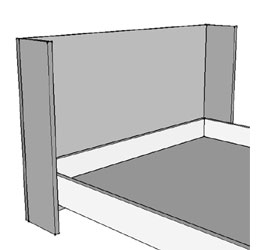
3. Position the bed frame within the sides of the headboard and flush against the back. Have something handy to raise the bed to the height you want it to be from the floor. Drill pilot holes through the base into the headboard and countersink. Use 3 x 30mm wood screws to attach.
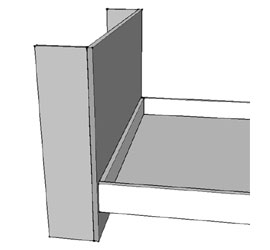
4. Repeat this for the footboard by mounting the bed frame onto the back side of the footboard.
Here are some pics of other pieces that we included as part of the entire bedroom set for a little girl's bedroom.
