
Install bi-fold doors on a closet
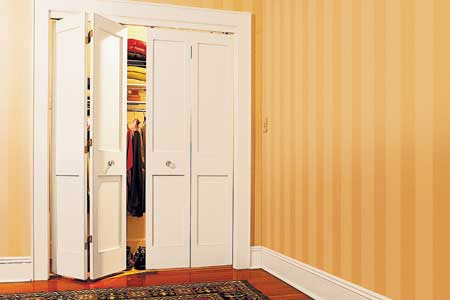
Heavy bifold doors with a sturdy track move effortlessly away from the centre of a closet to give you a full picture of the contents inside.
Replacing those hollow-core builder's specials with a pair of weighty solid folders isn't a huge deal; the whole assembly and installation will take you a mere Saturday afternoon. Then you'll be rewarded with a wide-angle view when it's time to pick out the day's outfits and have plenty more space in the room as well.
1. Mount the hinges
Finish or paint the doors before starting. Label the doors to show the order they'll be installed and which sides face out.
Take a jamb side door and mark its inner edge 280mm from the bottom, 180mm from the top, and centered between the two. Place the door on edge with the marks facing up.
Take the lower half of a hinge and align its bottom with the bottom mark, its knuckles facing back and flush to the edge. Use a self-centering bit to drill pilot holes through the hinge holes. Screw on the hinge plate. Attach the top and middle hinges, on their marks.
Place the leading (inner) door on edge, facing back-to-back with the first door. Align the doors evenly against a square, then put the hinges together. Screw the hinge plates to the leading door. Repeat on the second pair of doors.
2. Attach the track hardware
Fasten the pivot plates (the pins that fit into the track and the floor bracket), and the locking arms (the hooks that slide along the track) to the top and bottom of each set of doors. The pivot plates go on the tops and bottoms of the jamb–side doors, and the locking arm on the tops of the leading doors.
Each kit requires its hardware to be uniquely positioned, so check the diagrams that come with yours for exact measurements and placements. These will tell you, for example, not only how far a pivot plate should be from the door edges around it but also where its pin should be in relation to the door's edges. Adhering to all the given dimensions ensures that no piece goes on backward.
3. Install the track
Use a hacksaw to cut the track to length to fit the closet opening. You will find a wide range of Hillaldam door accessories at your local Builders Warehouse. Slide the hanging hardware into the track—the small stops in the centre, then around them the track hangers with wheels, and finally the pivot socket on the outside. Attach the track to the door header with the screws provided. Position the track 25mm in from the front edge of the header. This will give you enough room to hide the track with trim without limiting the door action.
DIY Tip:
Don't tighten the hardware onto the track. It will be easier to hang the doors later if the pieces are loose.
4. Position the floor bracket
Use the measurements supplied by the manufacturer to position the floor bracket next to the door jamb. Hang a plumb bob from the centre of the track above the floor bracket to align the pin hole in the bracket front to back. This will ensure that the doors are plumb when installed. Outline the bracket in pencil to mark its exact location. Screw the bracket in place, then remove the screws and set the bracket and screws aside.
5. Hang the doors
Bring the doors to the track and lift the jamb side to hook the pin of the top pivot plate into the pivot socket. Make sure the pin is all the way in, then push the lever on the side of the socket to lock it in place. Slot the pin from the track hanger into the locking arm on the leading door. Twist the arm to lock it into place. With the doors closed, swing them forward enough to catch the floor bracket in the bottom pivot pin.
6. Attach the floor bracket
Swing the doors back into place and align the floor bracket with the pencil marks. Use a flexible bit extender to screw down the bracket. Hang the other set of doors. Close both sets and adjust them along the track to even up the reveal around them. Then, using the wrench provided with the hardware, tighten the pivot sockets on the ends of the track and the small stops in the centre.
DIY Tip:
Ask a helper to give you a hand in lifting and holding the doors, which can be unwieldy.
7. Attach the door aligner
From inside the closet and with the doors closed, mount the door aligners between the two leading doors, 150mm up from the floor. The aligners catch when the doors are closed, keeping the door faces flush with each other. From outside the closet, check the alignment. Adjust the track hardware as necessary to keep the reveal around the doors even.
If you can't find doors to suit, you can always substitute with kitchen cabinet doors - normally available in various materials and profiles - from a supplier that stocks ready-made kitchen cabinets. Or make your own.
[this old house ]