Make a Pine Toddler Bed
This toddler bed is made using PAR and laminated pine that is available at Builders Warehouse, and is perfect for a child transitioning from cot to first bed.
11/12/2018
buildsomething.com
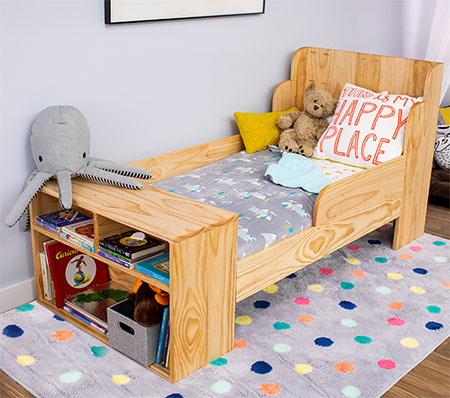
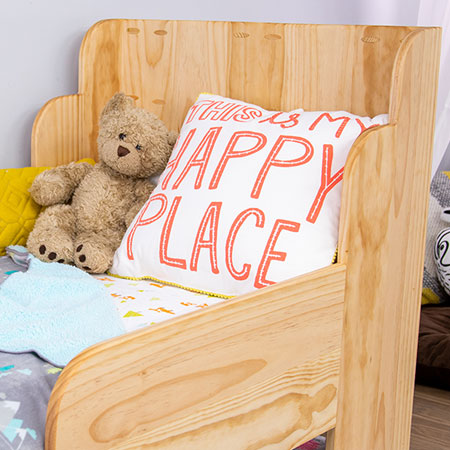
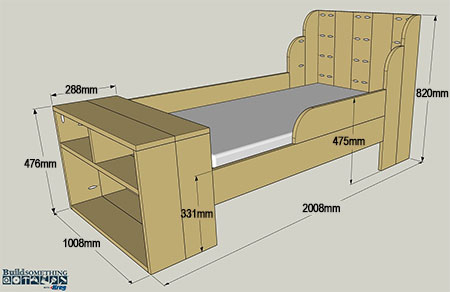
This pine toddler bed is perfect for a young child transitioning from cot to bed. It is designed with safety sides built-in to the bed so that you don't have to worry about your child rolling over and falling out.
Made using PAR and laminated pine, you can buy all the supplies needed to make this toddler bed at Builders Warehouse. And the bed is a standard toddler size, so you can fit a toddler mattress that is 920mm wide x 1700mm length.
GOOD TO KNOW: The materials and cutting list has been modified to allow for locally available materials.
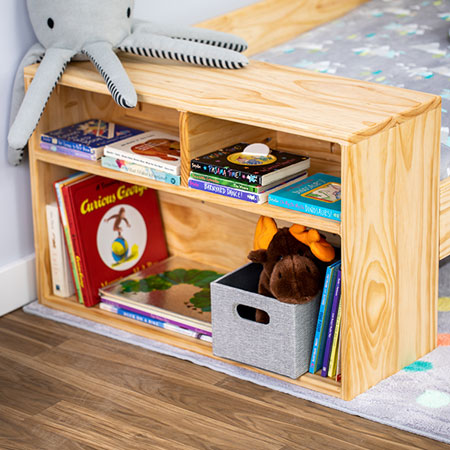
Built-in storage shelves at the end of the bed provide plenty of storage for toys and play things, or books if you like to read bedtime stories to your child.
Once you have assembled the bed you can select your own choice of finishing. You can apply tinted or clear wood sealer or varnish, or you can paint the bed using wood primer and acrylic paint or chalk paint.
For the perfect finishing touch to your new toddler bed, buy a pack of pine pocket hole plugs to cover all the screw holes.
YOU WILL NEED:
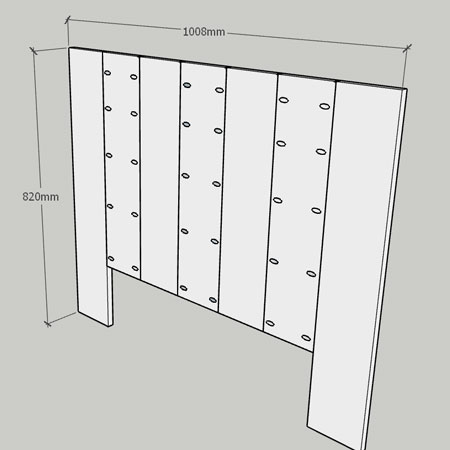
2 of 19 x 144 x 820mm PAR pine - headboard, end slats
5 of 19 x 144 x 620mm PAR pine - headboard, middle slats
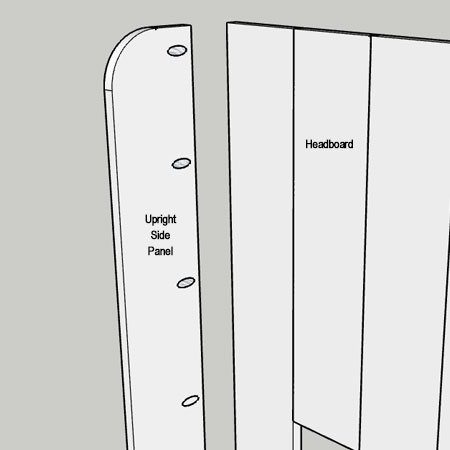
2 of 19 x 144 x 820mm PAR pine - upright side panel
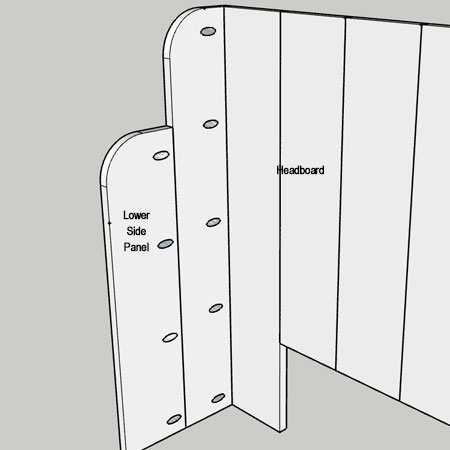
2 of 19 x 144 x 620mm PAR pine - upright side panel, lower
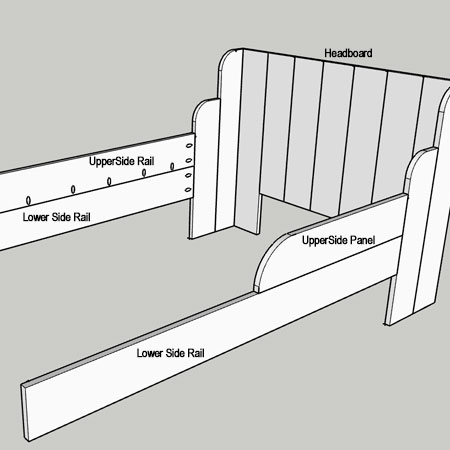
3 of 19 x 144 x 1451mm PAR pine - side rail, upper rail
1 of 19 x 144 x 700mm PAR pine - side panel, upper
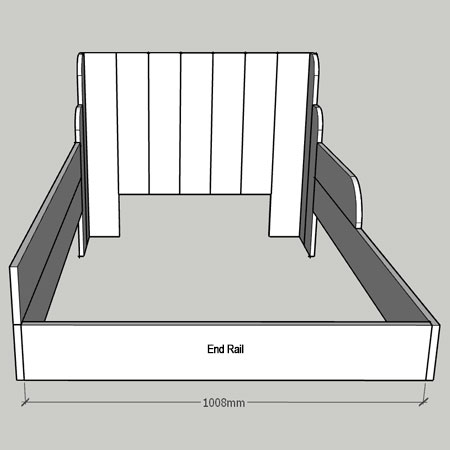
1 of 19 x 144 x 1008mm PAR pine - end rail
2 of 19 x 144 x 1046mm PAR pine - shelf tops
4 of 19 x 144 x 1008mm PAR pine - shelf bottom, center shelf
4 of 19 x 144 x 457mm PAR pine - shelf sides
1 of 19 x 144 x 288mm PAR pine - top shelf divider
2 of 19 x 144 x 494mm PAR pine - shelf back, top
1 of 19 x 275 x 1008mm laminated pine - shelf back, bottom
1 of 16 x 1008 x 1700mm BisonBord - base
4 of 22 x 44 x 1008mm PAR pine - base slats
Wood glue
25mm coarse thread screws
4 of 4 x 35mm screws
Choice of finishing and accessories to finish
OPTIONAL: Kreg pocket hole plugs, pine
TOOLS:
Drill/Driver plus assorted bits
Kreg pocket hole jig
Clamps
Jigsaw and clean-cut blade
Orbital sander plus 120- and 240-grit sanding pads, or sandpaper
Tape measure and pencil
Not responsible for errors or omissions
HERE'S HOW:
Set up your pocket hole jig for 19mm thick material.
GOOD TO KNOW: Sand all the pieces with 120- and then 240-grit before assembly, also sand all pieces after cutting and prior to assembly. Since this is a toddler's bed, round off all the sharp edges.
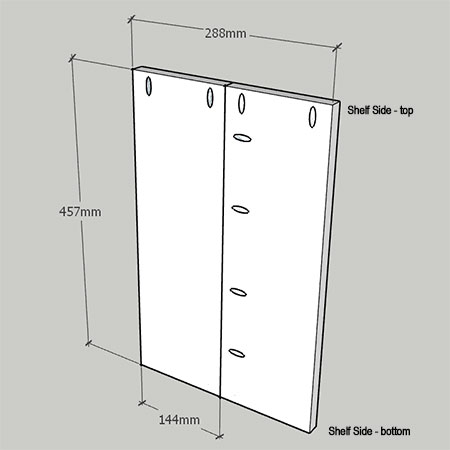
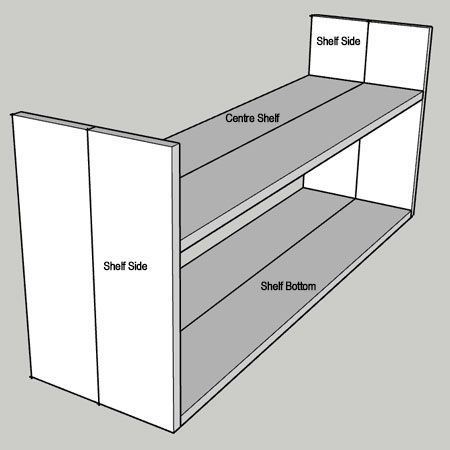
1. On all shelf sides drill [2] pocket holes at the top/bottom edges. Also drill [4] pocket holes down the long edge of both side sections. Use wood glue and 32mm screws to join the 2 side sections together and repeat for the other side section.
2. Drill [2] holes on both ends of the shelf bottom, and a row of [6] pocket holes along one long side. Join the [2] bottom shelves together with wood glue and 25mm pocket hole screws.
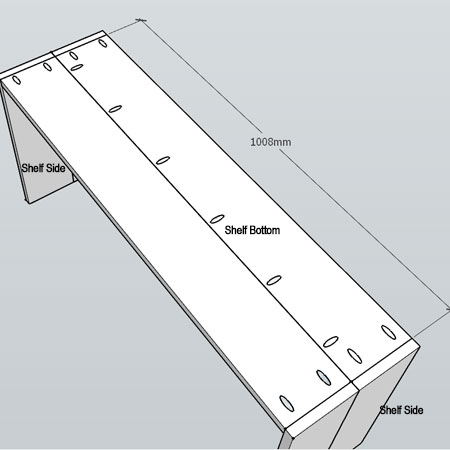
3. Repeat step 2 to add the centre shelf.
4. Drill [6] pocket holes along one long side of a top shelf and secure the two top shelf sections together using wood glue and 25mm screws.
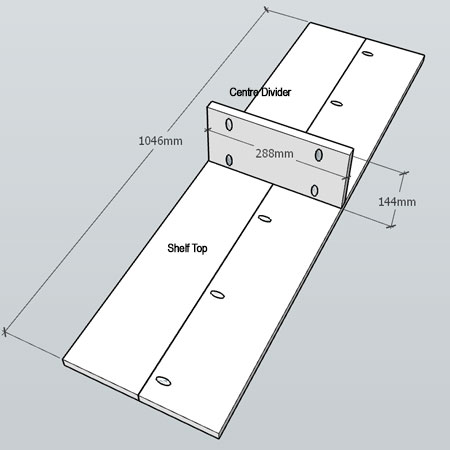
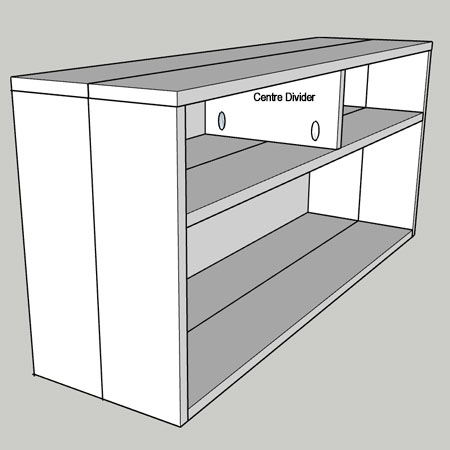
5. Drill [2] pocket holes on both sides of the centre divider. Secure this to the underside of the top shelf with wood glue and 32mm screws.
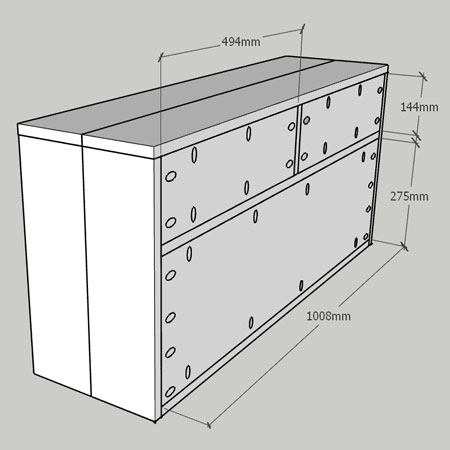
6. Drill pocket holes along the edges of the top and bottom shelf backs, as shown below, and secure with wood glue and 25mm screws.
7. Drill [5] pocket holes along the long sides of [3] centre slats to assemble the headboard. Use wood glue and 25mm screws to assemble the headboard, as shown below.
8. Use a circular template to mark a curve on the higher and lower uprights and cut out with a jigsaw.
9. Drill [5] pocket holes down one side of the longer uprights and use wood glue and 25mm screws to attach these to the headboard.
10. Drill [4] pocket holes along one edge of the lower side panel and attach to the higher side panel in the same way.
11. Drill [8] pocket holes along the bottom edge of the upper side rail, and [2] pocket holes at one end of both upper and lower side rails and side panels. Use wood glue and 25mm screws to join these sections to the previously assembled components.
12. Drill [2] pocket holes at both ends of the end rail (on the inside) to secure this to the bed frame using wood glue and 25mm screws.
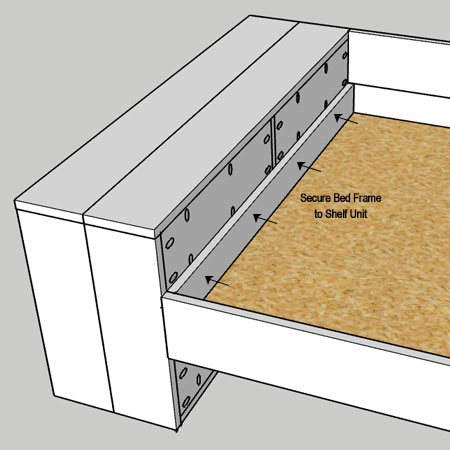
13. Secure the Bed Frame to the back of the Shelf Unit with 4 of 4 x 35mm screws.