
Quick Project: Easy Way to Reupholster your Headboard
If you are thinking of ways to give your bedroom a makeover, take a look at the difference you can achieve simply by reupholstering your headboard.
01/02/2020

Reupholstering a headboard can instantly refresh a bedroom and you get to choose the perfect fabric for the upholstery project - a fabric that adds colour, texture and pattern to give your bedroom a fresh, new look.
YOU WILL NEED:
Batting, medium-weight - to wrap headboard (measure height and length of the headboard and add extra for folding over)
Upholstery fabric*, same quantity as for the batting
TOOLS:
Bosch Tacker or heavy-duty staple gun
Scissors
Hammer
Tape measure and pencil
*Note: We recommend upholstery fabric for this project. Upholstery fabric is specifically manufactured to meet the high demands of daily wear and tear and will last substantially longer than other types of fabric.

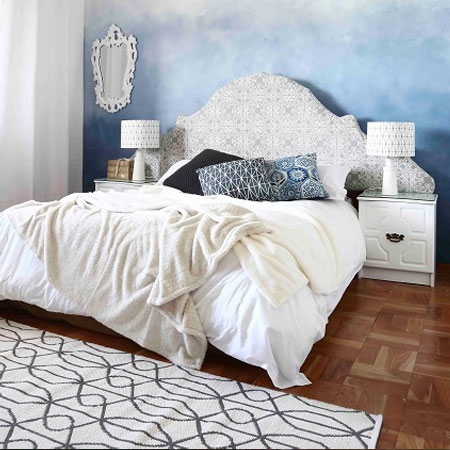
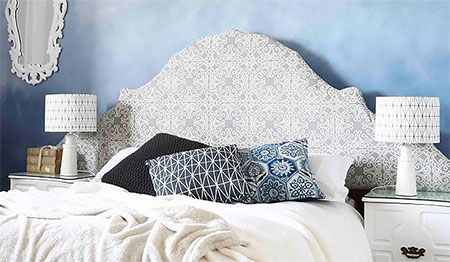
BEFORE and AFTER: This dated headboard gets a brand new look with trendy patterned fabric.
HERE'S HOW:
Note: For the purpose of this project, the original headboard was taken apart and only the upholstered panel was reupholstered.
GOOD TO KNOW: If you are only able to purchase lightweight batting, double the quantity to add luxurious padding to the headboard.
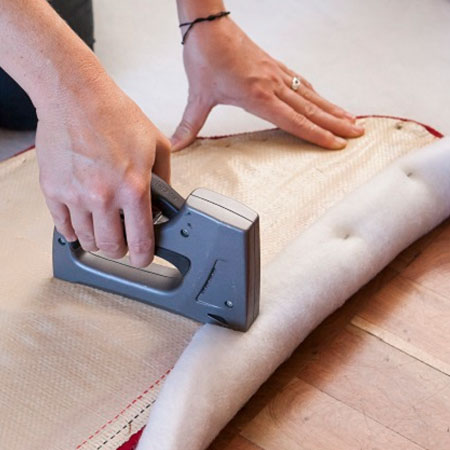
1. Place the medium-weight batting on a flat, level surface and place the headboard face-down on top of this. Make sure you have enough space all the way around to work and that you have extra batting all the way around the headboard - allow for 150mm extra batting for folding over
2. Fold the batting over the straight edges and onto the back of the headboard and secure with staples.
3. Before stapling any curved sections, use sharp scissors to trim the batting to fit around the edges. Where the batting becomes bulky around corners, trim away any excess.
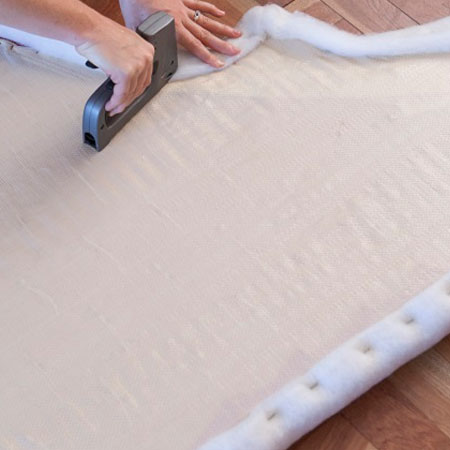
4. Place your upholstery fabric on the work surface and position the headboard on top of this, once again making sure that you have enough fabric all the way around.
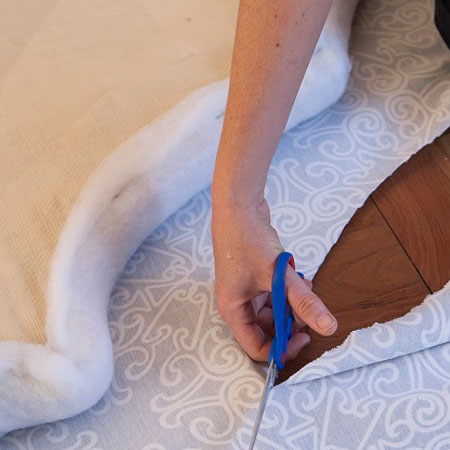
5. Use sharp scissors to cut around detailed areas, as shown below.
6. Now repeat the stapling process. Start at the centre bottom and work out to the sides of the headboard. As you work, use your hand to smooth out any wrinkles that form. Continue in this way as you work up the sides.
GOOD TO KNOW: Always make sure that the fabric is taut - not tight - so that you don't end up with a sloppy covering.
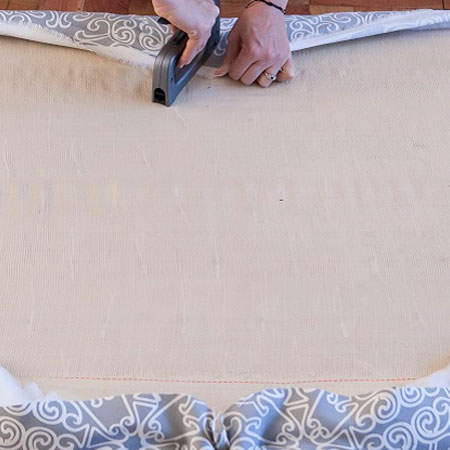
7. When working on the shaped sections, start in the centre and work towards the sides. Make sure to pull the fabric taut over the top edges and use your hand to smooth to the sides to get rid of any wrinkles. Take the time to arrange and fold the fabric over the detailed edges for a neat finish.
How easy was that! Now you have a refreshed bedroom and a pretty headboard to top off your bed.
Referenced from Gallo images / YOU Magazine