
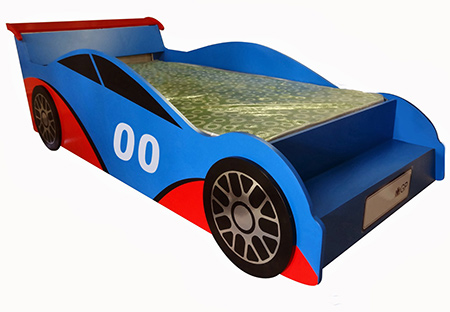
Make a race car bed
This DIY race car bed is a reasonably simple project that you can make in a couple of days with a few basic power tools.
YOU WILL NEED:
The following sections are all 16mm MDF / SupaWood that you can have cut to size at your local Builders Warehouse.
2 of 600 x 2500mm - sides
1 of 150 x 920mm - 1/front
1 of 350 x 920mm - 2/front
1 of 300 x 920mm - 3/front
1 of 400 x 920mm - back
1 of 150 x 953mm - back spoiler
2 of 150 x 250mm - spoiler supports
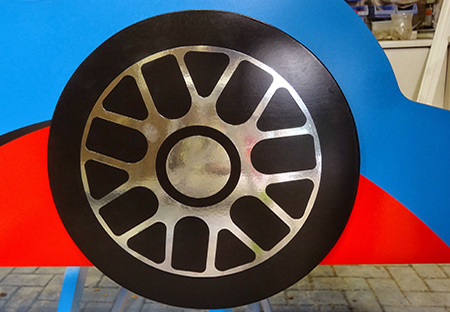
4 of 400 x 400mm - wheels
1 of 920 x 1800mm 16mm BisonBord - base
Stickers, custom printed to fit
5 x 50mm screws
Prominent Select Sheen paint - your choice of colour for the bed
Rust-Oleum 2X gloss apple red spray paint for the spoiler
Rust-Oleum 2X satin canyon black for the wheels
1000-grit wet/dry sandpaper
TOOLS:
Drill / Driver plus assorted bits
Countersink bit
Jigsaw and clean-cut blade
Orbital sander plus 120- and 240-grit sanding pads
Bosch PFS spray gun (PFS-2000 or 3000)
Workbench or sawhorse (2)
Quick clamps
Tape measure and pencil
HERE'S HOW:
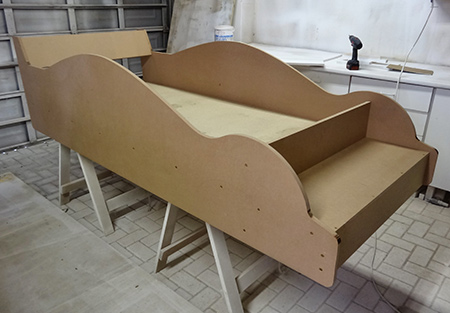
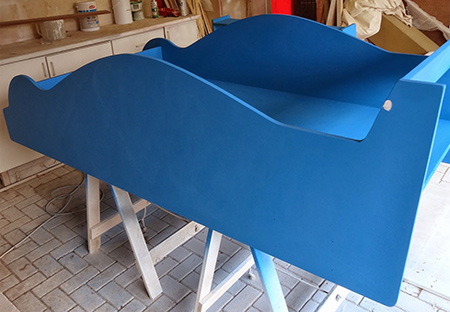
1. Before you begin assembly there are a few pieces that need to be cut. Grab your jigsaw and a couple of workbenches so that you can draw a design on the sides of the bed to give it a racing car-like shape. You can see the design for this bed has a large curve above the windows, and a smaller curve where the wheels are mounted.
2. Use a large circular template (400mm in diameter) to cut out the wheels - we used a braai lid.
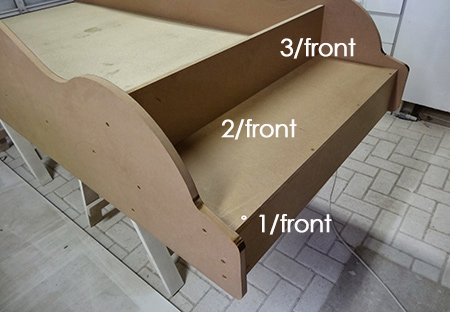
3. The front of the bed (3 pieces) are joined together before fitting. See the image above that shows how the assemble these sections.
4. Pre-drill 8 of 3mm pilot holes along the length of both sides at 150mm up from the bottom edge. Also pre-drill corresponding pilot holes in the base.
5. Partially drive the screws through the sides, so that a 5mm tip shows. Have someone on hand to hold the sides against the base - aligning the tips of the screws with the pilot holes in the edge of the base. The base is mounted 50mm in from the back edge of the side.

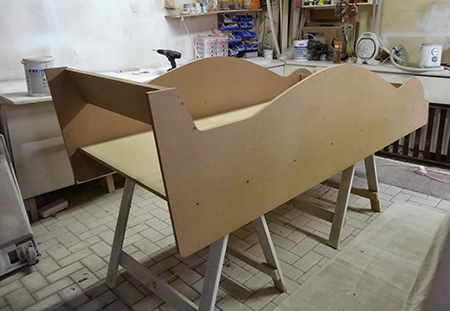
6. With the sides attach to the base you can now attach the back support and completed front shelf section.
7. Fill all the holes with wood filler. Allow this to dry and then sand smooth. Use 120- and then 240-grit sanding pads to smooth and round off all the edges. Wipe clean to remove all traces of dust.
8. Our car bed was given two coats of Prominent Select sheen using a Bosch PFS spray gun. This was sanded with 1000-grit sandpaper and a further two coats applied.
GOOD TO KNOW:
With the high temperatures
being experienced at the moment, rather do your
spay painting early in the morning or later
afternoon when it is cooler. This prevents the
paint finish from being sticky.
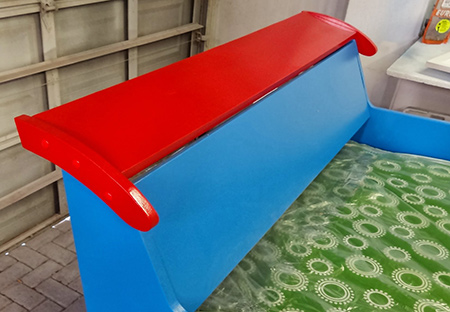
9. Assemble and spray paint the top spoiler separately and attach once finished. This also applied to the wheels, which are attached via screws through the sides.
FINISHING
Allow a day or so for the paint to dry completely before carefully applying your choice of stickers to finish the race car bed.