
Pine Bedside Cabinet with Dovetail Joint option
This pine bedside cabinet is the perfect project for any beginner DIY enthusiast looking to practice their skills, plus there is the option to add dovetail joints.
12/03/2019
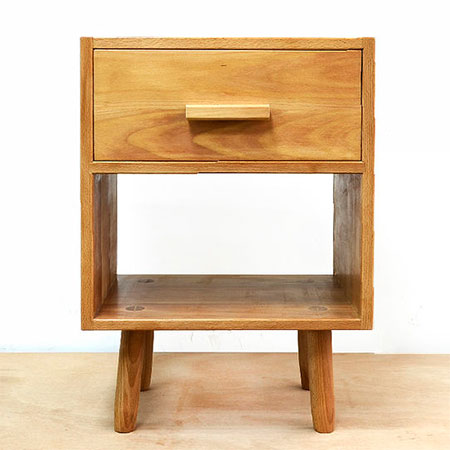
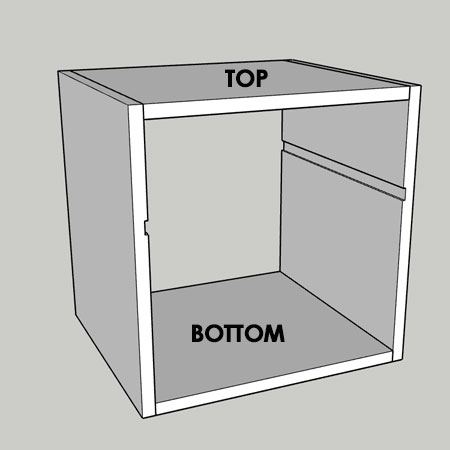
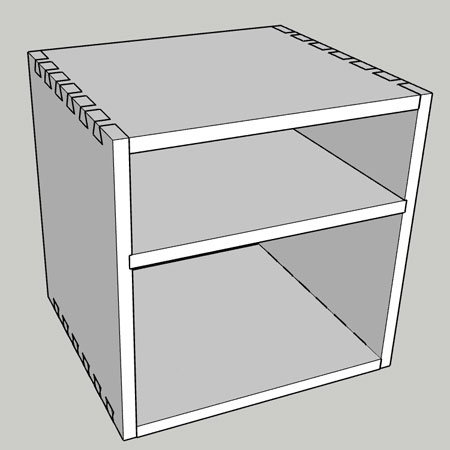
This pine bedside cabinet has modern lines and is very easy is to make using 455mm wide laminated pine shelving that you will find at your local Builders Warehouse or Builders store.
The design for this bedside cabinet allows you to practice your DIY skills to make a functional bedside unit for the bedroom. Plus, you have the option to try out a bit of carpentry by adding dovetail joints to the top and bottom sections.
YOU WILL NEED:
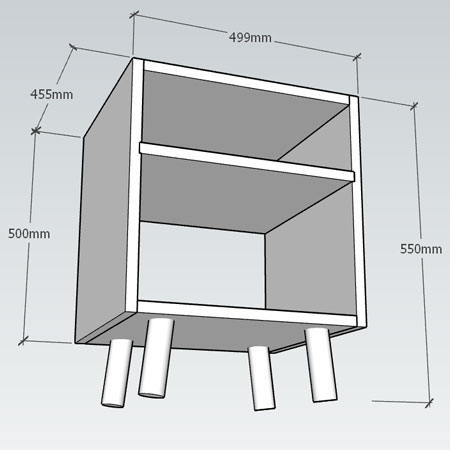
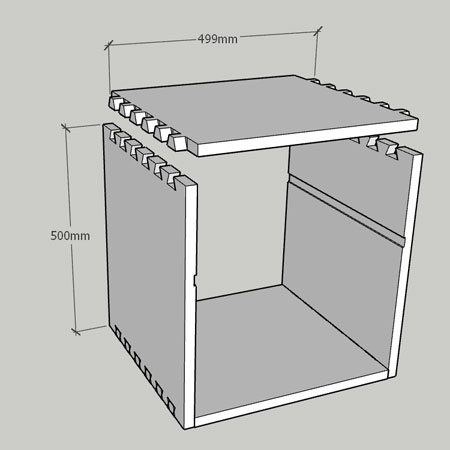
2 of 22 x 455 x 455mm laminated pine - top/bottom (Dovetail option 499 x 455)
1 of 22 x 465 x 455mm laminated pine - divider
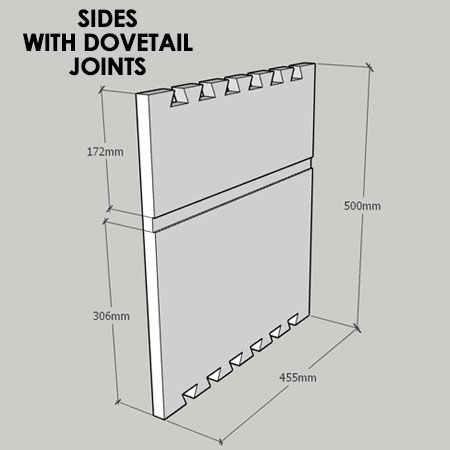
2 of 22 x 500 x 455mm laminated pine - sides
1 of 22 x 451 x 146mm laminated pine - drawer front
2 of 22 x 432 x 143mm laminated pine - drawer sides
1 of 22 x 407 x 143mm laminated pine - drawer back
1 of 22 x 413 x 407mm laminated pine - drawer base (or replace with Masonite)
3mm Masonite 496 x 496mm - backing
4 x 45mm screws
4 legs and screws
Choice of handle or knob plus screws
Wood glue
TOOLS:
Drill/Driver plus assorted bits
Router and groove cutting bit or table saw
Orbital sander plus 120- and 240-grit sanding pads
Tape measure and pencil
OPTIONAL: Biscuit Joiner | Pocket-Hole Jig
HERE'S HOW:
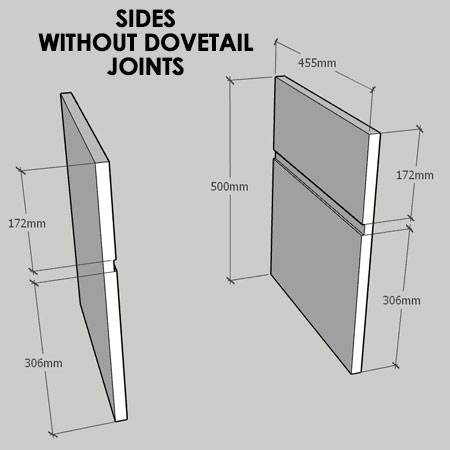
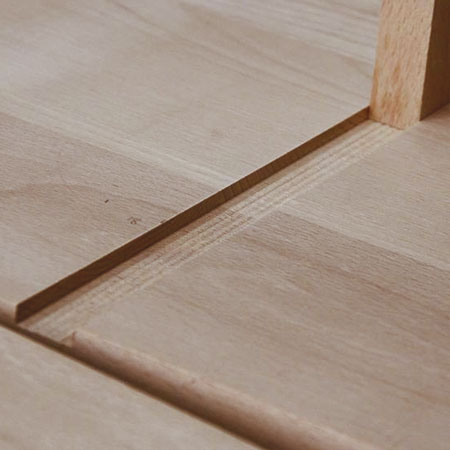
1. On both side sections (with or without dovetail joints), measure 172mm from the top and cut a 5mm deep and 22mm wide rebate for the divider.
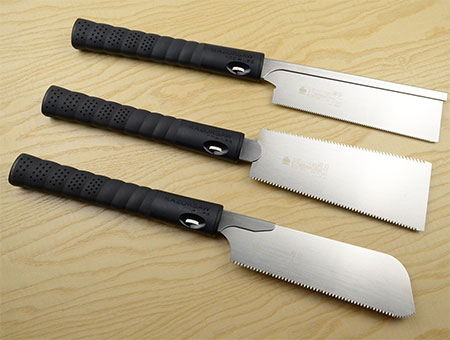
Japan saws or Pull-Out Saws are ideal for woodworking and carpentry projects. The Japan saw cuts on the 'pull' stroke rather than the 'push' stroke of other saws.
WITH dovetails
2. Measure, mark and cut dovetails at the top and bottom of both side sections.
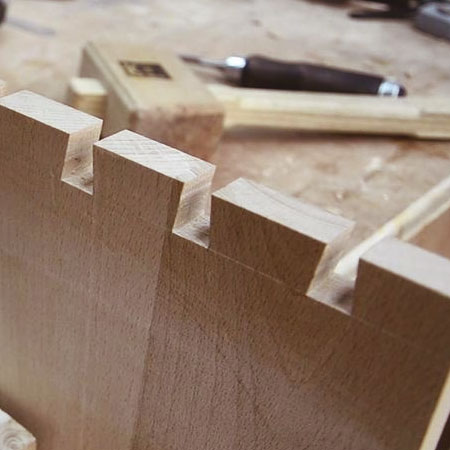
3. Transfer the measurements on the ends of the top and bottom to cut corresponding dovetail joints.
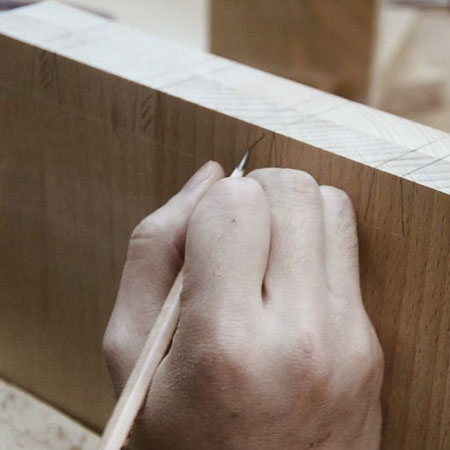
GOOD TO KNOW: Use a handsaw, Japan saw or hacksaw to cut out the dovetails.
4. To join the top and bottom sections - if you aren't using dovetail joints - you can use a Biscuit Joiner, Pocket-Hole Jig or simply screw through the sides with 4 x 45mm screws. Drill and countersink the holes beforehand.
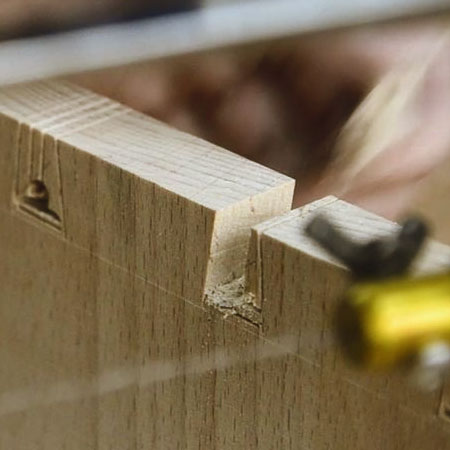
5. If you are using dovetail joinery, connect the top and bottom to the joints on the sides.
6. Apply wood glue along the slot cut out in the sides and insert the divider.
GOOD TO KNOW: When joining the dovetailed joints together it's handy to use a wood mallet.

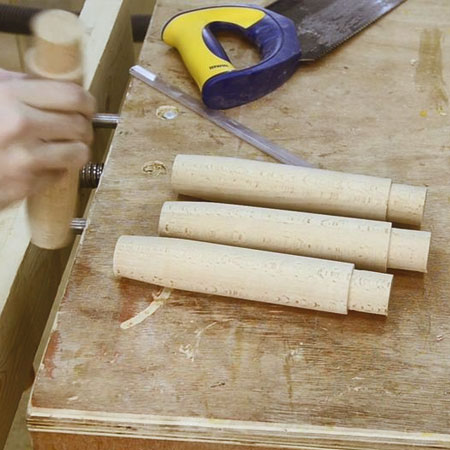
7. For this particular project, the legs were cut on a lathe. You have the option to cut your own legs or find suitable legs to fit onto the base. Secure the legs to the base as per the type of leg you use.
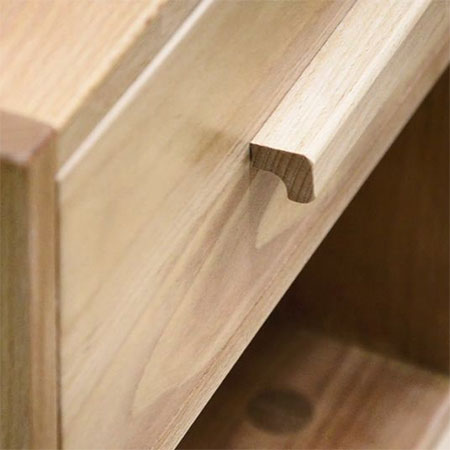
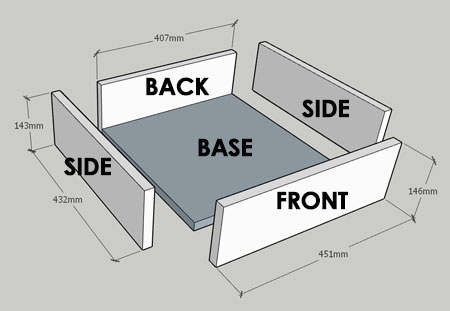
8. Assemble the drawer as shown in the diagram below and attach you choice of knob or handle. For this project, the handle was crafted from a piece of pine waste.
FINISHING
Secure the backing board to the back of the cabinet with heavy-duty stapes or use a hammer and panel pins.
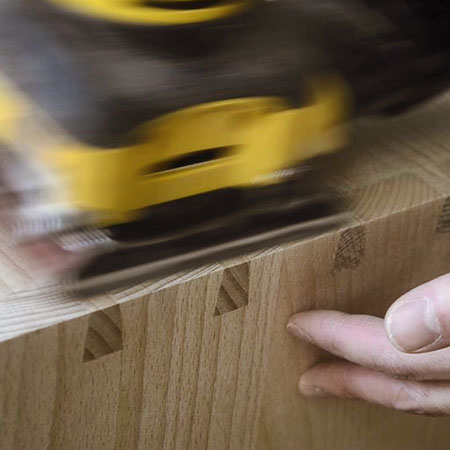
Sand the completed project with 120-grit sanding pads to remove any uneven edges and then with 240-grit sanding pads for a smooth finish.
After sanding you can apply your choice of finish.
instructables.com