Custom Storage Cubes or Kids Bedrooms
Grab some laminated pine shelving and paint to make these custom storage cubes for a kids bedroom - for mounting onto a wall, stacking on the floor, or simply using for bedside storage or essential storage.
08/04/2020

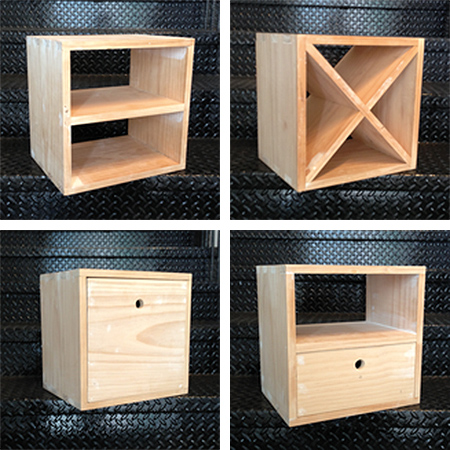
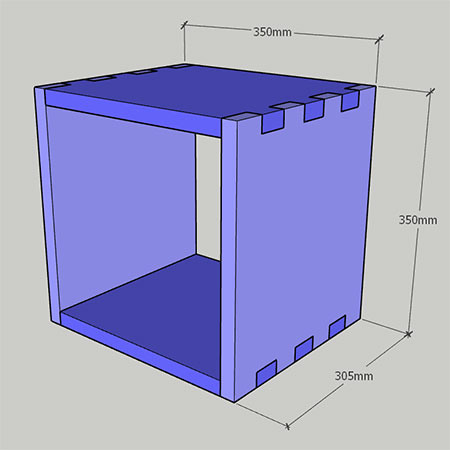
Stack them up to make a colourful storage unit, mount them onto a wall, or use them for bedside storage, seating or other storage necessary for a children's bedroom. These custom storage cubes measure 350mm height by 350mm length and are 305mm deep. You can make the storage cubes using a piece of 305mm wide laminated pine shelving that you can buy at any Builders Warehouse.
The assembly process for these storage cubes is done via a basic dove joint, so no screws are used in the construction for a seamless finish all round.
YOU WILL NEED:
Laminated pine shelving, 305mm wide, cut to the following:
- 4 of 350mm x 350mm
Ponal wood glue
Alcolin wood filler
50mm panel pins
Your choice of paint to finish
TOOLS:
Orbital sander plus 120- and 240-grit sandpaper
Jigsaw, Mitre Saw or Table Saw
Wood chisel
Hammer
Clamps
Tape measure and pencil
HERE'S HOW:
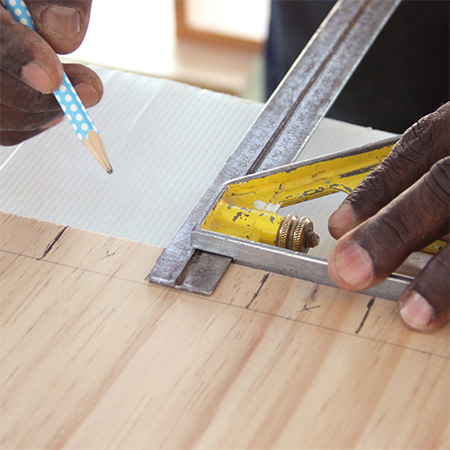
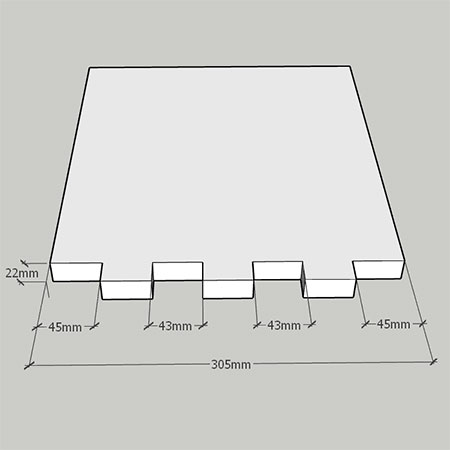
1. Using one of the pieces as a guide, draw a straight pencil line across the ends of all the sections 22mm in from the end. This is important to ensure that you cut the simple dovetail joints correctly.
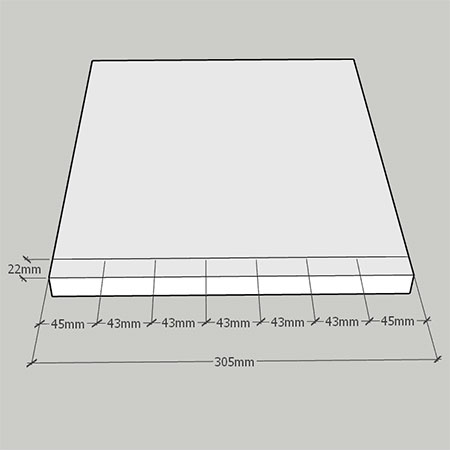
2. In the marked section on all the ends, divide 305mm into 7 segments and mark with a pencil line. The end segments are 45mm in from the end and all others are 43mm, as shown on the diagram above.
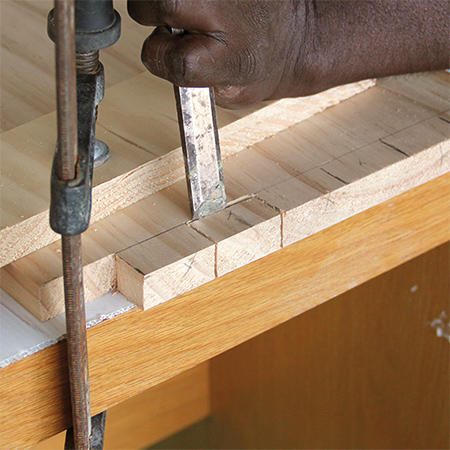
3. On the top and bottom sections, use a couple of clamps to firmly hold the workpiece to your workbench. Use a jigsaw to remove the 2 end sections and 2 middle sections - as shown in the diagram below. Use a chisel to clean up the cut joints.
GOOD TO KNOW: Make sure to cut on the inside line of the block you are removing, as even 1mm can make a big difference when cutting joints such as these.
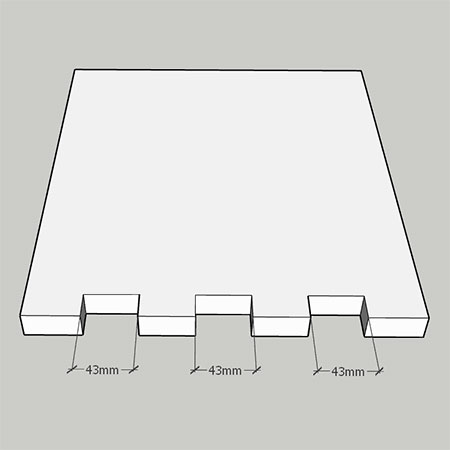
4. On the side sections, remove only 3 middle sections, as shown in the diagram below. The reason that the top and bottom and sides are cut in alternating sections is to allow for overlap when these sections are joined.
5. To tidy up the cut edges, use 120-grit sandpaper before joining the corresponding pieces to form the cube. The joints are secured with wood glue.
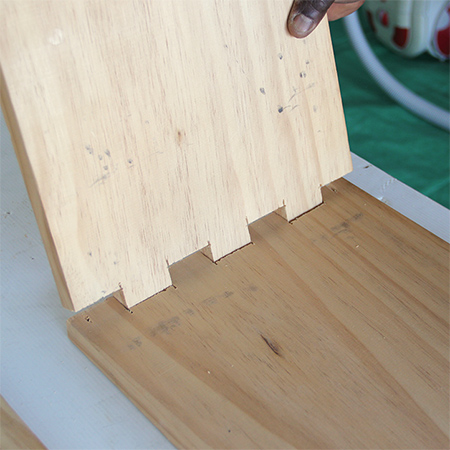
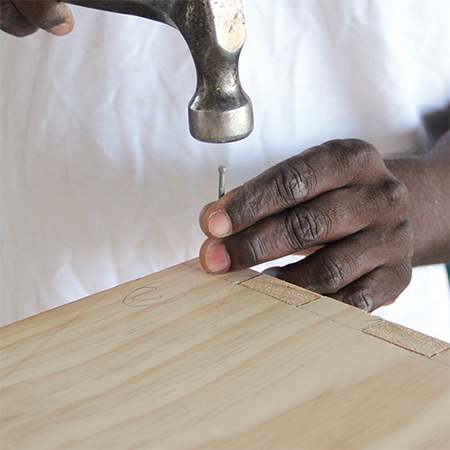
6. For added stability, hammer a 50mm panel pin into the first joint on both sides (the 45mm wide sections). Once the cubes are assembled you can use wood filler to fill in any gaps.
7. Finish off the cubes by sanding away any uneven edges and for a smooth finish. Wipe clean before painting.

Now that you have completed the basic cube, you can include added components such as shelves and doors to create custom storage cubes.