
Add Colour to a Nursery with Stripes
If you want to decorate a nursery or toddler bedroom with some colour, these dazzling stripes are perfect!
19/11/2019
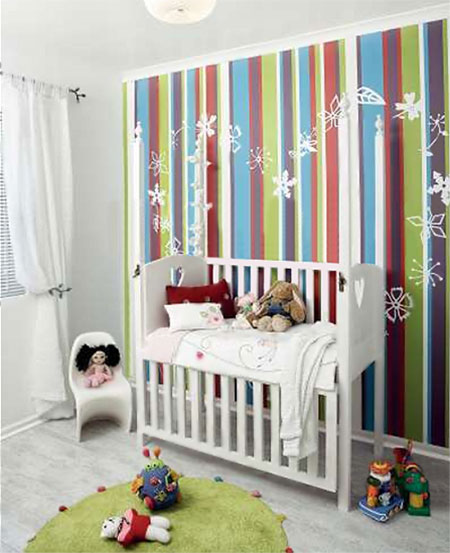
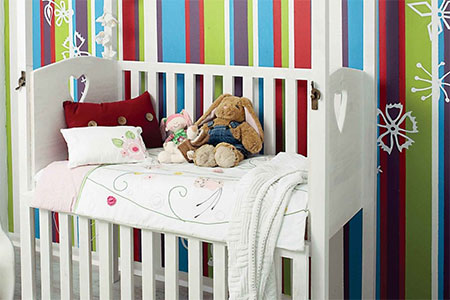
Decorating a new nursery for the first time can be a daunting task. You want to ensure everything is perfect for your new baby and there are plenty of options for deciding how to decorate. These bold stripes will definitely add an explosion of colour and the graphic shapes can be modified to suit your choice.
What's nice about the colours used to create this striped feature is that you can do it for a little boy or girl - it's a gender-neutral design. You can also modify the colours to those already being used in the room, or you can stick to the colours used for this project.
YOU WILL NEED:
Washable acrylic PVA in your choice of colours
Drop cloth - to cover flooring
Tape measure and pencil
Spirit level or laser level
Painter's tape (the blue one)
Assorted quality paintbrushes in different widths
Foam paint rollers
Vinyl stickers - use white Contact self-adhesive vinyl to cut out your own shapes
Scissors
Prestik
HERE'S HOW:
Before you start, work out the widths for the stripes and designate colours to these.

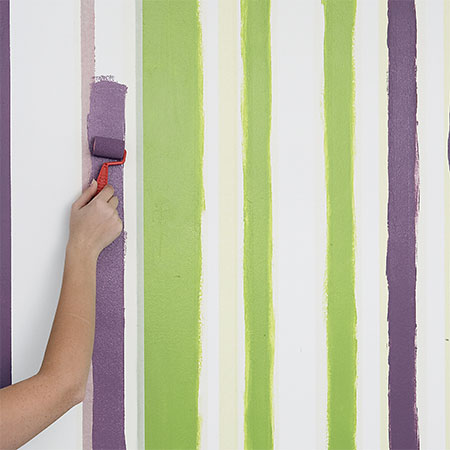
1. Use a spirit level or laser level to measure and mark for the stripes. It is best to use painter's tape rather than masking tape, as it reduces the possibility of paint bleeding under the edges. Mask out as many lines as you need for the stripes - only masking every alternate strip to start.
2. Apply your choice of colours with a foam roller or paintbrush. You are only painted to masked off stripes for the first run. Carefully peel away the painter's tape before the paint dries fully.
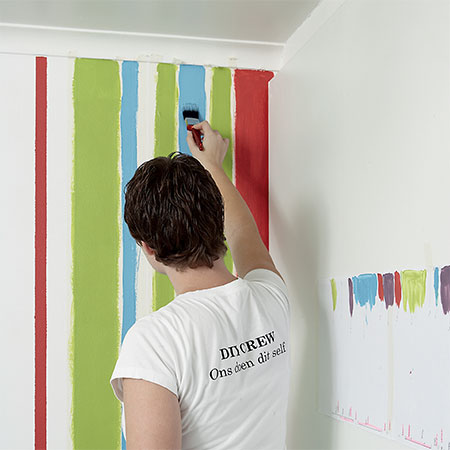
3. Repeat the steps above to paint the remaining stripes.
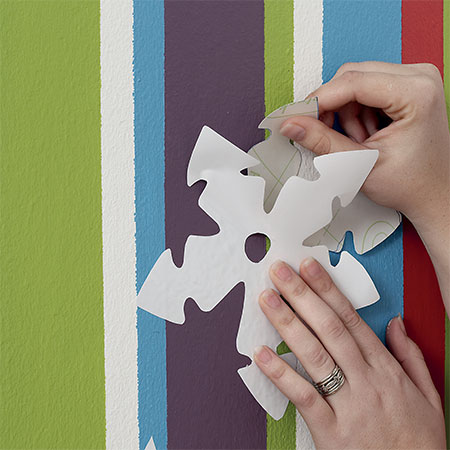
4. By using Contact self-adhesive vinyl you can create your own vinyl stickers. Simply trace your designs onto the vinyl using carbon paper and cut out the shapes with sharp scissors.

5. Before peeling of the backing, use Prestik to temporarily place the sticker designs onto the wall until you are satisfied with the result. Peel off the backing and press onto the wall to finish off.
credit: gallo images / media 24