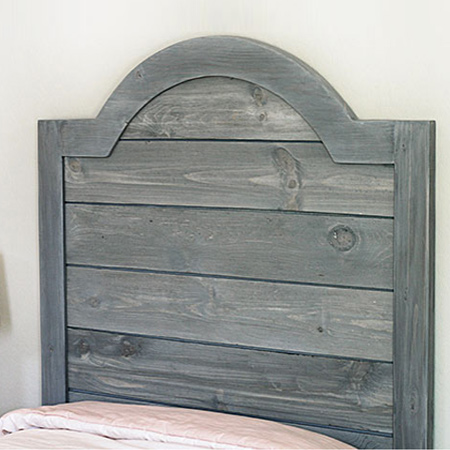
Affordable pine and plywood headboard
Make this affordable DIY pine and plywood headboard to fit any size of bed. You can even adjust the height to accommodate for an extra high mattress. Finish in your choice of paint colour or wood tint.
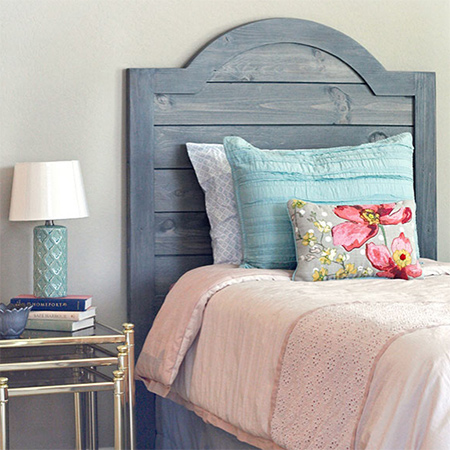
With its pine frame, the interior section is made up of a 3mm plywood back and 3mm strips, to give it a rustic feel yet still be affordable and easy enough to make on your own.
YOU WILL NEED:
Laminated pine to allow for the top curve or shape of the headboard
Pine planks, 20 x 67mm cut to the height of the headboard, and also for the cross piece
50mm [2 inch] coarse pockethole screws
Wood glue
Prominent Paints Select matt, in your choice of colour OR
Rust-Oleum Chalked ultra matte paint and Top Sealer
50mm steel braces [10] and 16mm screws
TOOLS:
Drill / Driver plus assorted bits
Kreg Pockethole Jig
Orbital Sander and 240-grit sandpaper
Painting equipment
Tape measure and pencil
Buy all the tools and materials needed for this project at your local Builders Warehouse.
HERE'S HOW:
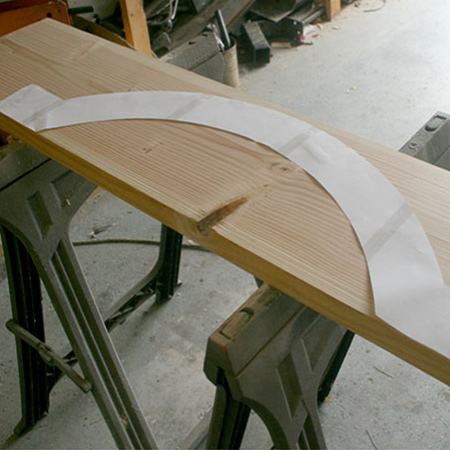
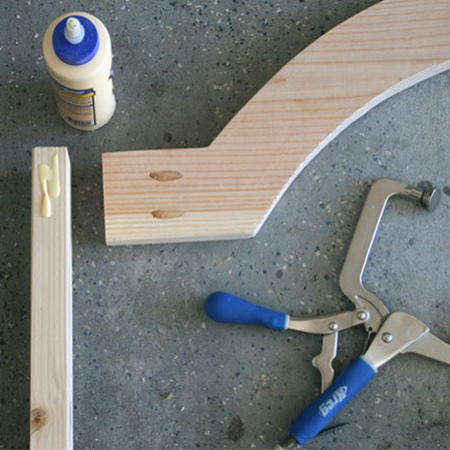
1. Use a large circular template, or see this easy way to draw a circle with a nail and a length of chain, to draw out the shape for the headboard. This one is curved, but you can make any shape you want for your own headboard. Use a pine of laminated pine wide enough to allow for the shape of the top section and then cut this out with a jigsaw.
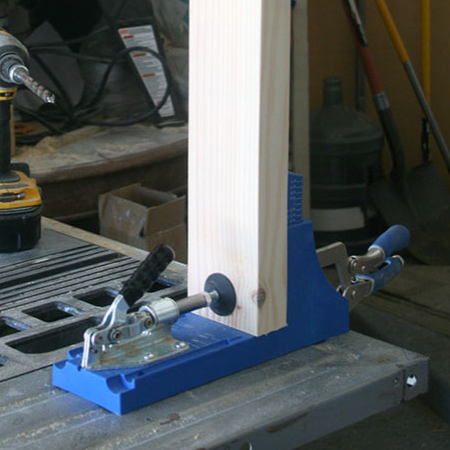
2. With the pockethole jig, make holes in the sides of the top headboard section and cross piece.
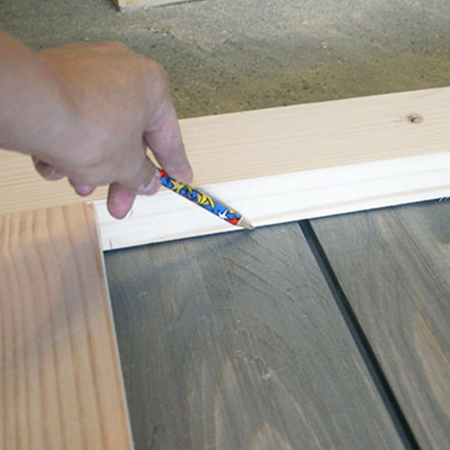
3. Apply wood glue to the joints for an extra strong join.
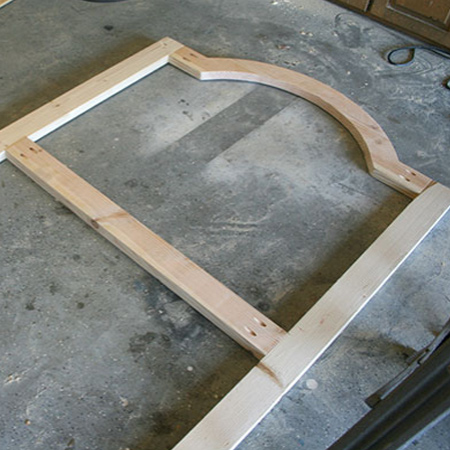
4. Screw the top and cross piece to the sides. Make sure that all the sections align and are flush on the top.
5. Have the 3mm plywood cut into a large piece for the backing board, and strips to mount on the front of the backing board.
GOOD TO KNOW: When buying plywood ask to see the piece before they cut to size. You want the plywood to have a nice finish on the front of the board.
6. Sand smooth and then paint these to your desired finish.
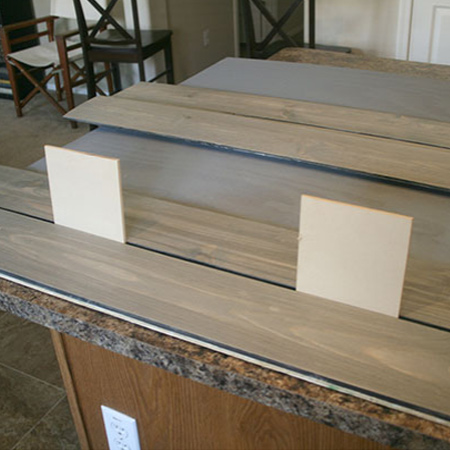
7. Glue the individual boards onto the backing, allowing a 3mm gap between each board. Let dry overnight.
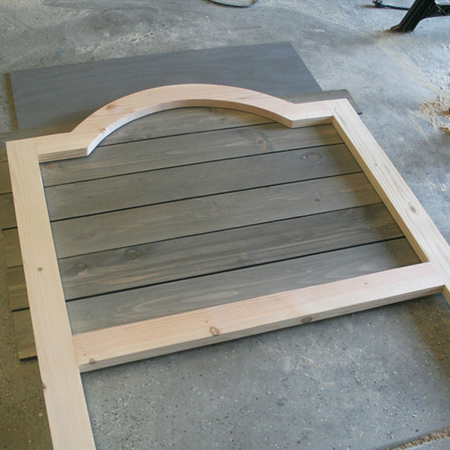
8. Place the pine frame over the top of the mounted board and mark inside the frame to know where to cut out. The back and boards should fit precisely inside the top section of the frame. Cut out with a jigsaw and test fit inside the frame. Use a sander to adjust where necessary.
9. Use scrap offcuts to raise the centre panel so that it is flush with the back of the frame. To mount the panel inside the frame use steel braces secured with 16mm screws over the frame and back.