
Make a vintage bathroom vanity
Making your own bathroom vanity allows you to add unique style and charm to a bathroom, and you'll pay substantially less to make one than you would to buy one. So here's how to make a vintage bathroom vanity.

You might think that this bathroom vanity is way too difficult for you to make, but if you have already attending a DIY Divas Beginners Workshop, you already have some skills under your belt. And once you get started you'll find that making this bathroom vanity is not as difficult as you thought. Thanks to DIY Diva for this amazing project.
YOU WILL NEED:
Wood glue
6mm dowels
TOOLS:
Jigsaw, circular saw or mitre saw
Dowel jig, dowel centres, biscuit joiner or pockethole jig
Drill/Driver and assorted bits
Clamps
Straightedge and Carpenter's square
Tape measure and pencil
HERE'S HOW:
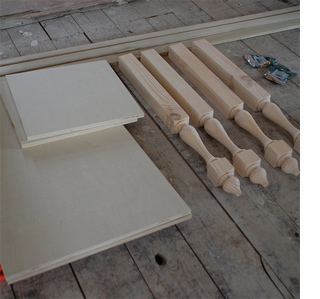
To make this project much easier and simpler, have all your timber and board cut to size at Builders Warehouse. Even if you only have the board cut to size and cut the pine and legs to size yourself, you will still save yourself a lot of time and speed up the assembly. However, do take a tape measure along with you to check that the boards are cut to exact sizes.
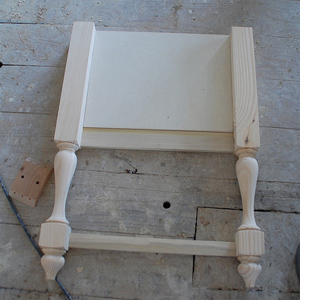
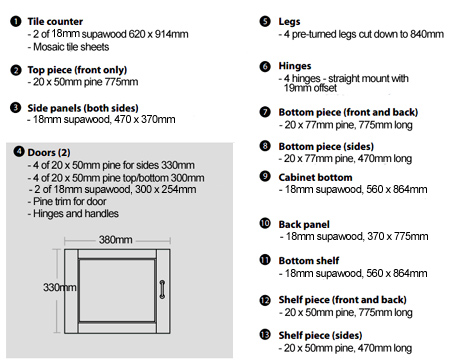
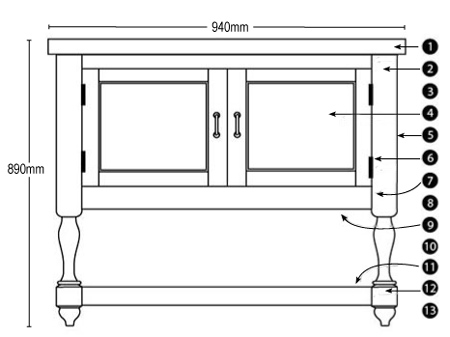
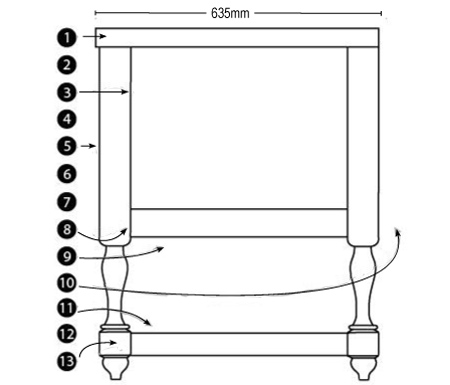
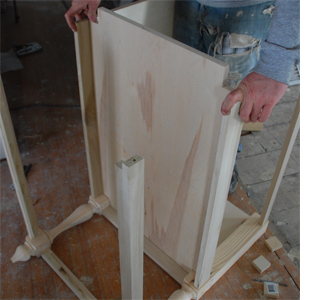
Assemble both of the sides using dowel, biscuit joints or use pocketholes. Attach the side panels [3] and bottom piece [8], making sure that both pieces are flush on the outside - the side that will be visible.
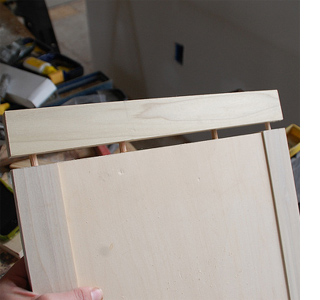
The design for the sides for the shelf [13] had to be modified for easier final assembly and you can see below how these were made.
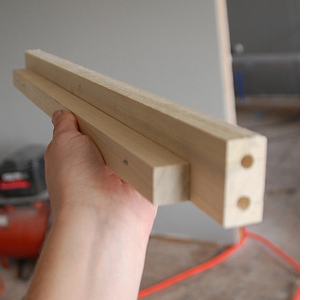
Originally the plan was to rout out a recess to hold the shelf, but because of the legs butting into the shelf, the design was changed. A scrap piece of 20 x 20mm pine was glued and nailed to the sides [13] to allow for easy slotting in of the shelf later on.
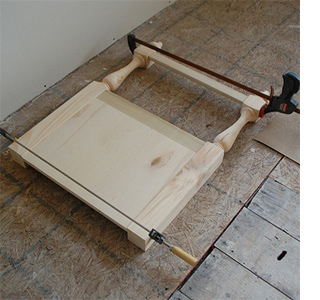
Once all the pieces have been assembled with dowel joints, biscuits or pocketholes, and glued together, you need to clamp the sides and leave overnight. It helps if you have 2 sets of clamps, so you can do both sides at the same time. Otherwise, you will have to let them dry one at a time.
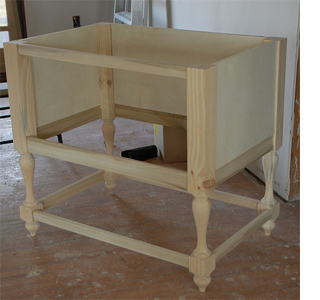
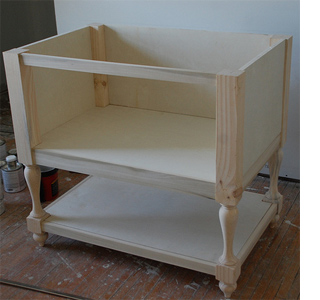
With the sides assembled you can attach the back panel [10] and bottom piece [7]. From there you can add the front pine strip [7] and the shelf piece [12] for front and back. DON'T glue these pieces together just yet...
It's easier to mount the cabinet bottom [9] before gluing everything together. Cut out the corners to fit around the legs; fit the bottom in place. Because the pine is wider than the supawood, there is a small lip around the inside and you can fit the bottom onto this.
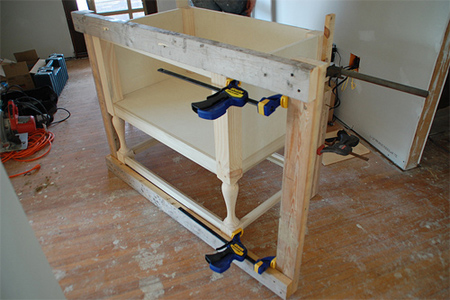
Assemble all the pieces again. Cut recesses in the bottom shelf [11] the fit around the legs and then slot the bottom shelf in place. NOW you can glue everything together. The assembly needs to be clamped, which would normally require extra-long clamps, but by building a scrap timber frame - see below - it can be done! Leave the glue to dry overnight.
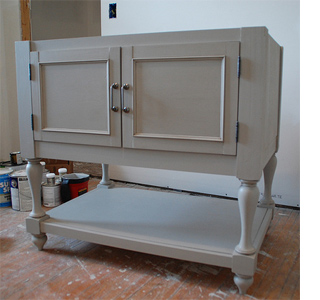
Take the time to sand down with 240-grit sandpaper so that everything is nice and smooth. If there are any small gaps you can use acrylic sealer to fill these. You will need to let the sealer cure overnight before painting.
Apply Plascon Wood Primer to all the pine pieces, to prevent any bleeding through and seal the surface of the wood before painting.
For painting the cabinet you can go with a variety of finishing options. You can paint with Plascon Double Velvet for a satin finish that is washable. Plascon Polvin is a matt finish that can be coated with matt sealer or antique wax, or you can go with Annie Sloan chalk paint. All these paints are OK in a bathroom that is well-ventilated.

Your local Builders Warehouse has a selection of cabinet hinges and before you make and mount the doors you need to find the hinges you want.
Assemble the doors in the same way as you did for the sides and back - by attaching the pine frames to the centre panel with dowels, biscuits or pocketholes. Test fit the doors by fitting them onto the hinges. Make any adjustments by sanding the pine frame around the doors.

If you are adding any trim onto the door, now is the time to glue it in place. This cabinet has a thin pine trim around the inside edge of the frame, but you'll see there are various other styles of trim that you can use the dress up the doors.
Attach your choice of handles to the door before mounting - it's easier to mark and drill - and then mount the doors onto your new bathroom vanity.
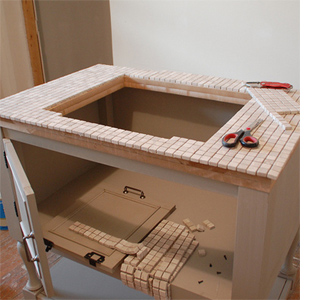
The countertop consists of 2 pieces of 18mm supawood glued together to add extra height for tiling around the edges. You will obviously need to cut an opening for the sink with a jigsaw - if you are installing a drop-in basin.
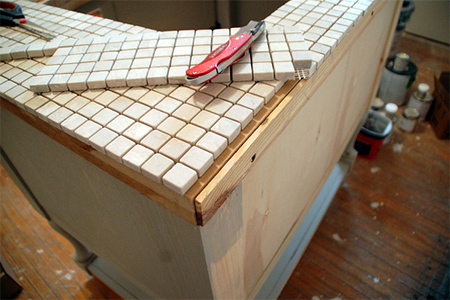
You don't have to tile the top with mosaic sheets, but it is far easier than using standard tiles. You can fiddle around with the mosaic until it fits perfectly around the edges and overhang before gluing in place with ready-mixed flexible tile adhesive. It needs to be flexible if you are laying onto a board substrate, as the ready-mixed flexible adhesive contains less moisture.
GOOD TO KNOW
If you find that the mosaic tiles don't fit nicely onto the top, add a strip around the outside of the top that provides a bit of extra space for adding whole sections of tile, rather than cutting to fit.
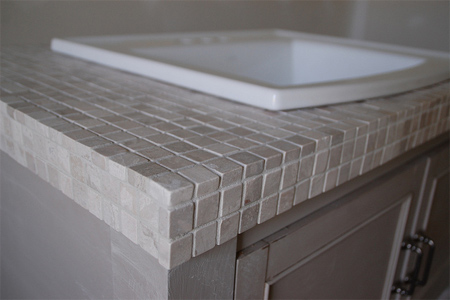
Apply a layer of grout over the top of the mosaic tile and let this sit for about an hour before wiping clean. Once dry, apply grout sealer to protect. You will also need to apply a thin bead of silicone sealer around the edge of the basin. You don't want any moisture getting inside the cabinet.
GOOD TO KNOW
For added protection I like to apply two coats of clear polyurethane on the inside and unpainted sections. This adds more protection and reduces the risk of swelling.