
How to remove and replace a toilet
Having recently revamped my bathroom for Easy DIY magazine, I decided to share with you how easi it was to remove and replace a toilet.

The complete bathroom revamp included remove and replace a toilet, remove and replace a wash basin, make a new bathroom vanity, installing bamboo panelling on one side of the bath and bamboo flooring, modifying the existing showerhead to allow for showering in the bath and adding a glass shower panel.
All-in-all the project took about a week - with breaks inbetween - and cost around R3000 (excluding the glass panel). It wasn't difficult - the toilet was removed and replaced in one day.
CONTINUES BELOW
HERE'S HOW:
Step 1
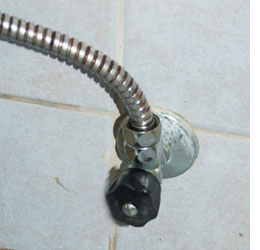
Switch off the water before you do anything. If your bathroom doesn't have a stopcock in the room, switch off the main water supply. Most modern homes have a stopcock positioned next to, or close, to the toilet. Switch off and disconnect the pipes from the water supply to the base of the toilet cistern.
Step 2
To empty out any remaining water in the toilet, flush until the cistern is completely empty and then use a dry sponge and bucket to remove any water left in the toilet. You will also need old cloths handy to catch water remaining in the outlet pipe. Don't worry - this is clean water!
Step 3
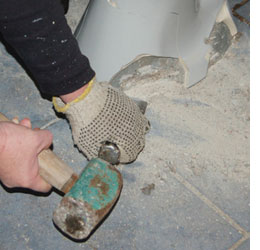
Now comes the fun part! If the toilet it bolted to the floor you can undo the bolts to remove the toilet. In my case, the toilet was cemented to the floor as you can see and have to be chiselled out and broken off.
DO wear goggles and gloves when chipping away, as bits fly everywhere. Once you have removed the toilet, use a cloth and a bucket of water to clean the floor. Don't sweep - it only makes more dust.
Step 4
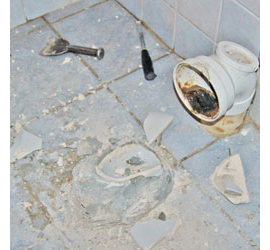
Toilet removed and excess concrete chipped off the floor. If you experience a bad smell coming from the outlet pipe - plug with a couple of plastic bags while you work.
Step 5
Fit the new toilet into the outlet pipe until snug and then fasten the toilet to the floor, pop the cistern onto the top of the base and fasten together, also fastening the cistern to the wall. While you can use sanitary fixings or rawl bolts to fasten the toilet to the floor, I have found that some of today's contractor adhesives work just as well. I used Pattex PL700 to glue the base of the toilet onto the top of the tiles.
Step 6
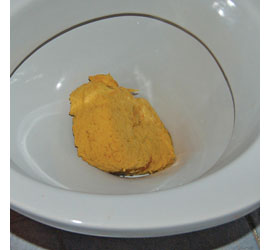
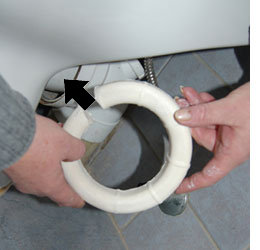
You now need to fit a new wax seal between the toilet and the outlet pipe. If not already cut - as most are - cut to allow you to fit the seal around the outlet pipe at the back of the toilet and push into the main outlet pipe. There must be no holes or gaps anywhere or water will leak out onto the floor.
Step 7
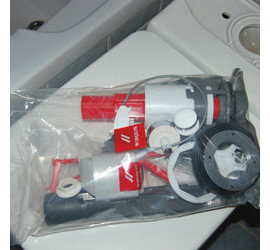
That was easy - now comes the tricky part! When you buy a new toilet it doesn't come pre-assembled. You have to put everything together that fits in the cistern. They do provide instructions and it's also a good way to find out how your toilet works.
Finished!
Connect the water supply, switch on the stopcock or main water cut-off and inspect the toilet for leaks.