
How to makeover a bathroom on a tight budget
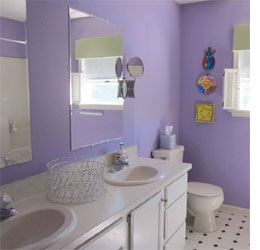
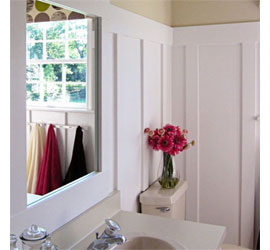
This bathroom has come a long way from the builder-grade beige and stock cabinets that came with the house when we first moved in.
Diane at In My Own Style transforms a dated bathroom into a trendy and modern space for an instant update.
This home improvement project started when I thought we were moving. I haven’t been able to redecorate like I used to before my hubby was laid off from his job 2+ years ago. We just take it one day at a time, knowing that moving is most likely going to happen sooner or later. I figured if we do have to move I might as well get a head start as this bathroom would need to be updated if we put the house on the market.
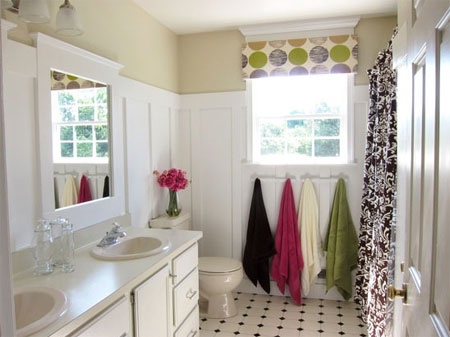
ABOVE: After spotting an inexpensive brown damask shower curtain. I loved it and that was all the incentive I needed to get started.
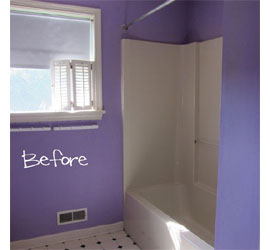
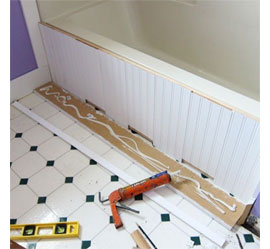
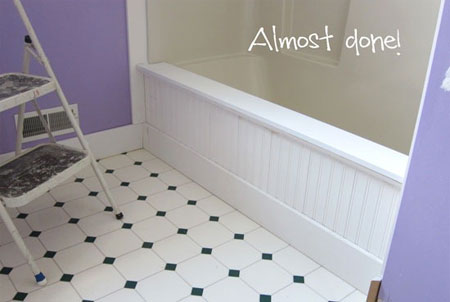
There is one of those modular shower enclosures in this bath that I had to keep, as this was truly a budget project. I wanted to make it blend into the background as much a possible, so I made a beadboard frame to hide the front. The other way I made it less noticeable was to paint the walls the same colour as the enclosure.

My initial plan was to make the decorative front in front of the tub – level with it, but I would have had to move the shower curtain rod out and it would have landed right smack in the middle of the window. I went to Plan B which was to wrap the decorative front over the front edge of the tub so the shower curtain rod could stay where it was.
Janice - We unfortunately can't source beadboard here in SA, but you can easily make your own using 3mm or 6mm PG Bison SupaWood and a router or Dremel Trio.
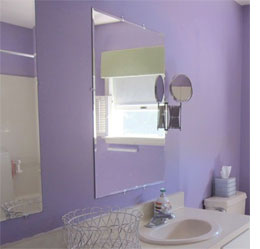
Plain mirrors hanging on the wall with clips – functional, but not very pretty. I removed the clips and remounted the mirrors with DenBraven Mirror Fix. You need a caulk gun to apply it to the back of the mirror.

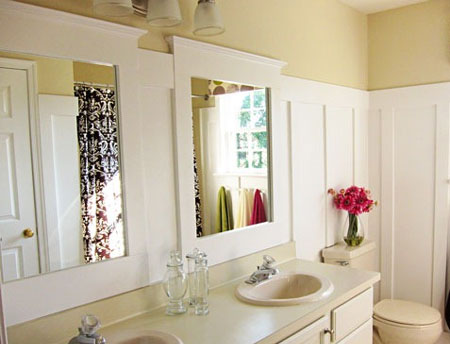
The easy part was framing the mirrors with 12mm SupaWood. Cut to fit around the mirror at the top, bottom, left side and right side. I then painted the back edges of each of the cut boards the same colour that the front will be – white – so that when they are mounted around the mirror, the mirror doesn’t reflect unfinished wood. Sand the edges and attach around the mirror with No More Nails.
Use a spirit level to make sure all the boards are straight and level. I chose to place the boards right on the mirror to hide a chip in one of them. This raises the frame away from the wall a bit. You also could just butt the boards right around the mirrors’ edges.
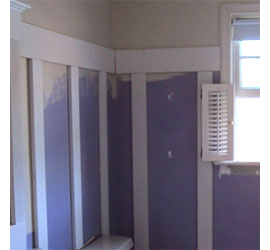
The part of the makeover that took the most thought was installing the board and batten. Lots of things to think about – how far apart I wanted the boards, thick or thin boards, how many obstacles I had to work around, how high etc. I had some of the boards cut to the exact size, not only to make the job easier, but so the boards would fit into my car.
The mitred corner cuts I had to do on my own. The mitre saw was set up in my garage, this bathroom is upstairs – I got a lot of exercise. I just pretended I was at the gym and was on a Stairclimber. I used all pre-primed SupaWood boards and used No More Nails to attach all the boards. A spirit level is a must to make sure your boards are vertically as well as horizontally straight when you attach them to the wall. I spaced mine 300mm apart.
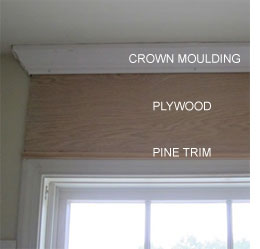
The window in the bathroom is not very big, it actually always looked squashed to me. I fixed that by adding a piece of plywood and crown moulding above it. It now has much more impact. You can use No More Nails to attach the individual sections to the wall.
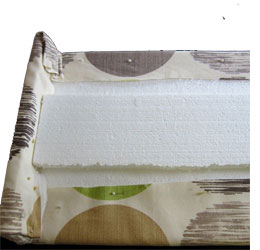
To make the valance I used a piece of polystyrene. You can make one for every room, your best friend, your mom… it is so easy to make and install you will be wanting to make them for everybody.
Attach the side pieces to the back edge along each side of the front piece. Use hot glue. I know hot glue melts the polystyrene, but only a little and it really doesn’t matter as you are not going to see it. If you have a cool melt gun then you can use that.

For added support – push a few straight pins in the front along the edge that will go through the side pieces. I used 3 – top, middle, and bottom on each side. Cut your fabric and lining large enough so that you have enough to wrap around to the back of the valance. Place the decorative fabric right side down and then the lining on top of that. Then place the valance – front side down onto the fabric. Make sure pattern is straight and then wrap excess fabric to the back of the panel.
Pull taut and use straight pins to attach to the valance. The straight pins need to go in on an angle so they don’t go through the front of the valance. Work your way around the valance attaching the fabric with pins. For the sides and corners –pull the side fabric up and around and attach with pins. Fold and/or tuck the excess in.
Tuck the corner fabric in and then fold over the excess and attach with pins. Pretend you are wrapping a gift. Pull excess fabric to the back to keep the front and edge smooth.
If you have a very long window you can brace the back of the valance with another piece of Polystyrene. Use hot glue to attach. Wait to add this piece after you have the fabric on. If you put it on before – the side fabric wrapping is harder to do.
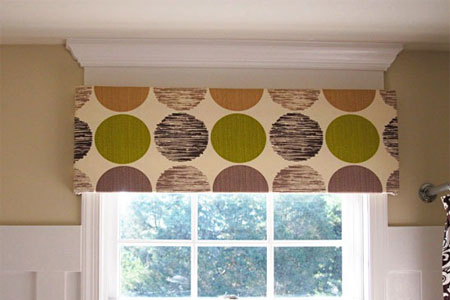
I am thrilled with how it all turned out, but it is a good feeling to be done. I spent about R2000 on everything.