
Make a bathroom cabinet
This easy do-it-yourself bathroom cabinet requires no special tools and can be assembled in 2 hours tops if you have everything cut to size!
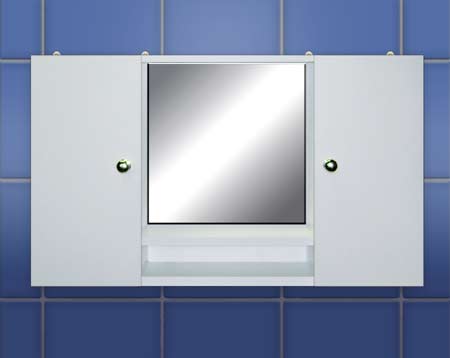
This basic do-it-yourself bathroom cabinet requires no special tools and can be assembled in 2 hours tops if you have everything cut to size! If you need storage space in a bathroom, a wall-mounted cabinet takes up hardly any space whatsoever.
YOU WILL NEED:
16mm BisonLam – Super White has been used for this project. Have all your board cut and edged at your local Timbercity or Builder's Warehouse.
[2] 150 x 900mm BisonLam – top/bottom
[4] 150 x 500mm BisonLam – sides/uprights
[2] 150 x 216mm BisonLam – shelves
[1] 140 x 398mm BisonLam – centre shelf
[2] 250 x 532mm BisonLam – doors
[1] 528 x 894mm Masonite (white) – backing board
[4] Hinges
[2] Handles
[1] Mirror, cut to size
[4] Wall hangers
[1] packet of shelf supports
[1] packet of screw caps – white
No More Nails adhesive
12mm wood screws
TOOLS:
Drill/Driver with 2mm and 6mm wood bit
Countersink and screwdriver bits
Bosch Tacker and staples (or staple gun)
Tape measure and pencil
HERE'S HOW:
1. Lay out all the pieces on a flat surface.
2. Use a pencil and tape measure to mark down 250mm and 30mm in from the front and back on the sides and uprights. Drill a hole at these marks to a depth of 100mm. Mark the depth out on the drill bit and use masking tape around the bit to ensure that you drill to the correct depth. These holes will be for the shelf supports.
3. Measure and mark where you want to position the central shelf. Pre-drill pilot holes at these marks, countersink and screw the central shelf to the uprights.
4. Pre-drill two pilot holes at each end of the bottom and top, and into the sides and uprights. Countersink these holes so that the screws will be flush with the surface of the board. Screw the bottom on top to the sides and uprights.
5. Screw 2 hinges to each door. Lay the door open and use a pencil to mark the position for the screw holes on the sides of the cabinet. Pre-drill the holes. Screw the hinges to the cabinet sides.
6. Turn the cabinet over and use the Bosch Tacker (or staple gun) to attach the backing board to the back of the cabinet.
7. On the door fronts, measure 250mm down and 30mm in and mark. Drill a 6mm hole for the handles. For a neat finish, when drilling through the BisonLam, stop as soon as you feel the point of the bit on the backside of the door, and then continue drilling from the back. This will ensure that the surface does not chip. Screw on the handles.
8. Use screw caps on all the visible screw heads for a neat finish.
9. Measure up and order your mirror. Use Alcolin Mount It adhesive to attach the mirror to the backing board.
10. Attach 4 wall hangers to the top of the cabinet. These will be used to mount the unit to the wall.