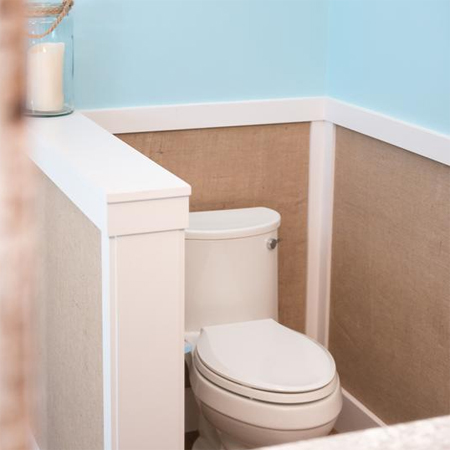
Burlap wall panels for a bathroom
Burlap is an inexpensive fabric and, if used in the right way, can add an earthy texture to a bathroom, plus, it's also very economical when compared to a custom wall treatment, wallpaper or tiles.

If you are looking to add something new to a bathroom, instead of the traditional tile, this custom panelling option is an easy and affordable way to transform the style and feel of a room. Burlap is an inexpensive fabric and, if used in the right way, can add an earthy texture to a bathroom. It's also very economical when compared to a custom wall treatment, wallpaper or tiles.
YOU WILL NEED:
Burlap
Spray adhesive Pine trim and skirting
Steel brad nails
TOOLS:
Tape measure and pencil
Carpenter's square
Spirit level
Mitre saw
Scissors
Craft knife
Flat-edged object like a ruler or paint stirrer
Hammer
Electronic detector
HERE'S HOW:
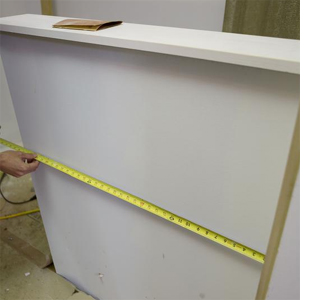
Measure up
Any seams will be covered with trim, so decide the optimum number of panels and split the wall length evenly.
For a partial-height wall add transition trim between the lower covering and upper wall. If there is no chair rail, horizontal trim will need to be installed over the burlap top edge. It will also be easiest if any existing skirting is removed and reinstalled over the burlap.
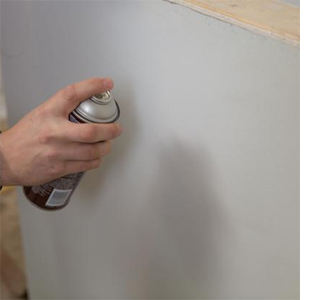
Spray on adhesive
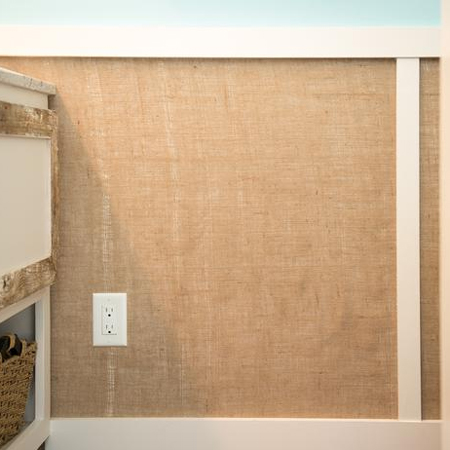
Because wall colour may show through the burlap, create a seamless finish by painting the wall with flat paint and allow to dry. Working in one area at a time, spray adhesive evenly onto the wall. Too much spray and you will end up with adhesive seeping through the fabric.
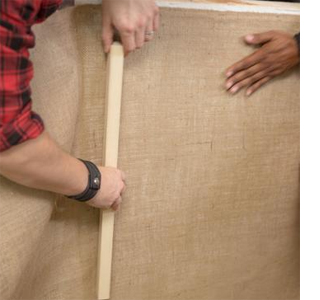
Cut and apply burlap
Starting at an inside corner, Install the first piece of burlap. Any rough edges will be covered with trim later. You'll need an extra pair of hands to spread the burlap and gently pull the burlap out and across the wall. Slowly work the burlap down onto the adhesive with a flat-edged object. Keep a gentle tension on the burlap at all times.
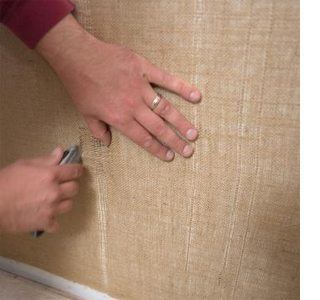
Use a craft knife to cut out any sections for light switches or power points. Remove as a little as possible so that the cover plate hides the cut edges when reinstalled.
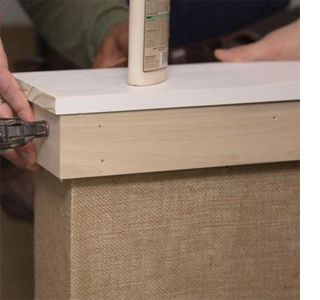
Install pine trim at top edge and around corners, using No More Nails adhesive and steel brads to hold onto the wall. Replace or add skirtings around the base.
Be safe when hammering or drilling into walls, especially in bathrooms and kitchens. The range of handy digital
detectors from Bosch enable you to find live cables, pipes or girders and frames made of metal, as well as wooden substructures with the highest precision and safety. As an optional finish, apply a polyurethane sealer over the burlap walls for added protection.