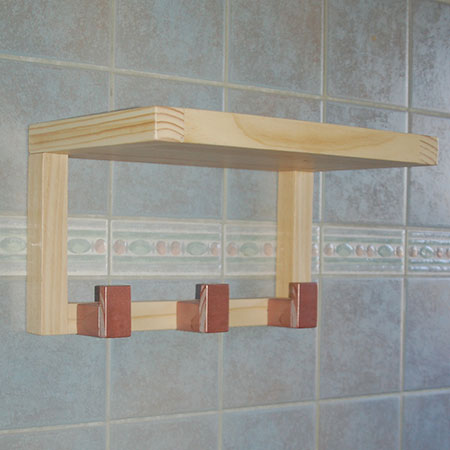
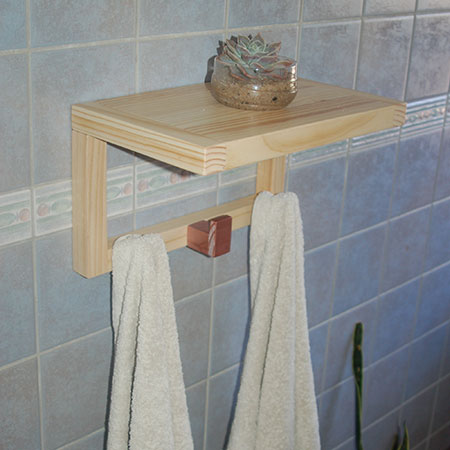
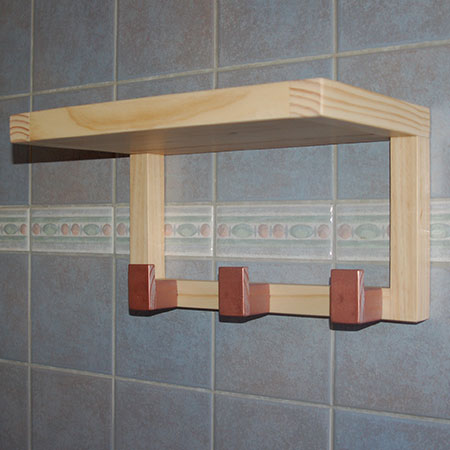
Bathroom Shelf and Towel Rack
Super easy to make. this bathroom shelf incorporates a towel rack and provides a stylish storage solution for a bathroom.
01/07/2018
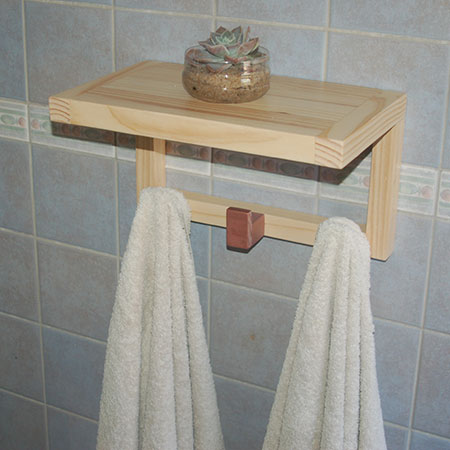
When you need a place to hang your towels, make a towel rack that also doubles as a handy shelf. Our shelf is made of 32 x 32mm pine finished with Rust-Oleum Ultimate Polyurethane Sealer, natural matte, and Rust-Oleum Textured Metallic spray paint for a touch of rich copper.
Buy the 32 x 32mm pine and all your supplies for this project at your nearest Builders Warehouse. Since we're using 32 x 32mm PAR pine for this project, you can make it for much cheaper than you could buy. And if you need a longer shelf, extend the length of the slats and add extra towel hangers.
YOU WILL NEED:
8 of 32 x 32 x 300mm pine - slats/shelf front/shelf support - bottom cross piece
2 of 32 x 32 x 224mm pine - shelf ends
2 of 32 x 32 x 180mm pine - shelf support, uprights
3 of 32 x 32 x 40mm pine - towel hangers
Pine offcuts for ends of towel hangers
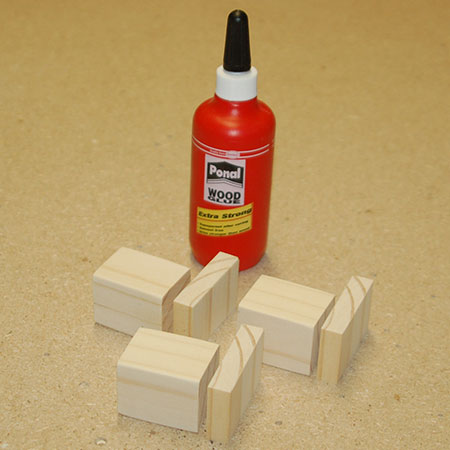
Wood glue
32mm coarse-thread, pocket hole screws [4]
45mm screws [3]
Keyhole hanger [2] and 16mm screws
Rust-Oleum Ultimate Polyurethane sealer
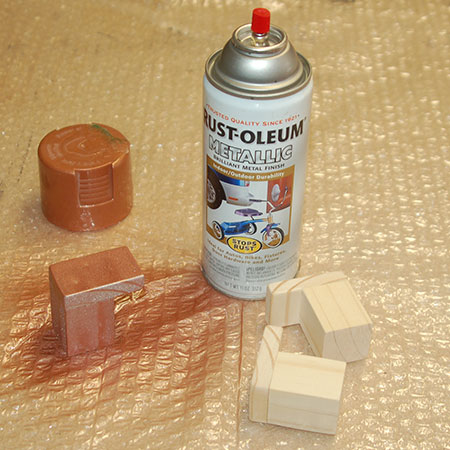
Rust-Oleum Textured spray paint, metallic copper
fischer SX6 wall plugs and 45mm screws [2]
TOOLS:
Drill/Driver plus assorted bits
Countersink bit
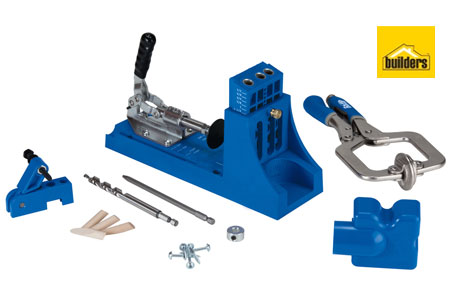
OPTIONAL: Keg Pocket Hole Jig, Pneumatic nail gun
Spirit level
Digital detector
Tape measure and pencil
HERE'S HOW:
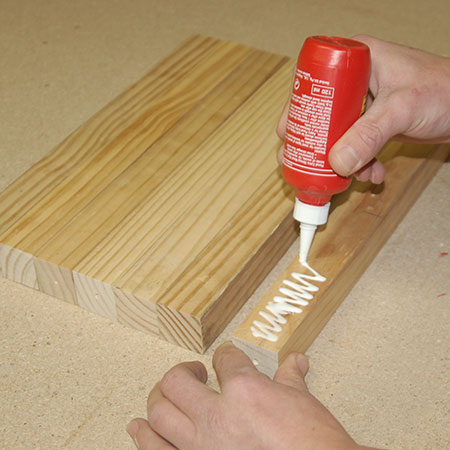
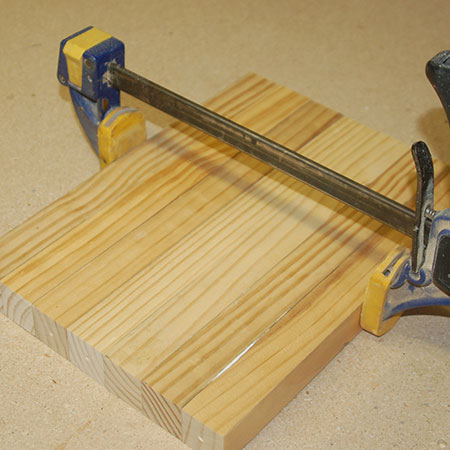
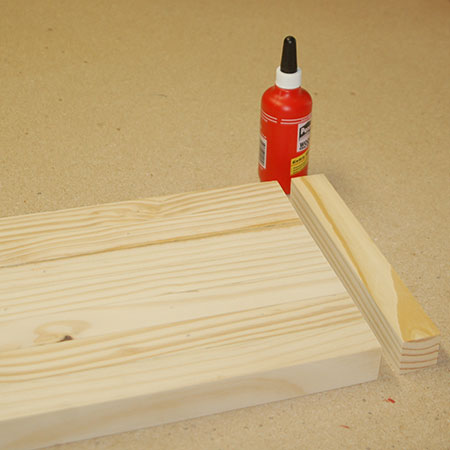
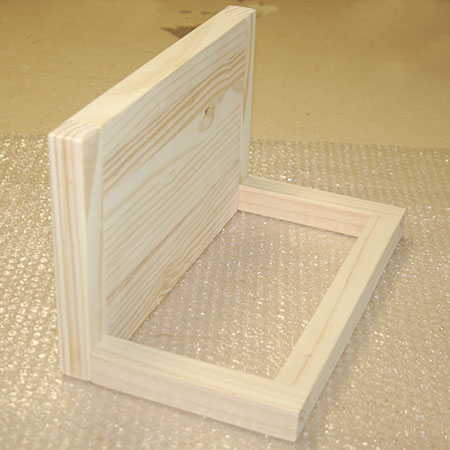
1. Glue the [7] shelf slats together and clamp overnight.
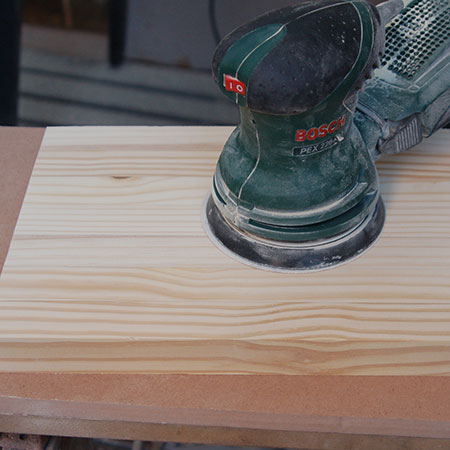
2. Use an orbital sander and 120-grit sandpaper to even out the surface.
3. Add the sides of the shelf. These are glued onto the edge of the slats to create the shelf ends.
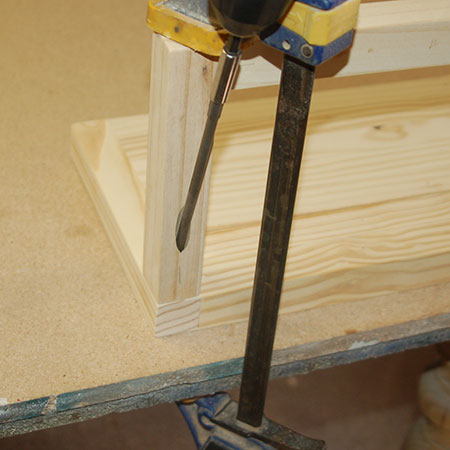
4. Set up your pocket hole jig for 32mm thick pine. If you're not using a pocket hole jig you can secure with wood glue and screws.
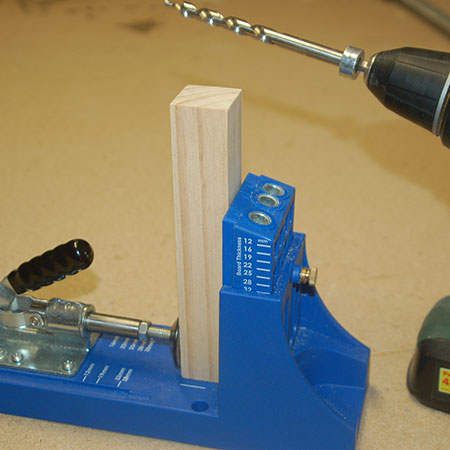
5. Drill a single pocket hole in the ends of the bottom uprights and at both ends of the bottom frame cross piece - see below.
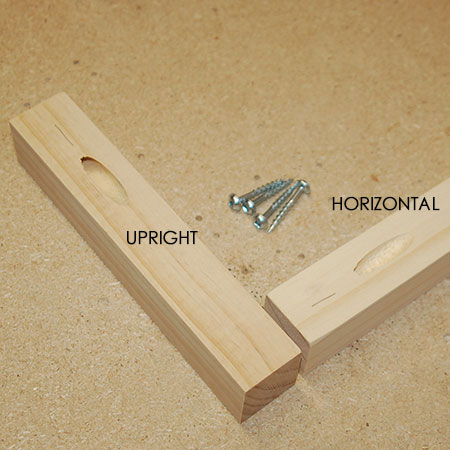
6. Join the sections together using wood glue and 32mm screws.
GOOD TO KNOW: Clamp the sections together to make it easier to screw firmly together.
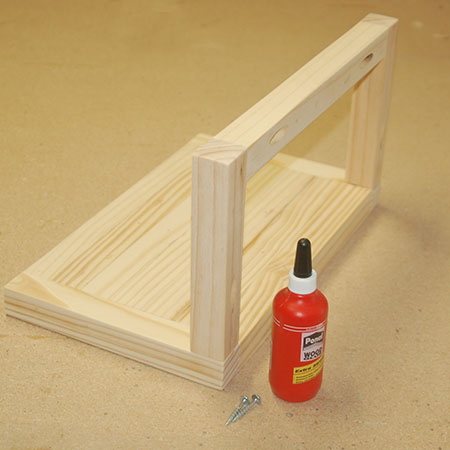
7. Sand the completed shelf until smooth all round and then wipe clean.
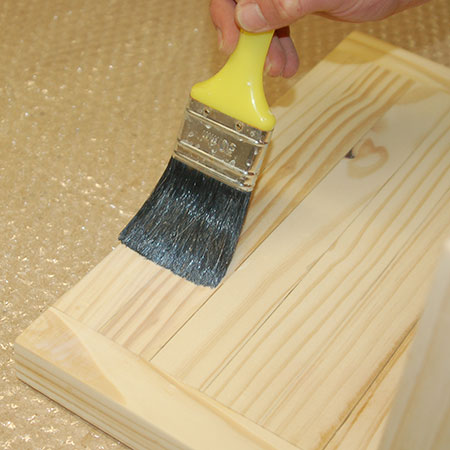
8. The pine shelf needs to be protected, especially since it is to be mounted in a bathroom. Rust-Oleum Ultimate Polyurethane gives a natural matt finish that looks goods and protects the wood.
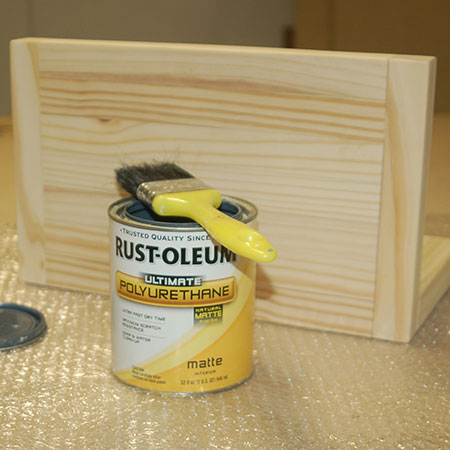
If you're not a fan of pine because it tends to go yellow, Rust-Oleum Ultimate Polyurethane sealer is excellent - it protects without yellowing.
9. Keyhole hangers are mounted on the back of the shelf for hanging on the wall, but these are a bit too long. I used my Dremel MultiTool and sanding disc to remove a couple of millimetres at the top of each hanger.

10. To mark the location for mounting the keyhole hangers, align the hanger where it is to be mounted and then use a pencil to draw the keyhole shape on the back of the shelf.
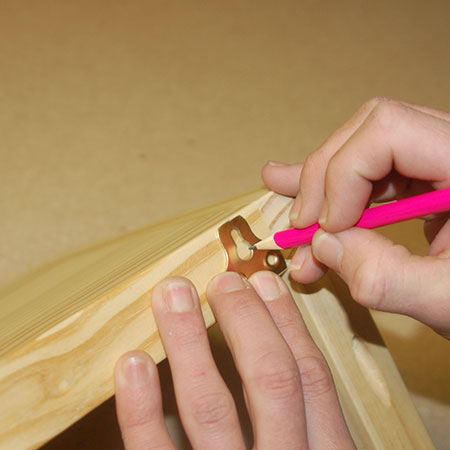
11. Using an 8mm drill bit, drill two holes (top and bottom of keyhole shape) to a depth of about 5mm.

GOOD TO KNOW: Use the drill bit to clean out the hole and make a single hole.

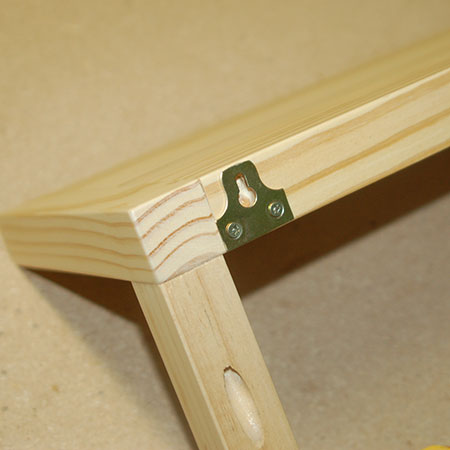
12. Mount the keyhole bracket with 16mm screws. The drilled hole allows you to slip the bracket over a screw head.
13. To make the towel hangers, cut 32mm pine to a length of around 40mm. Use pine offcuts to add the hanger part. For this project I had some 12mm thick pine left over from a previous project and cut this to fit on the ends of the 32mm pine.
14. Glue the ends onto the 40mm section - see below.
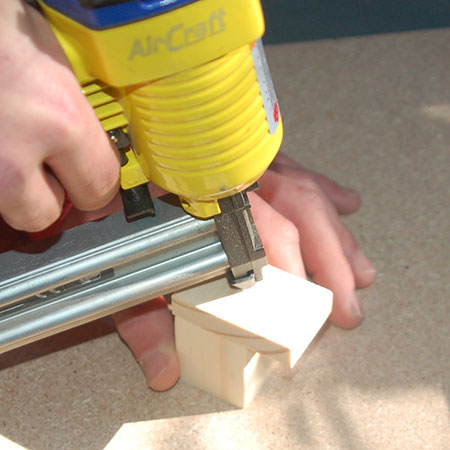
15. Use a pneumatic nail gun to drive brad nails through the front of the hangers - at a slight angle. If you don't own a pneumatic nailer use a hammer and panel pins. Fill the nail holes with wood filler and sand smooth once dry.
16. Spray the towel hangers in your choice of finish. I used Rust-Oleum Metallic, copper.
17. Glue the towel hangers onto the cross piece as shown below.
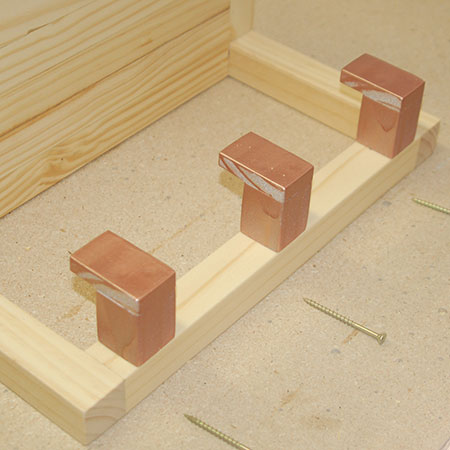
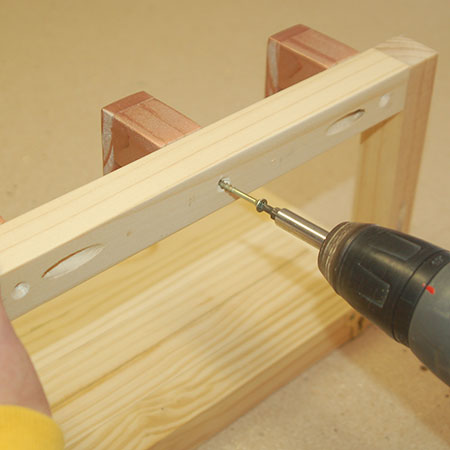
18. You also need to drill countersunk pilot holes at the back of the frame to drive [3] 45mm screw through the back and into the hangers. This ensures strong assembly.
Mounting onto the wall
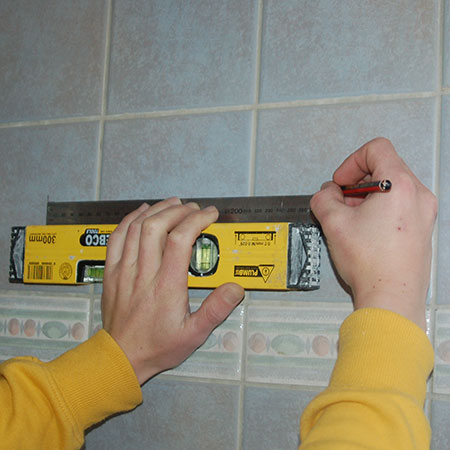
Measure and mark where you want to mount the shelf and use a spirit level to ensure the shelf will be level.
GOOD TO KNOW: Although you want your shelf to be level, if you know for a fact that your tiles are not level, visually align the shelf with the angle of the tiles. It will look silly if your shelf sits straight and your tiles are skew.
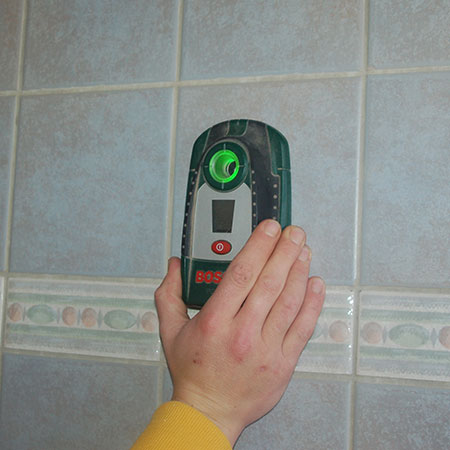
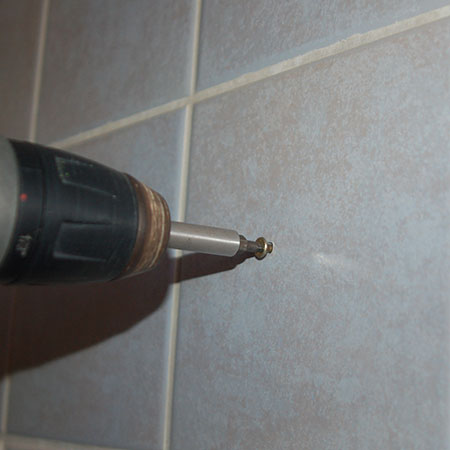
Check around the area with a digital detector before drilling into walls. A detector will display any cables, conduits or pipes in the walls and reduce the risk of harm or damage.
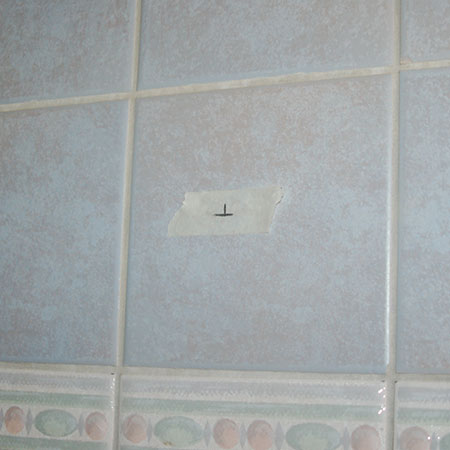
Place a piece of masking tape where you will drill to prevent the drill bit from sliding around.
Do yourself a favour and invest in a set of quality drill bits for all your home DIY projects. Alpen drill bits allow you to easily drill through tile and brick for easy mounting in walls.
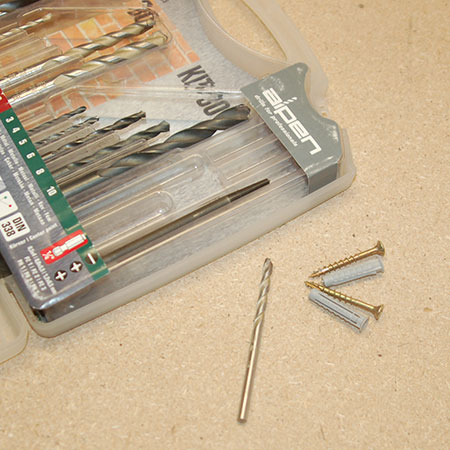
Replace plastic wall plugs with nylon wall plugs (fischer or Rawlplug) to ensure secure fastening onto walls.
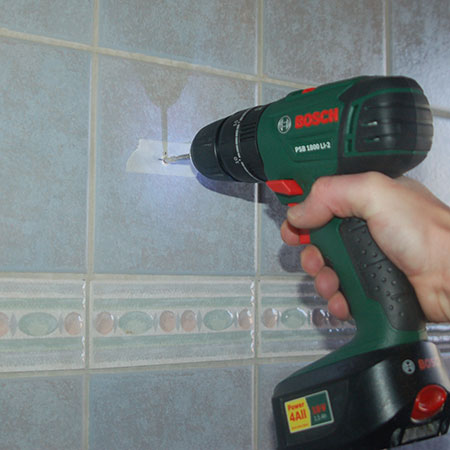
Drill a straight hole through the tiles and into the wall, push in the wall plug and drive in the screw - leaving about 4 to 5mm for slotting the keyhole bracket in place.
GOOD TO KNOW: When mounting the shelf on the wall, slip the keyhole hanger at the back of the shelf over the protruding screw head and tap the front of the shelf to slot in place. Once on the screw head, tap the top of the shelf to secure and lock firmly in position.