
Quick and Easy Bathroom Shelf
Make this pine shelf unit to add elegant storage to any bathroom.
10/03/2019
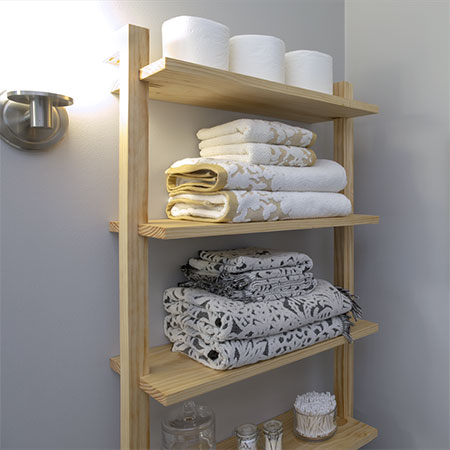
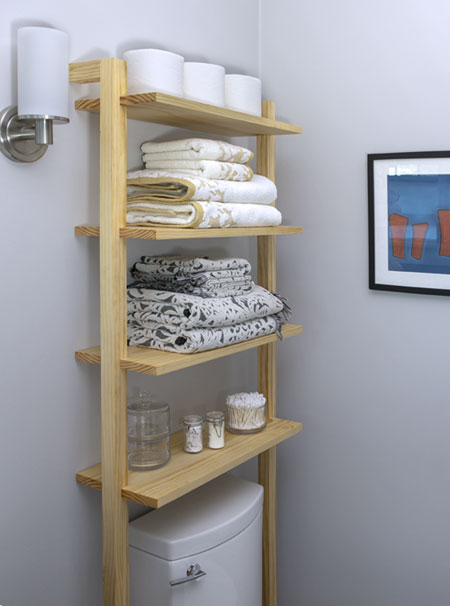
Made using PAR pine that you will find at any Builders Warehouse, this pine shelf unit by Build Something fits nicely above a toilet and provides plenty of shelf space for bathroom essentials.
The pine shelf unit adds elegant storage and its compact design allows it to be fitted above a toilet, taking up almost no floor space in a small bathroom. You can use the shelf unit to store bathroom essentials, or to show off bathroom decor, display a plant or two, or a place to store towels.
YOU WILL NEED:
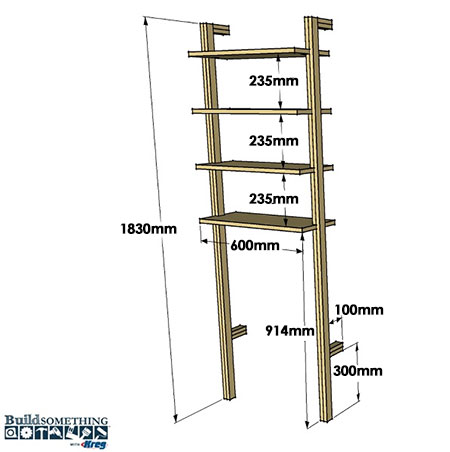
2 of 19 x 44 x 1830mm pine - long leg
2 of 19 x 44 x 914mm pine - short leg
6 of 19 x 44 x 235mm pine - fillers
2 of 19 x 44 x 134mm pine - top filler
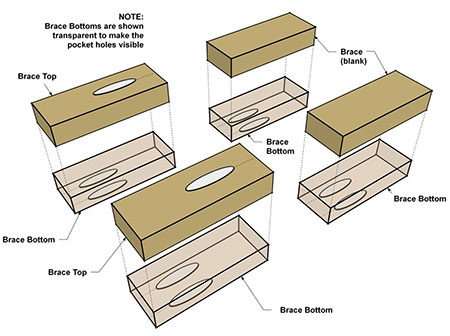
8 of 19 x 44 x 100mm pine - brace
4 of 10 x 914 x 600mm pine - shelf*
*Note: Widen this if necessary
32mm Coarse-thread pocket-hole screws
Wood glue
Wall plugs and screws
Pack of felt or rubber pads (for base)
TOOLS:
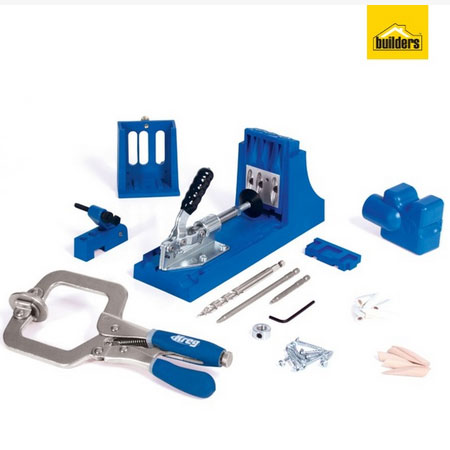
Kreg Pocket-Hole Jig
Drill/Driver plus assorted bits
Orbital Sander plus 120-grit sanding pads
Clamps
Workbench
Tape measure and pencil
FIND A WIDE RANGE OF KREG TOOLS AND ACCESSORIES AT BUILDERS
HERE'S HOW:
1. To assemble the legs, apply wood glue to the face of a Short Leg and apply it to the lower portion of a Long Leg. Make sure the Legs align on the edges and at the lower ends. Clamp the pieces for about an hour. Repeat this step for second Short Leg and Long Leg.
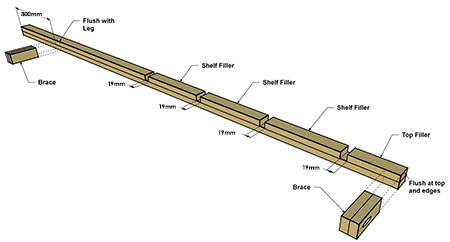
2. To attach the Shelf Fillers to the Long Legs, begin at the upper end of the Short Leg. Apply wood glue to one face of a Shelf Filler, and position it on top of the spacer. Align the edges of the Shelf Filer with the Long Leg, and then clamp the Shelf Filler in place. Remove the spacer, making sure to take it out before the glue dries so you don’t accidentally glue the spacer in. Repeat this process for the next [2] Shelf Fillers and finally add the Top Filler
GOOD TO KNOW: Use a scrap piece of a board to act as a spacer as you position the Shelf Fillers on the Long Legs.
3. Repeat for the other Leg assembly.
4. Always wipe away excess glue and sand the completed leg assemblies nice and smooth.
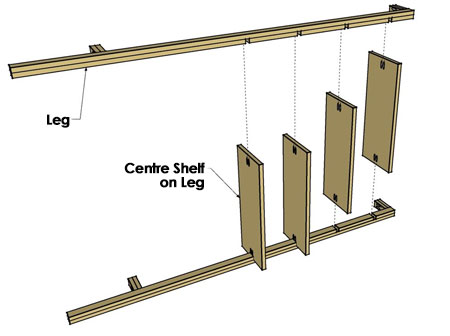
5. To finish the assembly, place one leg assembly on its side on your work surface. Place the first shelf in the slot created by the space between the Short Leg and the first Shelf Filler - see below. Ensure the Shelf is centred on the leg, and then secure it using two screws. Repeat this for the other [3] Shelves. With one side complete, flip the assembly over onto the second Leg and secure the Shelves to the other leg assembly in the same way.
Finishing
If necessary, do any touch-up sanding and then apply the finish of your choice. We used a matt polyurethane sealer for protection.
Apply felt or rubber pads to the bottom of each leg and mount so it is centred over the toilet. You can leave the shelf unit freestanding, or attach keyhole hangers to the ends of the top supports and then insert wall plugs screws into the wall to secure in place.
