
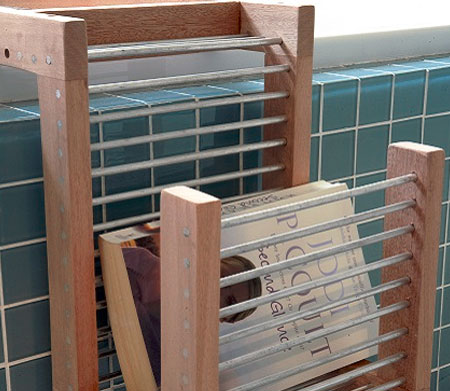
Stylish DIY Bath Tray
Take bath relaxation to a new level with this stylish bath tray that ensures everything you need is within easy reach.
24/06/2018
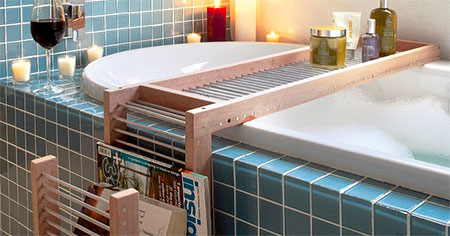
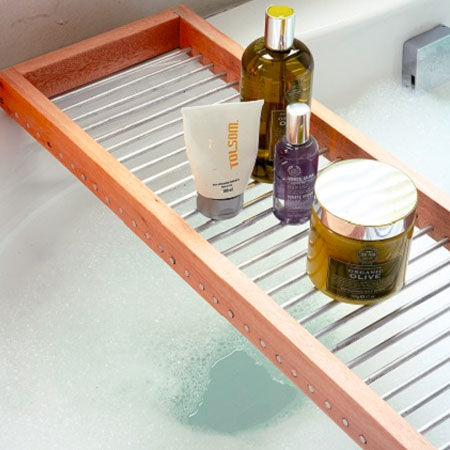
This stylish bath tray is made using components that you will find at your local Builders Warehouse. The frame is made using PAR hardwood (Meranti, Sapele or Saligna) that can withstand the humid atmosphere of a bathroom (once treated) and it has aluminium rod inserts.
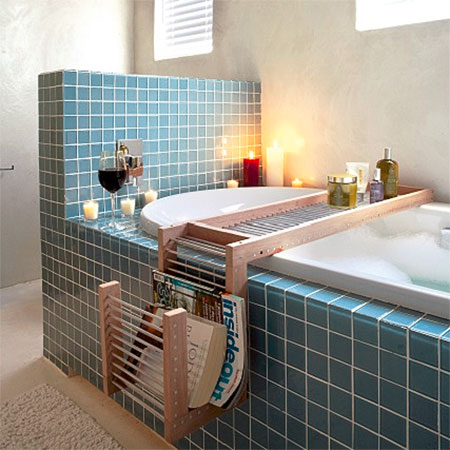
The aluminium rods won't rust and provide a sturdy shelf, where you can have everything you need close at hand for the perfect bath time.
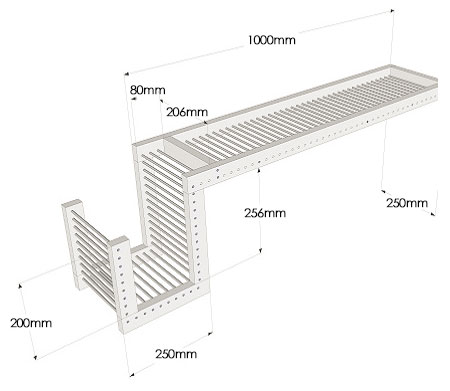
The finished size for the bath tray is 1200mm L x 250mm W x 350mm H and is made to fit our bath. You can modify the measurements to fit a bath of different size.
YOU WILL NEED:
3 of 22 x 44 x 1800mm lengths of hardwood cut to:
- 2 of 1000mm, - 2 of 256mm, - 2 of 250 mm, - 2 of 200 mm and - 2 of 206mm
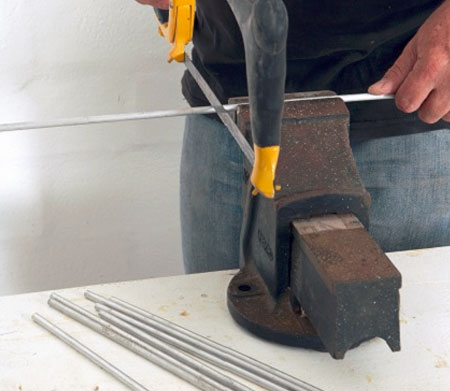
3 of 6mm x 6000mm lengths of aluminium rod cut to:
- 70 of 250mm (approx.)
Waterproof wood glue
50mm chipboard screws [12]
Polyurethane varnish to finish plus paintbrush
TOOLS:
Drill or Drill / Driver plus assorted bits
Hacksaw or Dremel MultiTool and cutting disc
Sander plus 80-, 180/240-grit sanding pads
Quick clamps [2]
Tape measure and pencil
HERE'S HOW:
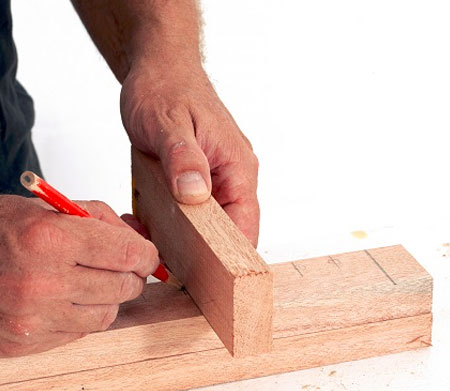
1. On one of the 1000mm pieces, measure 22mm from the end and draw a line. Mark a second 22mm-wide band at 80mm in from the other end. Draw a line at 22mm intervals along the remaining length. Repeat this for the 256mm, 250mm and 200mm lengths.
GOOD TO KNOW: You can use a piece of offcut to mark the intervals along the lengths.
TOP TIP: Clamp each pair of lengths to your workbench - with the marked pieces on top - with a piece of scrap underneath. Make sure that the ends and edges are flush.
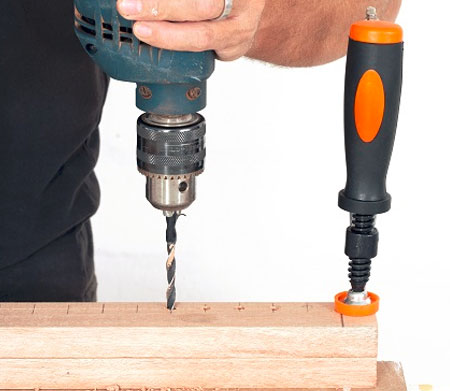
2. Use the 6mm drill bit to drill holes through both pieces at the marks so that the holes will line up perfectly.
3. If you have a combination countersink drill bit, drill [2] countersunk pilot holes in the centre of the lines drawn in step 1. Repeat at the other end. If you don't have a combination bit, use a drill bit and then a countersink bit.
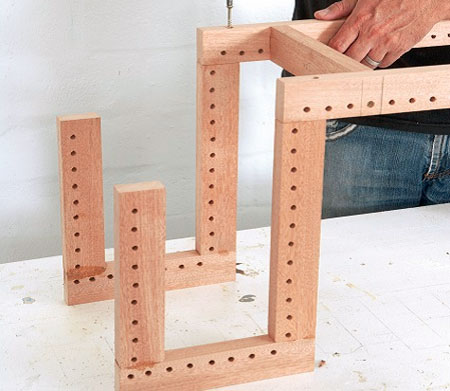
GOOD TO KNOW: Use waterproof wood glue and 50mm screws to join all the sections together.

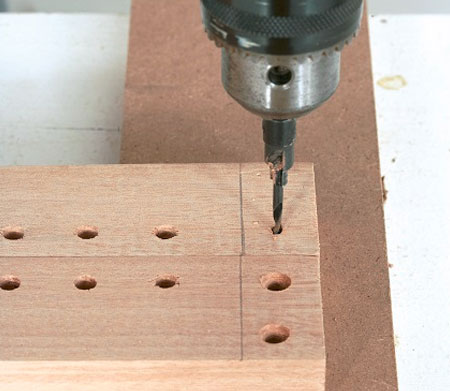
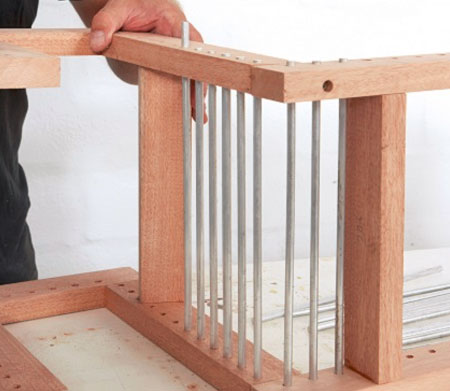
4. Drill pilot holes into the ‘top’ edge of the 1000mm pieces and the 250mm sections when joining the rest of the frame - shown below.
5. Lightly sand the frame with 180/240-grit sanding pads to remove the pencil marks and smooth to prepare for finishing.
6. It's easier to apply the polyurethane varnish before inserting the aluminium rods. Follow the manufacturer's recommended instructions for proper application.
7. Clamp the aluminium rods to your workbench - or use a vice - and then cut with a hacksaw.
GOOD TO KNOW: If you have a Dremel MultiTool, the cutting disks are perfect for cutting the aluminium rods to length.
8. Push the aluminium rods through the holes to the other side. You can use a hammer to tap them firmly in place.
GOOD TO KNOW: Use a sander and 80-grit sanding pad if you need to sand any protruding pieces flush with the surface.
Your bath tray is now ready for use.
gallo images via Builders