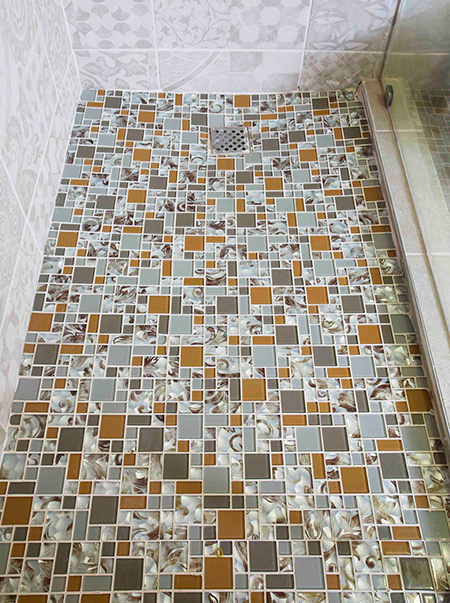
Install glass mosaics on shower floor
Mosaics installed in a shower are particularly popular. In this article TAL provides useful tips and guides on how to apply glass mosaics to a shower floor.
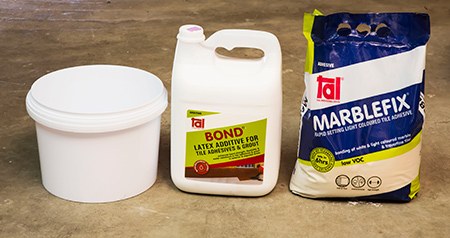
TAL’s rapid-setting Marblefix adhesive is ideal for installing mesh-backed glass mosaics onto a shower floor, as it is light in colour, and since glass tiles tend to be transparent, darker adhesives may affect the aesthetic finish .
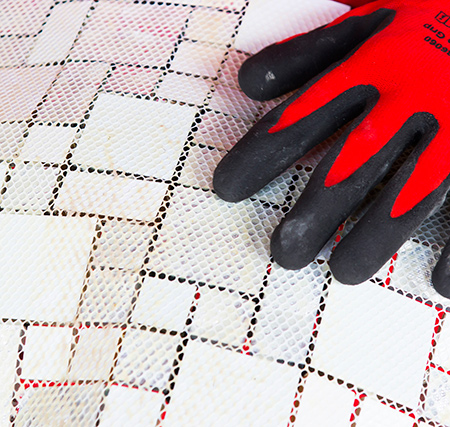
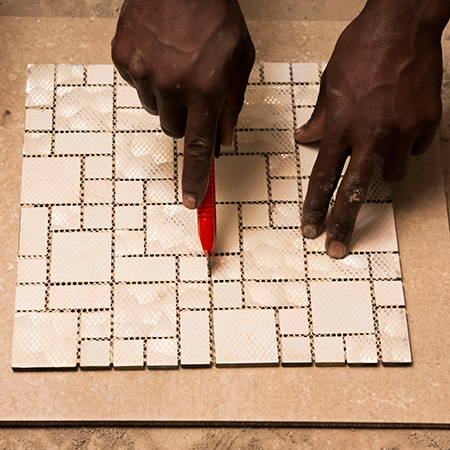
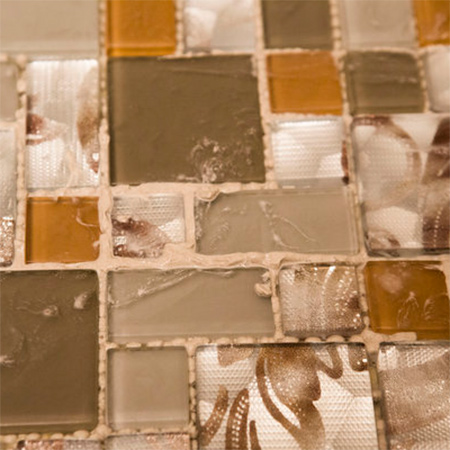
Mosaics are available as sheets that are either paper-faced or mesh-backed. Mesh-backed mosaics allow full contact with the adhesive. The mesh should be a water-resistant synthetic or nylon that will weaken when exposed to moisture. With mesh-backed mosaics, the fabric or tabs and bonding should cover less than 25% of the back of each mosaic tile to allow adequate adhesive contact.
For enhanced flexibility and water resistance, TAL recommends replacing the water to mix with TAL Bond. This is essential in installation areas exposed to water, heat and humidity.
Preparation
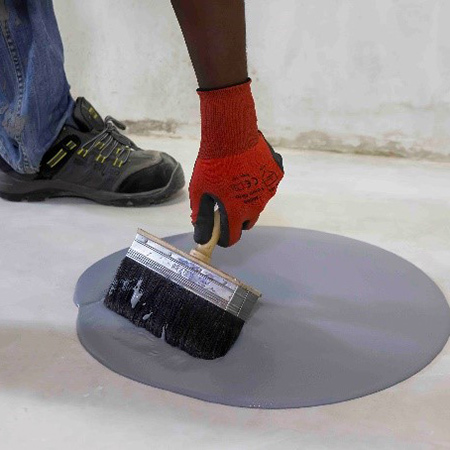
1. Start by priming the surface to ensure it is in good condition, clean and dry, and with a moisture content of less than 5%. Mix a primer slurry consisting of [1] part TAL Key coat to [2] parts TAL Keymix or Marblefix. Brush this onto the surface and let dry completely before preparing the adhesive mix.
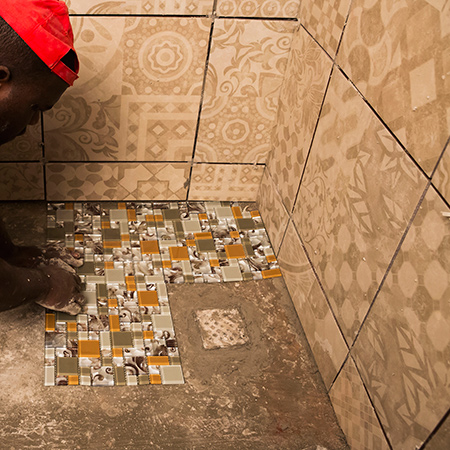
While waiting for the primer coat to dry. plan the layout of the mosaic sheets and use a Stanley or utility knife to cut them to fit around the drain or other fixtures.
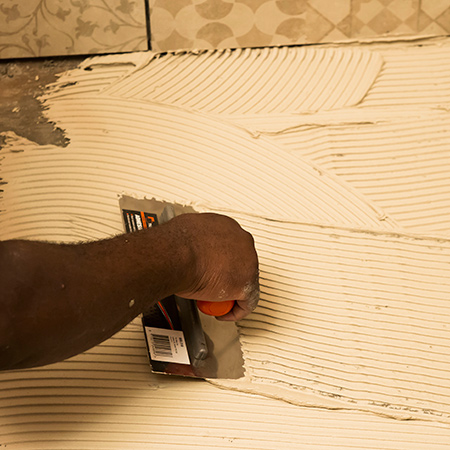
2. Add TAL Marblefix to the liquid and mix well to a creamy, lump-free consistency. Let it stand for three minutes and stir again. Once mixed well, apply the adhesive to the surface in a solid bed of 4mm to 6mm.
GOOD TO KNOW: Work in small areas of a square metre at a time.
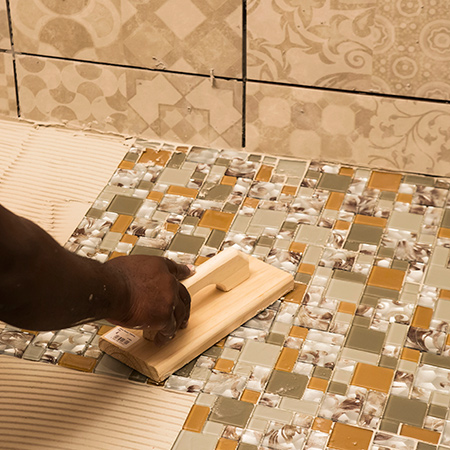
3. Bed the mosaics immediately, pressing them firmly into the adhesive. Use a wooden beating block or rubber grouting float to tap them in and create a level surface. Using tile spacers between the individual mosaic sheets will maintain the joints.
To fill the grout lines, allow the adhesive to squeeze through the joints between the mosaics. If necessary, fill in any low areas in the joints with extra adhesive.
4. Use a wood float to bed the mosaics firmly into the adhesive.
GOOD TO KNOW: Avoid disturbing the mosaic installation as you work and keep equipment away from the installation so as not to scratch the glass mosaics during application and cleaning.
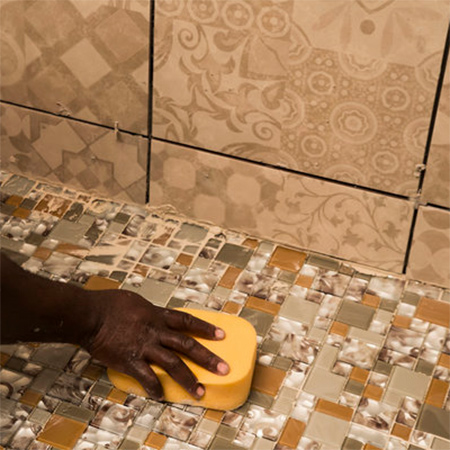
5. Clean the excess adhesive off the face of the mosaics gently with a lightly dampened sponge, and leave to dry for a few hours. Polish the mosaic tiles with a dry cloth to remove any grout haze.
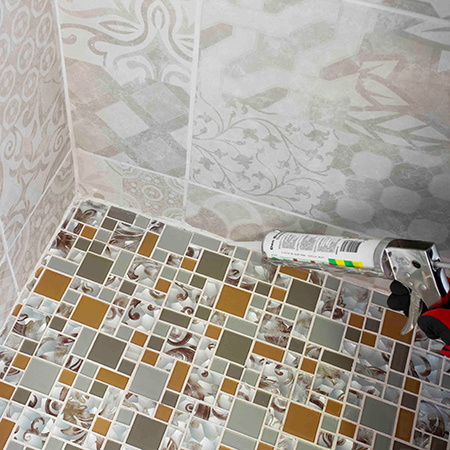
6. Apply a Sanitary Silicone Sealant to all the perimeter joints using a caulking gun. For a neat finish you will find profiles at your local Builders store that allows for easy and neat application of sealer.
GOOD TO KNOW: As a final touch, seal the grout joints with TAL Grout Sealer to keep the joints from discolouring.