
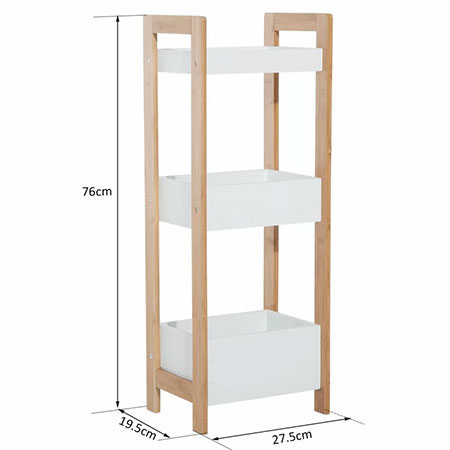
Make Handy Storage Shelves For A Bathroom
Make this handy storage unit for a bathroom using 16mm SupaWood and PAR pine or your choice of hardwood.
09/03/2021
wayfair
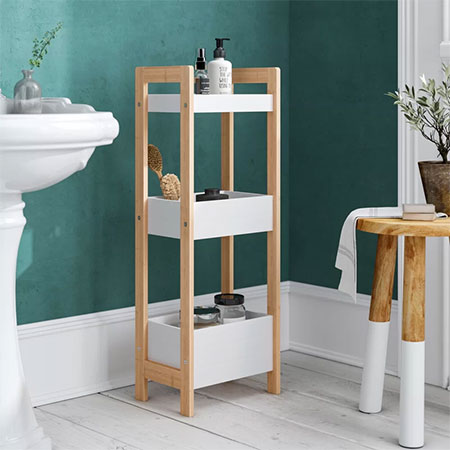
This handy storage shelf unit is so easy to make and you can use pine or your choice of hardwood to make your own bathroom storage unit. The one shown here is made using bamboo, but it can be difficult to get your hands on bamboo planks, so substitute with your favourite hardwood. Cedar would look nice as would cherry or oak.
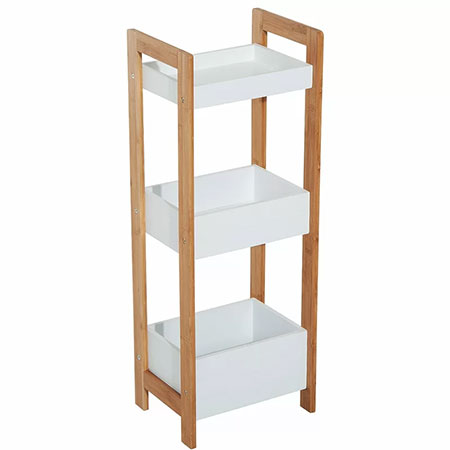
The storage containers for the handy storage unit are made using 16mm SupaWood. Yes, you can use this in a bathroom as long as it is kept off the floor and properly painted and sealed to protect from moisture. Apply a primer and then 4 to 5 coats of acrylic paint, preferably gloss or high-gloss for added protection and easy cleaning.
The frame for the bathroom storage shelves is made using bamboo but you can easily substitute with PAR pine, cedar, cherry or oak.
The wooden frame that supports the storage shelves brings warmth to a sterile bathroom as well as a nice contrast to the white storage containers. I like the raw look of the timber frame, but finishing is entirely up to you.
YOU WILL NEED:
Your choice of PAR pine or hardwood for the frame
16mm SupaWood for the storage containers
Waterproof wood glue
Wood filler
** Have all your pieces cut to size to make assembly quick and easy.
TOOLS:
Drill/Driver plus assorted bits
OPTIONAL: Kreg Pocket-Hole Jig or Biscuit Joiner
Orbital Sander plus 120- and 240-grit sanding pads
Clamps
Tape measure and pencil
HERE'S HOW:
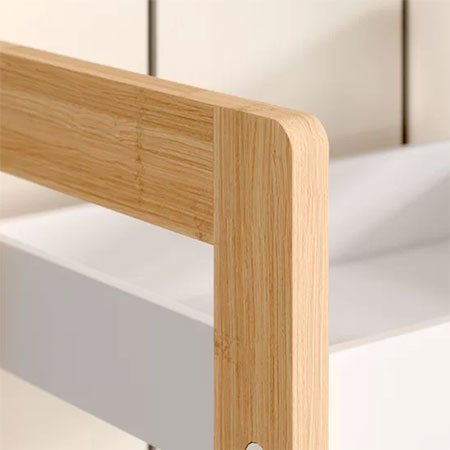
1. Before you start assembling the frame, use a sander to smooth and round-off the top corners. This isn't a must-do but does give a nice finish and good looks to the storage unit.
2. To join the frame, you can use wood glue and clamping, pocket-holes or biscuit joints.
GOOD TO KNOW: When using wood glue on joints, be sure to wipe away any excess glue immediately with a slightly damp cloth. This is important if you plan on staining the wood frame, as wood glue will affect the stain finish.
3. Finish off the frame as required. You can leave it as is and apply a polyurethane sealer or varnish, or you can apply a stain or tinted varnish. Don't leave the wood without any protection, especially as you are using this for bathroom storage. Leaving the wood unprotected will allow mould or rot to set in.
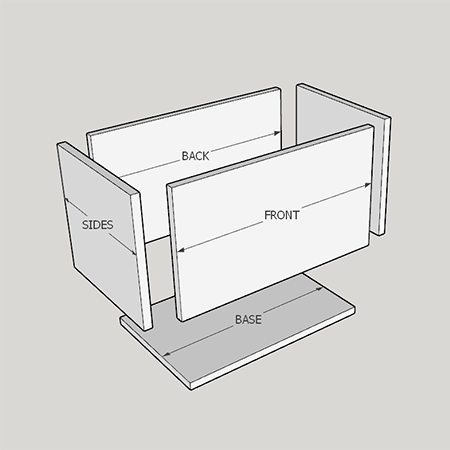
3. Make the storage containers by securing the Front and Back onto the base. Add the Sides to finish off. To assemble, you can use wood glue and clamp overnight, pocket-holes, biscuits, or screws with the screws covered with wood filler and sanded smooth before painting.
4. Sand the storage containers nice and smooth before applying a painted finish. Apply a primer before a minimum of 4 to 5 coats of paint, ensuring that the containers are completely covered with no gaps or bare spots. By doing this you provide maximum protection from moisture for the SupaWood.
5. Now you can finish the assembly by securing the frames onto the storage containers, working one side at a time.
