
Make a Floating Bathroom Vanity
If you have a compact or cramped bathroom, adding a floating bathroom vanity takes up less space and still offers plenty of storage.
06/07/2019
loughlinfurniture.com.au
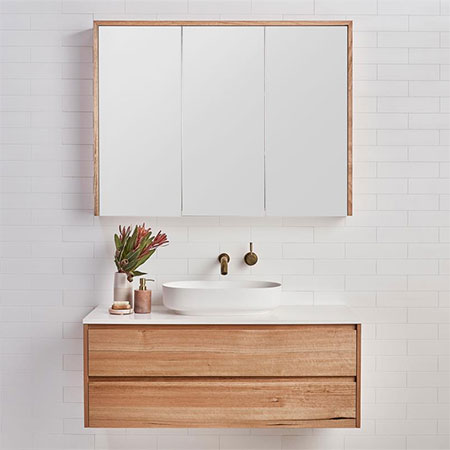
Floating bathroom vanities have been around for quite some time and their popularity is based on the fact that they are easy to make, quick to install, and provide plenty of storage without taking up too much valuable space. A floating bathroom vanity also adds a modern touch to a dated bathroom, and if you use pine for the construction, it can be an affordable project that you can complete in a day. And while bathroom trends may come and go, a stylish floating bathroom vanity will always be an essential piece for any bathroom.
If you do decide to use pine to make your own floating bathroom vanity, it is important that the entire piece be finished in a suitable sealer or varnish, or a polyurethane finish. A finish will not only protect and beautify the wood, but will also extend its lifespan by protecting from moisture.

pinterest.com/pin/361202832613966559/
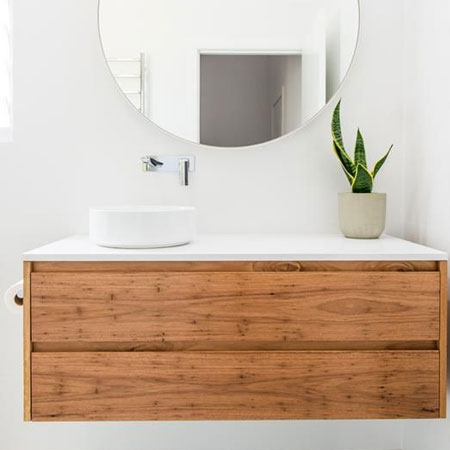
Having said that, you don't have to use pine for this project; you can also build your own floating bathroom vanity using veneered plywood or your choice of exotic hardwood such as bamboo, meranti, saligna or other wood species. It all depends on how much you want to spend on making your floating vanity. And after making the vanity frame, you also have a choice for the top, be it caesarstone, marble, granite or other composite, or even a bamboo countertop.
pinterest.com/pin/520869513153102178/
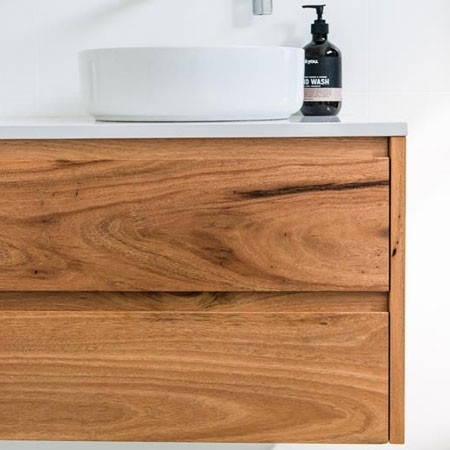
Choose from marine plywood, veneered plywood, bamboo, meranti, saligna or other wood species to make your floating bathroom vanity.
pinterest.com/pin/90494273749234478/
HERE'S HOW:
1. Decide on the wood species you want to use for your project. If you opt for pine, you can have all the pieces cut to the exact size at your local Builders Warehouse or timber merchant. In this way everything is cut and ready to assemble.
2. You can make this floating bathroom shelf almost any size to fit in the available space.
3. To assemble the floating bathroom vanity you can use a simple butt joint (with visible screws on the outside), or use a Biscuit Joiner or Kreg Pocket Hole jig if you don't want any visible screws.
GOOD TO KNOW: If you decide to go with the basic butt joint to assemble the frame, fill any holes with wood filler (in a colour that matches the final finish) and then sand smooth.
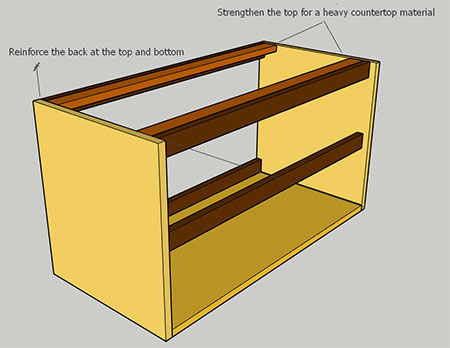
4. Make sure to reinforce the top of the vanity if you plan on adding a heavy countertop, and add 19 x 44mm PAR pine battens at the back of the cabinet to provide stability and strength. You can also use the battens at the back to mount your floating bathroom vanity onto the wall.
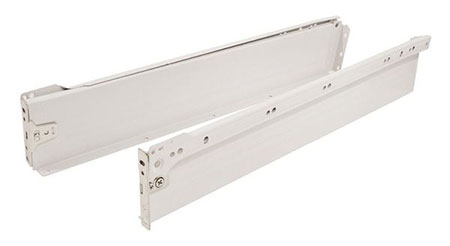
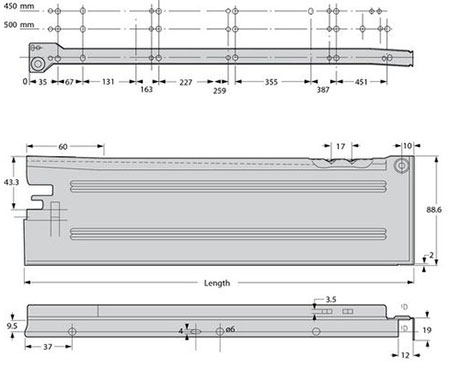
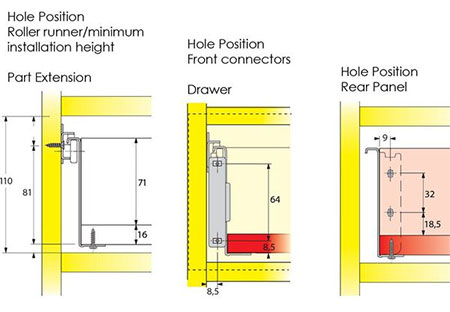
Making your own bathroom vanity is so easy if you have the right accessories. These metal drawer sides with integral drawer runners form the sides of your drawers and allow for smooth opening and closing of the drawers. You can find these drawer sides at your nearest Gelmar store, or specialist hardware supply.
Finishing
Once you have assembled the floating bathroom vanity, it is essential that the entire piece - inside and outside - be finished in a suitable sealer or varnish, or a polyurethane finish. Because bathrooms are wet and humid areas, the finish will not only protect and beautify the wood, but will also extend its lifespan by protecting from moisture.
loughlinfurniture.com.au