
Repair, reuse, recycle
For many of the trusty products we use every day, malfunctions are a worst-case scenario. You don’t want to spend the money on repairs, and replacement means you have to get rid of the old one.
You can be a smarter consumer by knowing how things work and what to do if they don’t and have the satisfaction of fixing something that’s broken, and it teaches you to buy better things that will last longer because you’ll know how to fix them.
So which projects can you do yourself, and when should you seek outside help? You might be surprised how simple some of these repairs can be.

New life for old
With a creative eye and a bit of elbow grease, the endless possibilities that reuse offers can easily make their way into your home. Finding a new purpose for items you already have not only reduces your overall environmental impact, but it also gives you a way to become a frugal and funky visionary. Each piece that you revamp from a secondhand store or from your home has the potential to become a unique work of art filled with sentimental value.
Not to mention that furniture is also incredibly expensive. But it’s amazing what a new coat of paint or finish can do to improve the look of a used desk or dresser. Head to any store that specialises in secondhand furniture, and you will quickly see that many of the best finds have already been in use for decades.
A sturdy piece of furniture is meant to last for years and to often be used by multiple households, so start your redecorating endeavors with a treasure hunt at a local thrift store. And don't forget to visit the
Craft and Decor sections for even more ways to transform and makeover old furniture.
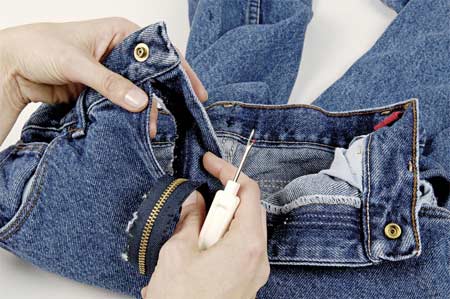
Easy fixes for zippers
For clothing, bags or even camping equipment, what you may encounter is a faulty zipper. Either the teeth become misaligned, snagged in fabric or the slider breaks off. In all of these instances, repair is an option.
If the problem is a missing pull tab, check to see whether the slider has a hole where the pull tab was attached. If so, slip a tiny safety pin or paper clip through the hole to serve as a substitute. If there is no hole, try to salvage a clamp-on pull tab from an old zipper of a similar size; put the tab onto the slider with a needle-nosed pliers.
If a zipper breaks near one of the ends, another option is to move the slider (the end of the zipper track where the slider stops when you unzip). You can then sew closed the material below where you reposition the slider, so you won’t have any holes showing.
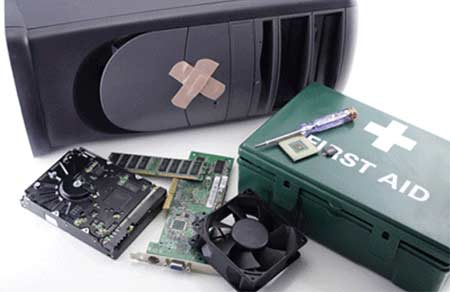
Computer repair for dummies
Ah... computers. One of the most complex and helpful products in your life. But have you ever noticed that a computer is basically one big box with a bunch of removable parts? This makes it a prime candidate for repair. The important thing to address with computer repair is what issue you are trying to solve. If the system is running too slowly, you may want to consider additional RAM or a larger hard drive. If it’s making a lot of noise, it might be time to replace the fan or power supply.
Another important aspect to consider is that if you open up your CPU and poke around, it will likely void any existing warranty. So, if your computer is still covered by a manufacturer or retailer, you’re probably better off having it professionally repaired.
With any electronics repair, the first step is to unplug the device to prevent electrocution. You’ll then want to remove the plastic case of your computer, which can typically be done by removing corner screws and then sliding the case out. Be sure you’re removing the casing and not the front panel.
Now that you’re inside, you’ll notice that most devices can be easily removed. You can slide in new RAM in slots on the motherboard (keep in mind that each board has a maximum amount of RAM allowed, so you’ll want to look this up online for your computer model), or install a new display card for better viewing. Just remember where all the cords are plugged so everything ends up in the right place when you’re done.
You can also repair things other than the CPU. If your mouse has difficult moving, remove and clean the track ball. If one of the keys is stuck on the keyboard, pop it out with a screwdriver and see if there is food lodged underneath.
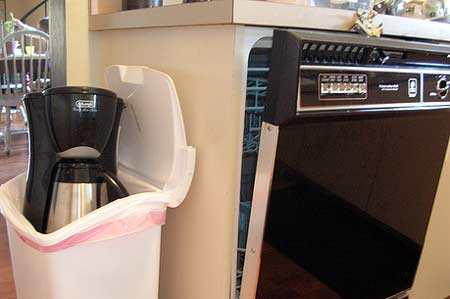
Do-it-yourself in the kitchen
Many kitchens are equipped with a variety of small cooking appliances including grills, sandwich makers, waffle irons, frying pans, skillets, and electric woks that may need fixing. Some have controls built into the appliance while others have them built into the detachable cord. Let's take a look at how to fix both types here because they all work similarly.
Cooking appliances are designed to cook food at changeable temperatures. In some units, the temperature control is permanently attached to the appliance; the unit cannot be immersed in water for cleaning. Those with removable controls often can be immersed with the controls detached. Some units with built-in controls have removable electric cords and some have built-in nonremovable cords.
Small cooking grills have one element and no thermostat to regulate temperature. Sandwich makers and waffle irons have two cooking surfaces with internal heating elements; cooking temperature is regulated by a built-in thermostat. In some cases the elements are exposed (you can actually see them turn red hot) or covered (you can't see the element, but you can feel the heat).
What can go wrong?
Many things can go wrong with these cooking appliances. Fortunately, most of the units are relatively simple in design and simple to fix. For example, the electrical cord may malfunction. The heating element may be broken. The terminal pins on detachable cords may be faulty. The thermostat may malfunction. Internal wiring may have a short circuit. Other internal parts may be damaged or not working properly.
What to do?
Make sure you read the intruction manual (hopefully, filed away in a safe place) before trying to clean it. Some can be immersed in water (though typically not put in a dishwasher) while others have nonstick surfaces that only require wiping with a damp cloth. Don't immerse any part of the unit in water unless the manufacturer says it's okay.
If the appliance does not heat, make sure that power is on at the outlet and test the electrical cord; replace it if needed. If this doesn't work, disassemble the unit and test the heating element.
If the appliance heats on one side only, test each heating element and replace it if it is defective. While you have the unit open, check the internal wiring to see if you can identify any loose or broken wires that can be replaced.
With basic tools and a multimeter you can test and replace many components on cooking appliances. Replacement parts can be purchased from the appliance manufacturer or various aftermarket suppliers.
For all repair jobs, you’ll have to put in a little bit of work. But with all the information available, it’s likely you can find an easy (and eco-friendly) way to fix many of your household products. And for those who need to learn a little bit more about do-it-yourself, electrical and plumbing in a home, sign up for a DIY Divas workshop and we'll show you how!
earth 911 - images: threads magazine and various