
Make a pinboard office organiser
At a recent workshop I showed how to make a simple pinboard but wanted to make this a bit more practical for my own home office. This basic pinboard is mounted into a frame and offers more organisation.
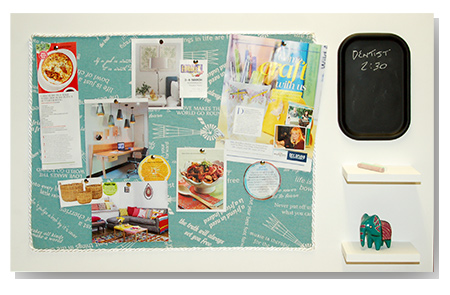
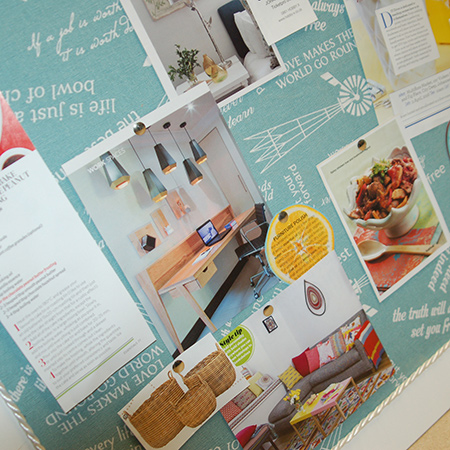
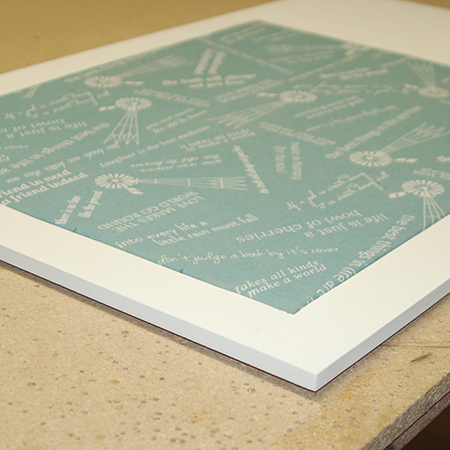
The fabric-wrapped pinboard fits inside a 12mm SupaWood frame, and the frame allows space on one side for a couple of shelves and a mini chalkboard. You can modify this design to be as large as you want, and to incorporate various organisation and storage elements.
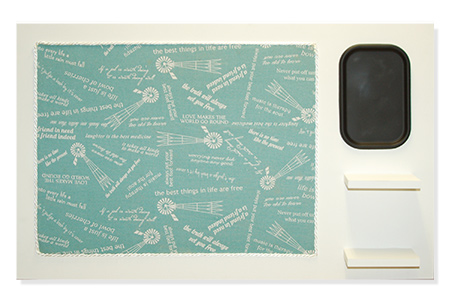
The pinboard is softboard wrapped in fabric and an entire board (2000 x 1000mm) costs around R200, so make a few boards for your family, or friends. You can buy softboard at your local Builders Warehouse or larger hardware/timber store.
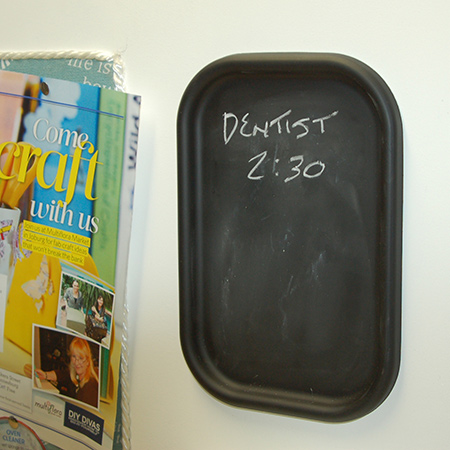
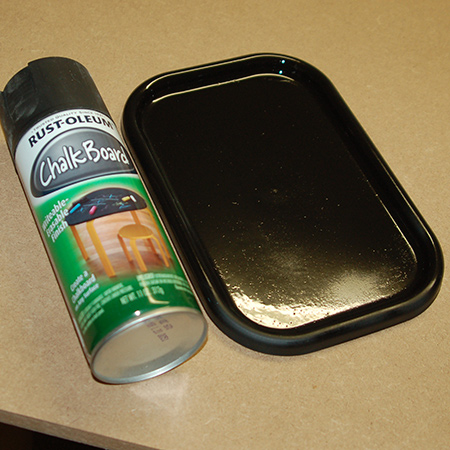
The mini chalkboard is made using a lid from an ice cream tub. The lid is sprayed with a couple of coats of Rust-Oleum Chalkboard spray paint and hot-glued onto the pinboard frame. It comes in handy for jotting down daily appointments or things you need to remember.
YOU WILL NEED:
Sheet of softboard
Piece of SupaWood (12 or 16mm offcut) - cut to size required - for the frame and shelves
Fabric to cover softboard
Bosch Tacker or stapler
Ponal wood glue
Craft knife
Tape measure and pencil
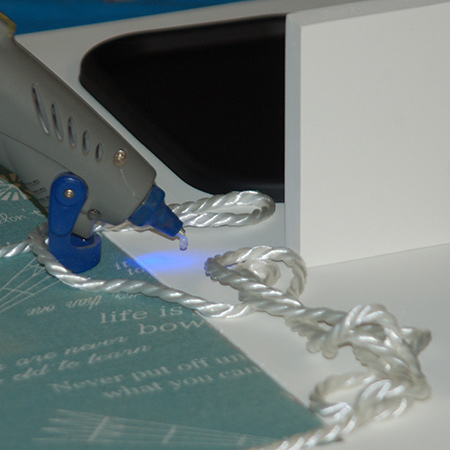
Hot glue gun and glue sticks
Rust-Oleum Chalkboard spray
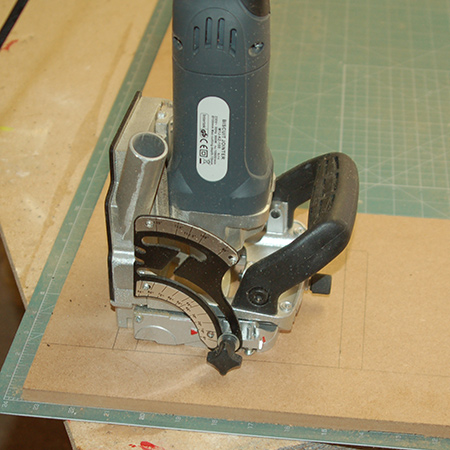
OPTIONAL: Tork Craft biscuit joiner and #10 biscuits
HERE'S HOW:
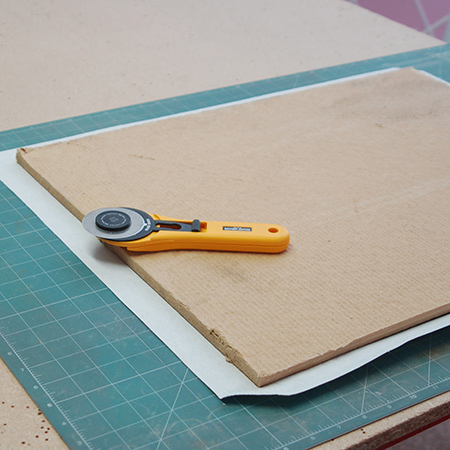
1. For my pinboard the board is 400 x 600mm. You can cut this using a sharp craft knife.
2. The fabric is 500mm x 700mm and the corners are cut away. Ideally, you want the fabric to be about 50mm wide all around.
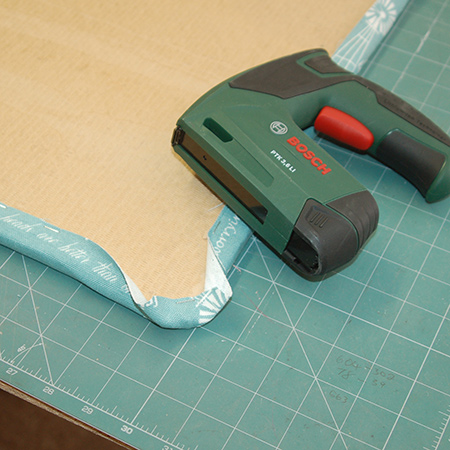
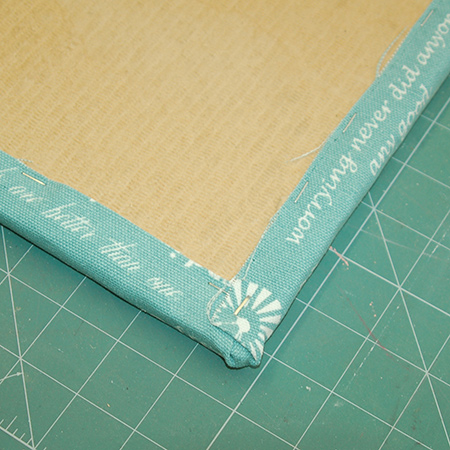
3. Fold over the sides and staple to the back of the softboard. Leave the corners until last and fold neatly. I found it was less bulky to staple the corner first and then fold over the sides and secure. This makes it easier to fit the softboard into the frame later on.
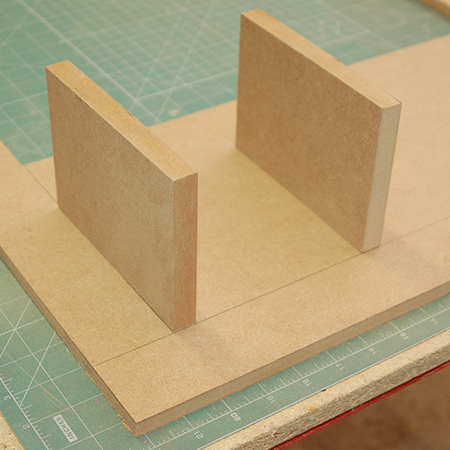
4. I made the 12mm SupaWood frame 900mm x 600mm, and this allowed 240mm on one side for the mini chalkboard and shelves. The shelves are 100 x 150mm.
5. Use a pencil to draw around the shelves to mark the location.
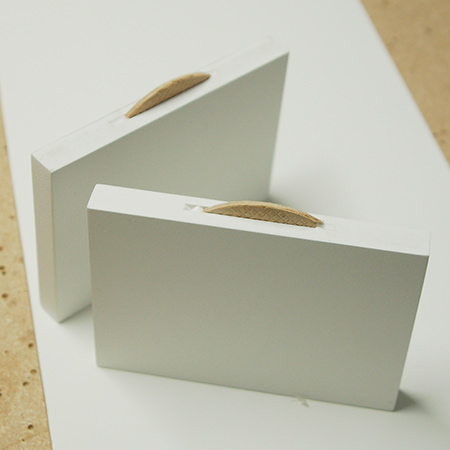
6. To mount the shelves I used a Tork Craft biscuit joiner and #10 biscuits. This is optional and you can also simply screw through the back of the frame and secure with screws and wood glue. Use the drawn pencil line as a guide for cutting the slots.
7. Paint the shelves and frame before using Ponal wood glue to secure the shelves onto the frame.
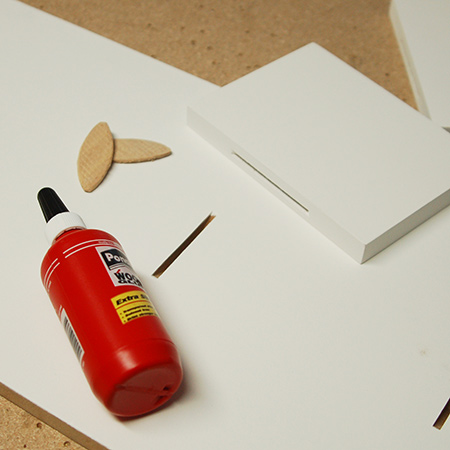
GOOD TO KNOW: It's easier to add glue and biscuits to the shelf ends, let this dry for an hour and then secure onto the frame. Less messy!
8. The ice cream tub lid for sprayed with Rust-Oleum chalkboard spray. One dry, prime the surface by rubbing lightly with a stick of chalk and wiping clean. The lid is then glued onto the frame using a hot glue gun.
9. Now you are ready to pop the pinboard into the frame. Place the pinboard - face up - on a flat surface and place the frame over the top. Tap down to fix in place. If you need to use a rubber mallet - also use a towel or cloth to prevent damaging the frame.
10. To neaten off I added a synthetic rope border around the edge of the pinboard using hot glue.
Hang the frame onto a wall using picture hangers attached to the back of the frame with 13mm screws.
