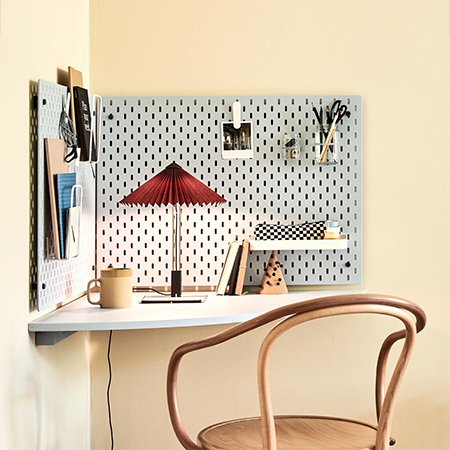
This Corner Desk is the Perfect Idea for your Corner Office
Most employees dream of having that corner office with a stunning view and, while this one doesn't have a view, it is a great solution if you need a small office space.
25/10/2021
all about diy
Soooooo, it might not be an actual corner office with a stunning view, but this cosy corner is perfect for where you need to set up a small working space. You can always enlarge the size of the desk for more countertop area if you need it.
This cosy corner idea is also ideal if you need a place to put on your makeup in the mornings or a spot to style your hair.
This corner desk can be assembled in an hour and the materials and supplies you need can be found at any Builders store, so grab your power tools and let's get started.
YOU WILL NEED:
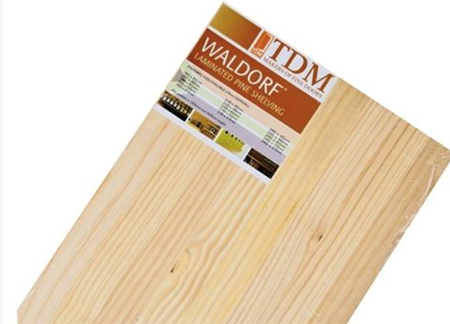
1 of 800 x 800mm laminated pine (see ** below)
2 of 44 x 44mm x 400mm - PAR pine
4 x 50mm cut screws
8mm Wall plugs and 65mm screws for mounting onto wall
Wood filler
120-grit sanding paper
Nail and length of string
Sealer or varnish to finish
TOOLS:
Drill plus assorted bits
8mm masonry bit
25mm spade bit
Jigsaw and fine-toothed jigsaw blade
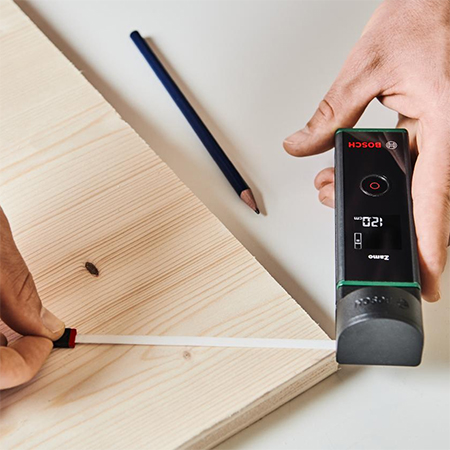
Tape measure and pencil OR laser measure
Spirit level or laser line level
HERE'S HOW:
1. Measure and Mark
Place the pine board on a flat surface with the best side face down. Measure and mark at 800mm down one side. You will use this as a guide for cutting the curved shape of the top.
2. Drill Hole for Cables
Mark the position where you will drill a hole for the cables to go through the top. Drill out the hole with a 25mm spade bit. The hole should be close to the corner but not too close to the edge to prevent the wood from splitting.
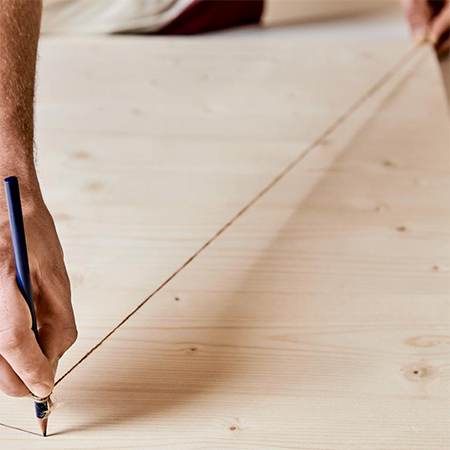
3. Draw the Shape for Cutting
Hammer the nail into the top corner and tie on a length of string. Fasten the other end of the string around a sharp pencil. Measure from the corner to the 800mm mark down one side to adjust the length of the string and then draw this across from one side up to the top to create the curved shape.
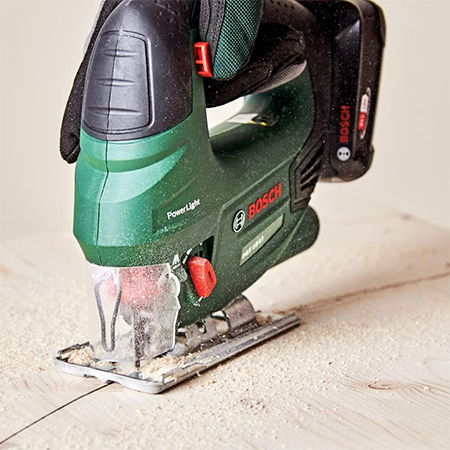
4. Cut the Top
With your jigsaw and a fine-toothed blade, cut along the drawn pencil line. Using a jigsaw blade with small teeth reduces the amount of ripping along the cut line.
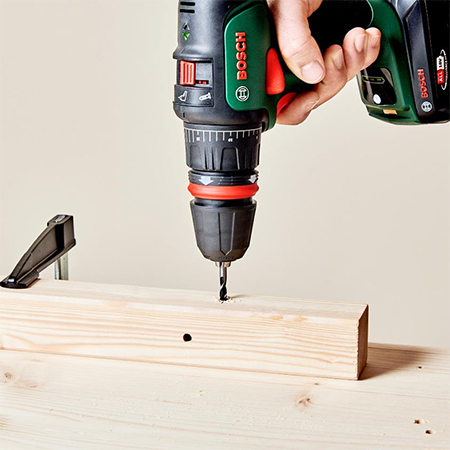
5. Drill and Countersink the Supports
Make a mark at 100mm in from each end of both 44 x 44mm supports. Drill a 3mm countersunk pilot hole on these marks. These holes are for mounting the supports onto a wall. Repeat this on the underside of the supports in the same location. These will be used to secure the supports to the top to firmly hold the top in place.
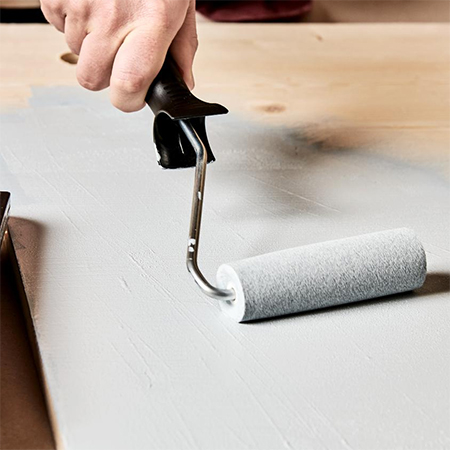
6. Sand, Prime and Paint
Prepare the top and supports for painting by sanding with 120-grit sandpaper. Wipe clean to remove all the dust. This step is up to you. You can prime and paint or you can apply clear or tinted sealer or varnish to the supports and top.
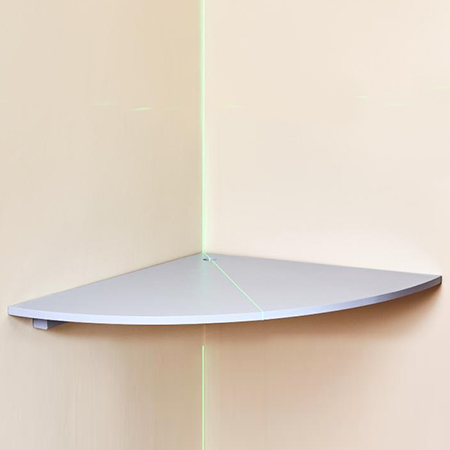
7. Mark for Wall Mounting
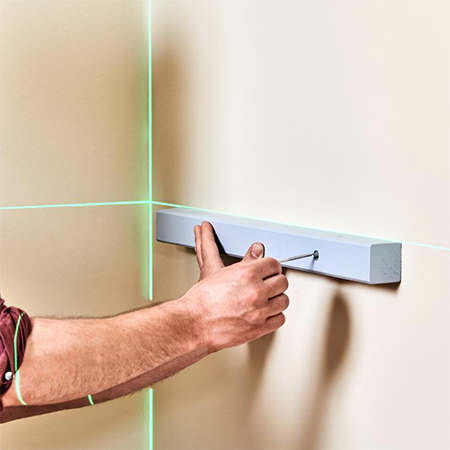
For this next step, having a laser line level will make the job easier, but if you don't have one you can use a spirit level to mark the location for mounting the supports onto the wall. Make sure to leave a gap in the corner so that the supports will not overlap each other. Use a nail pushed through the drilled holes to mark the wall in order to drill 8mm holes for the wall plugs to secure the supports onto the wall.
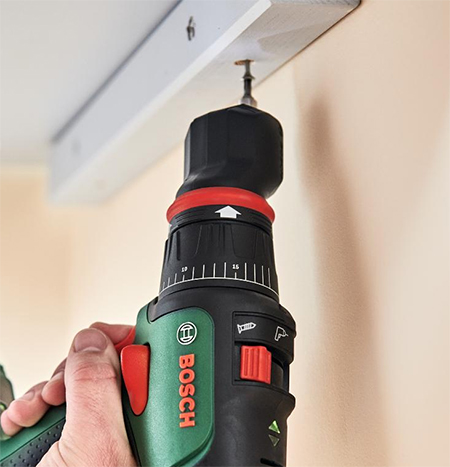
8. Mount onto the Wall
Position the top on the supports and then drive 50mm screws through the underside of the supports and into the bottom of the top section. Have someone on hand who can press the top down while you drive in the screws.
9. Finishing
Now that the corner desk is installed, you can pay attention to the wall above this. You can add pegboard and hooks, or make a framed softboard pinboard, or even use Duracryl to provide a surface on which to use a whiteboard marker.