
How To Create A Backyard Home Office
We look at all of the steps necessary to build a backyard home office.
27/05/2021
As working from home continues to gain popularity, millions of families have made necessary adjustments to their daily routines. People who work remotely must balance their professional and familial responsibilities—which can be tough without a dedicated workspace.
Fortunately, a new trend in micro-construction has helped breadwinners maintain a healthy separation between work and family life through backyard offices. Backyard workspaces offer the comfort of commercial office spaces and eliminate many of the common distractions that occur while working from home. Plus, a backyard office space is easy and affordable to build.
This article will go over all of the steps necessary to build a backyard home office.
Creating Your Backyard Office
Getting started on building a backyard office represents a mixed bag. On one hand, planning your new office can be a lot of fun. On the other hand, obtaining the necessary permits is a bit of a nightmare for DIYers.

Planning
The worst mistake you can make in construction is to start building without knowing how much it will cost. That’s why planning ahead is so important.
Depending on the size and quality of the backyard office, one can expect building one to cost between $1,500 and $5,000. This price range excludes essential amenities such as a PTAC air conditioner.
Before you start working on your backyard office, you should consider the following:
• Size and shape
• Orientation depending on the climate
• Location and proximity to the house
• Single-purpose vs. multipurpose use
• Amenities (running water, toilet, air conditioner, etc.)
• Single room vs. multiple rooms
• Location of electrical units
Permits
As with any construction project, you’ll have to watch out for legal pitfalls that an owner-builder may fall into when constructing a backyard office. Make sure you’re informed on all the information you need on securing permits, including:
• Permit exemptions based on size, cost, and people involved in building the office
• Permits for utilities exempt from payment
• Setback rules that dictate the minimum distance between the office and property lines
If you find yourself adrift in a sea of
legalese, consider asking for help from your
friends, neighbors, or family who already
experienced building a backyard office space.
They can help you avoid mistakes they've made in
the process.
If all else fails, ask your
local building inspector some questions about
building a backyard workplace when they come
over for an inspection.
Foundation & Flooring
When starting construction, builders have a choice of installing a concrete slab foundation or wood subflooring.
A concrete foundation represents the more expensive option but proves necessary when constructing a large backyard home office. Wooden subflooring costs less and remains suitable for smaller offices.
Concrete Slab
For concrete slabs, you have to decide between an above-ground or below-ground foundation. In the case of an above-ground foundation, use wooden shuttering to maintain the shape of the concrete as it cures. Do not install the slab directly on the soil. Instead, place crushed gravel on the topsoil to allow the concrete to cure properly.
For larger buildings that require a below-ground foundation, one must dig trenches three feet down to support all load-bearing walls and take about six inches off the top of the interior soil. If the backyard office is rectangular and possesses no interior load-bearing walls, dig the three-foot trenches in the shape of a rectangle with lengths equal to the intended wall lengths.
Finally, fill in the trenches with three feet of concrete and cover the top of the interior soil with six inches of concrete.
Wooden Subfloor
For a wooden subfloor, create a frame of suitable size with 2x6 studs or larger and reinforce it by spacing interior studs about one-and-a-third feet apart. Use joists and brackets on all of the connection points, including the corners. Make sure to use pressure-treated wood and a layer of crushed gravel. Placing the wood directly on the soil will make it rot quicker.
Alternatively, you can raise the wooden subfloor and set it on cinder blocks. Either way, place insulation between each of the support beams—otherwise, the floor of your backyard office will stay cold most of the year.
Walls, Windows & Doors
Windows, walls, and doors need to be planned at the same time, so you don’t make the mistake of constructing four solid walls. That would require going back and cutting the support beams to make room for the windows and doors. Planning ahead goes a long way!
Make the walls entirely out of 2x4s and nails, with vertical support studs two-and-a-third feet apart.
Both windows and doors require header beams at the top of the openings. But keep in mind, only windows require sills at the bottom of the openings. Headers and sills both need short, vertical support beams (called cripples) that connect to the outer frame.
Once the walls are raised, nail plywood to the outside to create the wall sheathing.
Roof & Insulation
Large backyard offices may require a gable roof with two slopes. But the vast majority need only a mono-pitched roof in the lean-to style. Flat roofs can also work depending on the local climate.
Building the roof structure involves placing angled or flat joists at regular intervals. In the case of a mono-pitched roof, a bird’s beak cut will allow each joist to fit snugly on top of the wall. Make sure each joist sticks out further than the wall at both ends for a more decorative effect.
Once the joists are in place, use plywood sheathing to cover the joists. Choose between metal, plastic, shingles, or tiles, then install them to make your roof waterproof.
Insulation, Siding, & Drywall
Don’t forget to install insulation in the walls before installing the drywall, especially in harsh climates. Simply cut your insulation of choice into strips that will fit between the vertical support beams.
Now that the insulation has been installed, it’s time to nail on the drywall. Cut holes in the drywall for any doors, window, electrical sockets, or other utilities. Drive nails through the drywall and into the vertical support beams and cripples. Finally, fill any cracks or gaps between sheets of drywall with a spackle.
Choose a type of siding to install on the exterior walls. When making a selection, be sure to strike a balance between aesthetics, price, ease of use, durability, and weather protection.

Electrical & Decor
For electrical work, it’s best to hire a professional. In many cases, the law requires it.
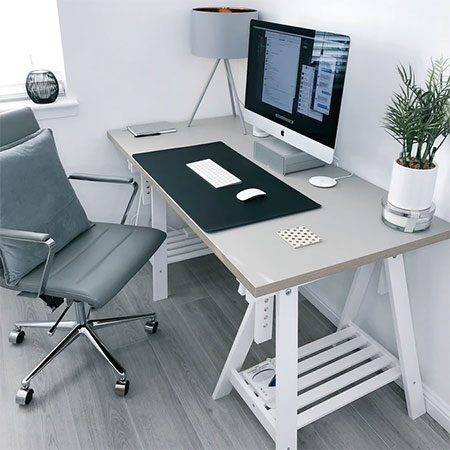
With the backyard home office nearly complete, the fun begins. Select the interior and exterior paint. Bring in the furniture.
Hang some artwork. Place some knick-knacks. Then get to work!