
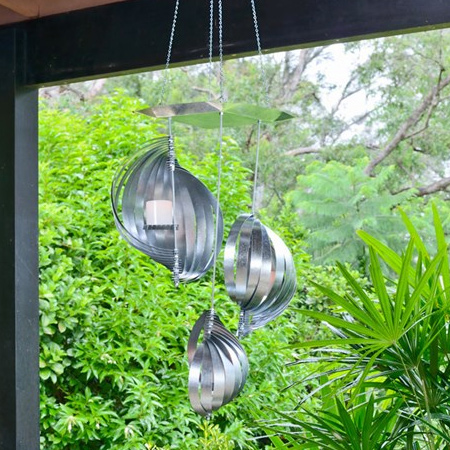
DIY Patio Chandelier
This sculptural metallic chandelier will add a soft evening glow to your patio, deck or entertainment area.
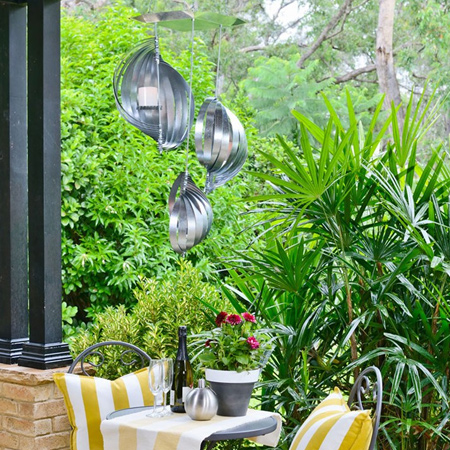
Made using supplies that you will find at your local Builders store, this galvanised tin chandelier is perfect for using with battery-powered candles or solar lights.
YOU WILL NEED:
Galvanised zinc straps, approximately 300mm wide (buy a 30mm roll)
Flat galvanised zinc plate,80 x 200mm [2]
Threaded rod, 6mm x 1 metre length [3]
Nuts for 6mm threaded rod
Plywood, 220 x 200mm
Cup hooks [4]
Chain, 2 metres
Wing nuts [3]
Battery-powered lights or solar lights
TOOLS:
Tin snips
Hacksaw
Pliers
Drill / Driver plus assorted bits
Safety gloves
HERE'S HOW:

1. For three different sized chandeliers, measure and use tin snips to cut the zinc straps to 57cm lengths (15), 45cm lengths (15) and 28cm lengths (15). Keep in separate piles. The same instructions apply to all chandelier sizes.
GOOD TO KNOW: DO wear safety gloves when cutting the straps
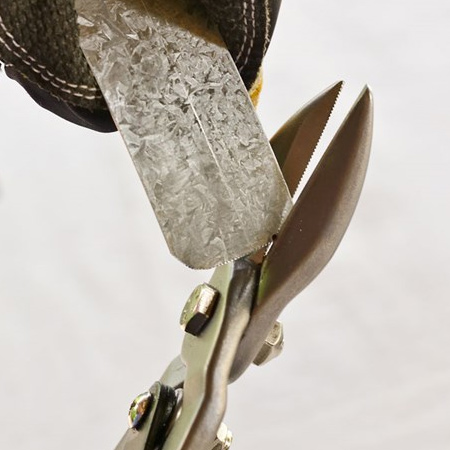
2. Use the tin snips to round off the corners at each end of every strap.
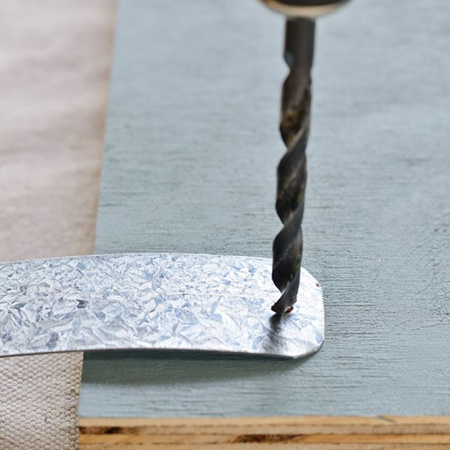
3. Drill a 6mm hole in the centre at 10mm from each end of strap.
GOOD TO KNOW: To prevent the bit from sliding push down on the metal to make a dent.
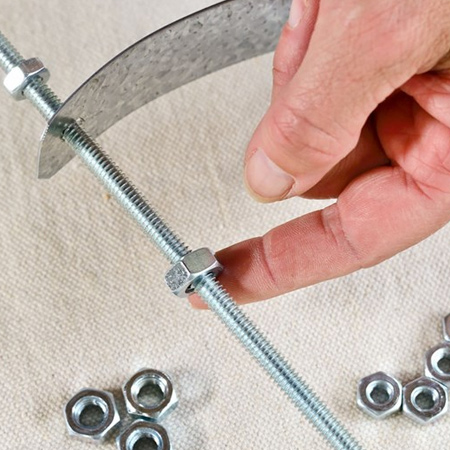
4. Assemble the first chandelier by threading a nut onto the rod and twisting up to halfway. Place one end of the strap onto the rod at the same position as the nut. Add another nut as a spacer.
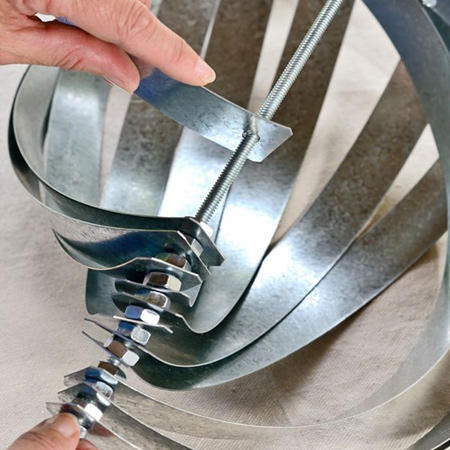
5. Repeat for the remaining straps and after adding the last piece of strap, add a nut to hold the assembly in place.

6. Make a platform for your candles of solar lights by cutting flat sheets in half. Drill a 6mm hole in one corner.
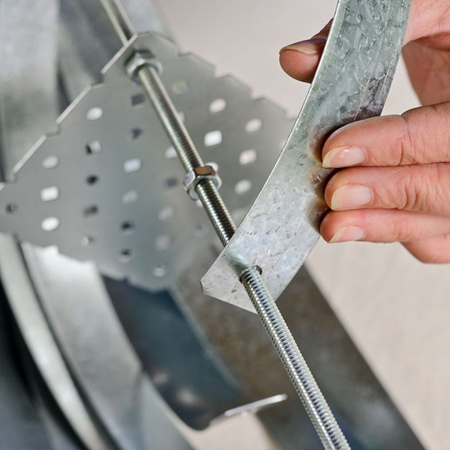
7. Twist on a nut to roughly halfway and then add the platform. Secure in position with a nut.
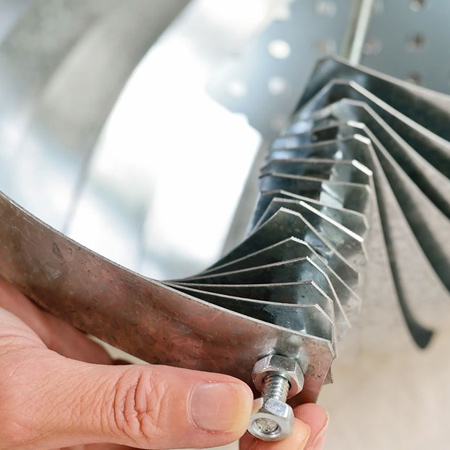
8. Now you will work in reverse order, beginning with a nut, then a strap, and so on. It may be necessary to move the assembly up the rod so the straps will fit over the opposite end of rod.
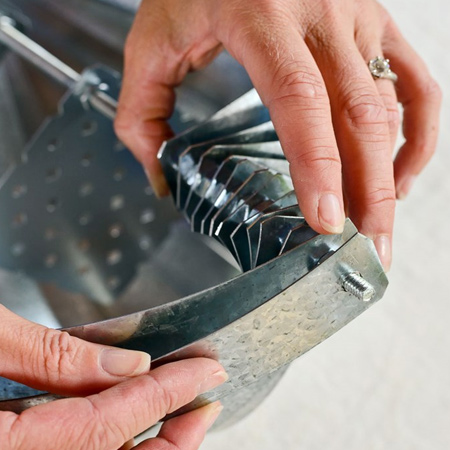
9. Secure the last strap with two nuts and tighten with pliers.
10. For hanging the chandelier you need to fit a plywood square at the top and a piece of galvanised zinc to hide. Drill [3] evenly spaced holes close to three corners for best balance. Cut the zinc sheet as shown in the final image below.
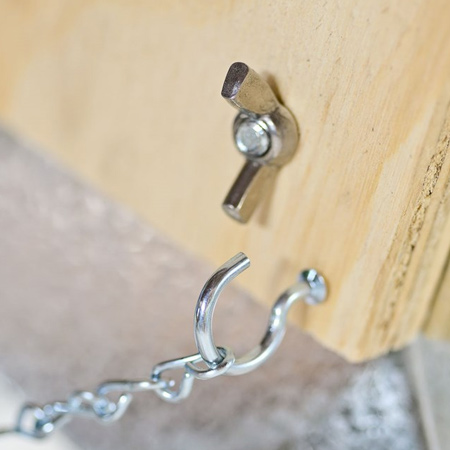
11. Thread the rods through holes in the zinc / plywood top and lock in place with wing nuts. Use a hacksaw to trim the threaded rods to desired length

12. To your chandelier attach a cup hook at each corner of the plywood top and link the chain onto the cup hooks.
GOOD TO KNOW: You will need someone to assist you in holding the assembly while adjusting the chain to length to balance the assembly.
bhg.com.au