
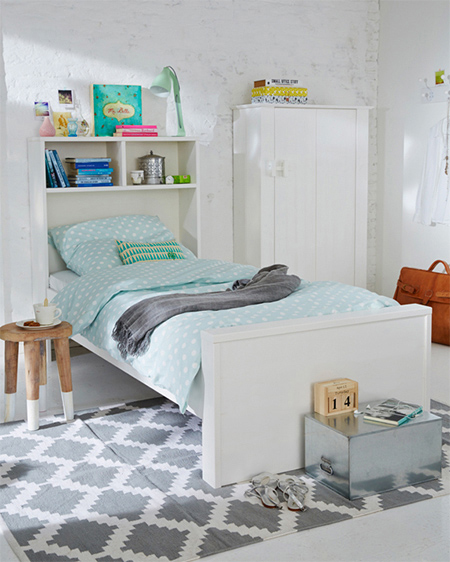
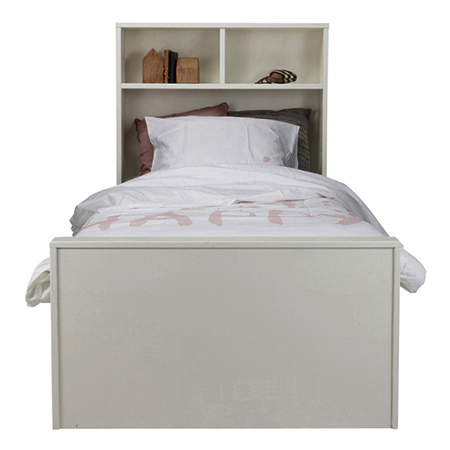
Child's bed with bookshelf or storage headboard
In a small bedroom this child's bed with its bookshelf or storage headboard takes up no additional space and offers a place to store books and small toys.
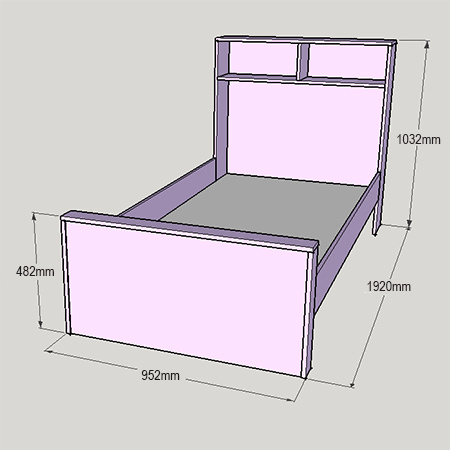
You can easily modify the dimensions of this bed to make a larger three-quarter or double bed for an older child or teen bed.
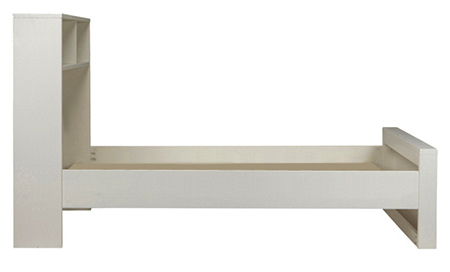
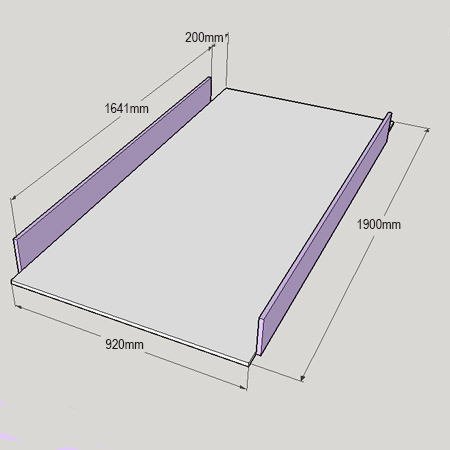
No slats on this bed base, use a solid sheet of 16mm BisonBord for the base for added strength and stability.
YOU WILL NEED:
2 of 200 x 1641mm 16mm
SupaWood - bed sides
1 of 466 x 920mm 16mm
SupaWood - footboard
2 of 80 x 466mm 16mm
SupaWood - footboard sides
1 of 80 x 952mm 16mm
SupaWood - footboard top
2 of 80 x 920mm 16mm
SupaWood - footboard
top/bottom supports
2 of 200 x 800mm 16mm
SupaWood - headboard sides
1 of 200 x 952mm 16mm
SupaWood - headboard top
1 of 200 x 920mm 16mm
SupaWood - headboard shelf
1 of 200 x 200mm 16mm
SupaWood - headboard shelf
divider
1 of 820 x 940mm 3mm white Masonite -
headboard backing
1 of 920 x 1900mm 16mm BisonBord - base
5 x 75mm cut screws
4 x 30mm cut screws
Ponal wood glue
Plascon Velvaglo water based enamel
Paintbrush and foam paint roller
TOOLS:
Drill / Driver plus assorted bits
Countersink bit
Pockethole jig (or substitute with biscuits
or dowels)
Sander plus 120- and 240-grit sanding pads
Find 16mm SupaWood at your local Builders Warehouse.
HERE'S HOW:
1. Drill 6 of 4mm countersunk pilot holes 8mm up from the bottom edge and along the length of the sides into the base. Leave a 200mm gap at the top of the base for mounting the headboard. Apply a bead of Ponal wood glue along the edge of the base and secure with 5 x 75mm screws.
GOOD TO KNOW
When it comes to finishing the bed you can fill these holes with wood filler or use 5-min epoxy glue to pop on screw cap covers to hide the screws.
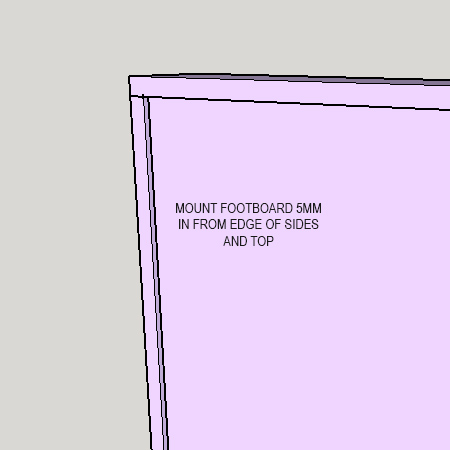
2. Assemble the footboard by drilling pocketholes on the back of the footboard (2 holes at the corner of the sides and top). Apply wood glue around the edge of the footboard and secure with 4 x 30mm to the sides and top.
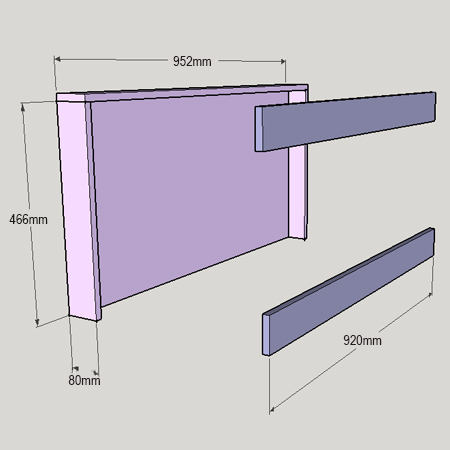
3. Drill 3mm countersunk pilot holes to attach the top and bottom supports. These supports provide strength and stabilise the footboard.
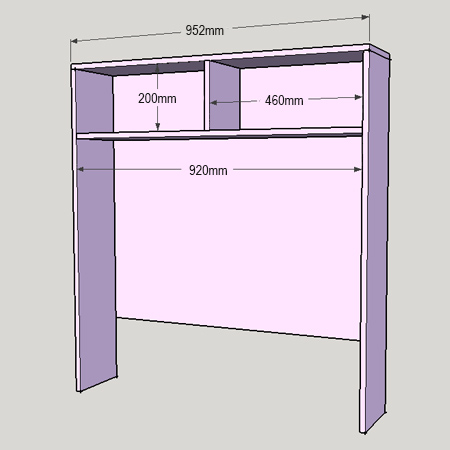
4. Assemble the headboard by drilling 3mm countersunk pilot holes through the top and into the sides and secure the sides with 30mm screws.
5. On the inside frame measure down 200mm and 216mm. On the outside frame measure down 216mm and 232mm. Place the frame on its back and use the guides to drill countersunk pilot holes for mounting the shelf. Secure with 30mm screws.
6. Measure and mark the centre to mount the shelf divider. Drill countersunk pilot holes through the top and shelf and secure with 30mm screws.
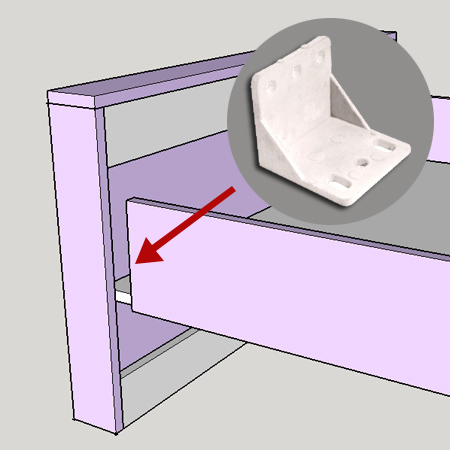
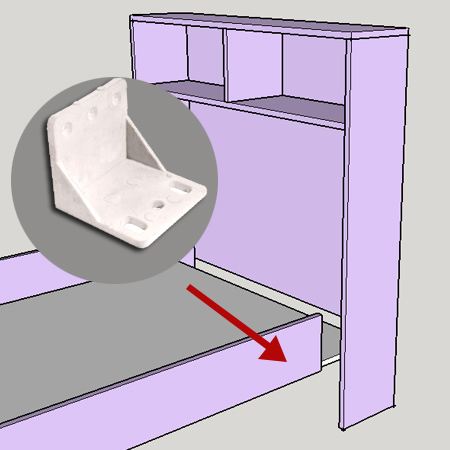
7. Now you are ready to attach the headboard and footboard to the base. You have the option to drill countersunk pilot holes through the sides and into the base, or use heavy-duty plastic or galvanised angle brackets to secure these sections to the base. The latter option allows for easy disassembly if you need to move the furniture.
Finishing
Fill all screw holes with wood filler and
sand smooth once dry. Sand any uneven edges with
120-grit sanding pads and then finish with
240-grit sanding pads. Wipe clean before
painting with Plascon Velvaglo water based enamel
for a washable finish.
Not responsible for errors or omissions