
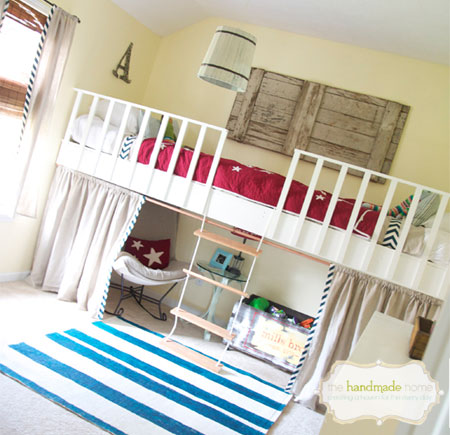
Build a loft bed
It's easy to build a loft bed... Think 1 box on 4 posts. It’s that simple. Let me dispel any false notions up front: I’m not sure my dad ever passed on to me how to hammer a nail. I’ve learned it all on the fly. So trust me – you, too, can easily build a loft for your kids to love.
.
thehandmadehome.net
YOU WILL NEED:
All wood is untreated pine and you don’t have to cut a single piece of wood, your local Builders Warehouse will do it all for you. Just measure up the size of the space and work out the sizes that you need.
20 x 100mm par pine for the bed frame
20 x 50mm par pine for the bed slats
20 x 44mm for the rails
20 x 76mm for the steps
100 x 100mm par pine for the support posts
16mm SupaWood for the mattress base
Plenty of lag bolts and wood screws [5 x 65mm]
Prominent Paints Premium Satin - white
Copper pipe, brackets and hooks for the curtain rail
Nylon rope for the stepladder
TOOLS:
Drill/Driver and assorted drill and screw bits
Countersink bit
Orbital sander with 120- and 220-grit sandpaper
GOOD TO KNOW
Be sure to sand all the pieces outdoors before you assemble everything indoors. Go over all the pieces with 120-grit sandpaper to remove and smooth; finish off with 220-grit sandpaper.
HERE'S HOW:
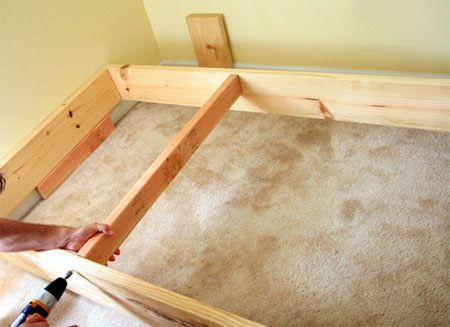
1. Lay out the four outside pieces that will form a rectangular box. Make sure the box corners are square then use 5 x 60mm screws to screw all four pieces together securing the outside of your box. Use two screws for every corner and countersink all the holes.
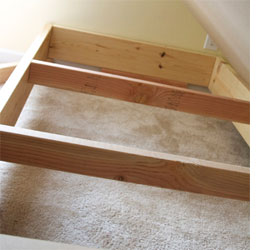
2. Next take place slats evenly throughout the inside of the box you have just made. Two or three slats should be sufficient.
Screw them in at the top edge of the box. Make sure the slats are flush with the top edge of the box to support the SupaWood board for the loft.
3. Lay 16mm PG Bison SupaWood boards over the frame and screw it in place. I recommend at least 5 screws on each beam and 2 in between each beam. However, in my book, there’s no such thing as too many screws.
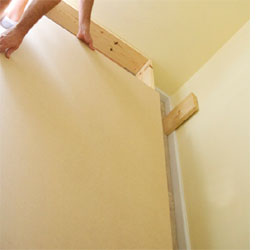
4. Find some friends, or people that owe you favours. You’ll need help in lifting the box and placing it on the posts. Once you have gathered your work crew, lift the box and place a post in each corner.
5. Make sure to push, knock, or flat out beat the post flush into those corners. Then take a lag screw and screw in through the top of the SupaWood down into the posts.
6. Next, take a lag screw and screw into the side of the frames running both ways of the corner.
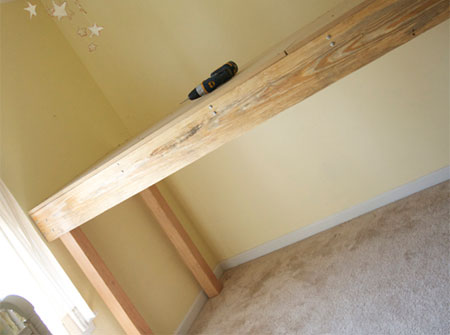
Before you know it, your platform is done. You’d never know from the finished photo, that this is a simple box on four posts.
If you're feeling insecure about the safety of the loft bed, you could also bang in a few anchors through the posts and into the wall. I suppose it depends on how dangerous your kids are!!!!!
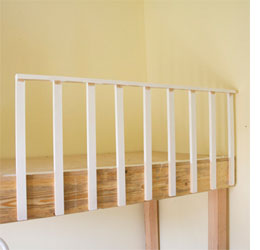
7. Add a railing to the edge of the loft bed for safety's sake. Again, you can have everything cut to size at your local Builders Warehouse. Screw the uprights onto the front of the bed at equal distances and the screw on the top support, leaving the lip on the outside of the loft.
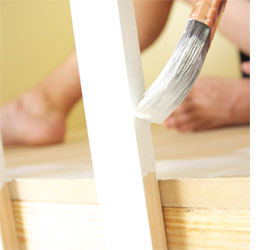
8. Apply two coats of Prominent Paints Premium Satin - white - with a paintbrush, allowing the paint to dry between coats.
You shouldn't need a primer if you are using PAR pine, but do pick out nice pieces of wood that don't have any resin blocks or hearts in them, as this could leach through the paint at a later stage.
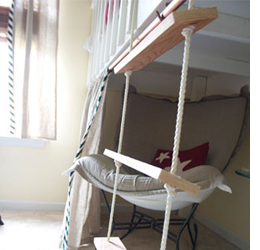
9. For the ladder, make sure that you use only nylon rope that is rated to carry a certain weight. We wouldn't want any accidents to happen. It should state on the pack. Drill holes into the steps to allow you to thread the nylon rope through. Starting at what would be the bottom rung I fed the rope through and tied a knot, any self-tightening knot will do. Move your way up each board with more knots. I spaced my boards at about 25cm.
10. Once you have done both sides, not forgetting to make sure the boards are level you will be ready to attach the rope ladder. Use eye hooks and screw them into the SupaWood board about 3cm back from the edge. Make sure that they will screw into not only the SupaWood board, but the frame as well. Once screwed in, feed the rope through the eye hook; tie it off, and cut the excess.
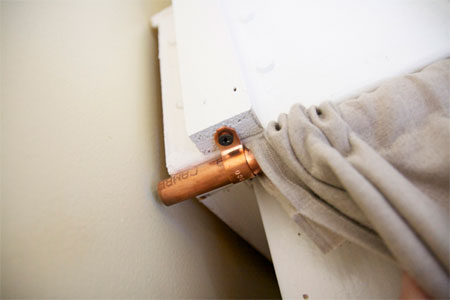
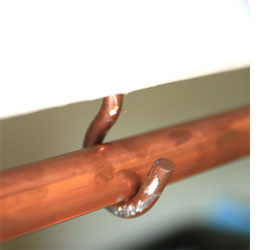
11. The curtain rail is a copper pipe extending all the way across the length of the bed and fixed onto the frame with mounting brackets. We minimized drooping in the middle by screwing in a hook in the centre to support the rod.
The total cost for this project was a bit more than we originally anticipated, at about R3500. The posts at the bottom alone, accounting for half the cost. (Ouch.) But we sold the old furniture that was in the space to fund this one, and if you purchased a plain old bunk bed, it would be much, much more than this amount. So all in all, we say it was a great, price efficient project.