Make a Drop-Down Clothes Drying Rack
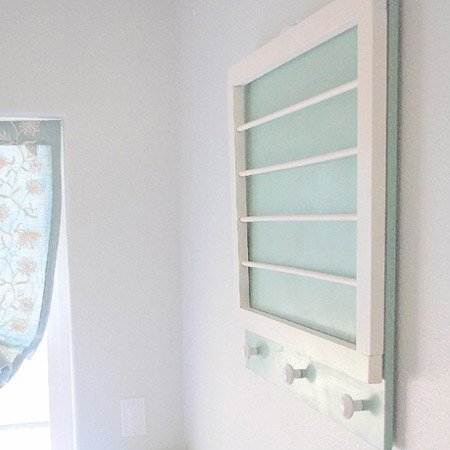
This drop-down clothes drying rack is mounted onto the wall and is an easy drying solution for towels, delicates and undies!
03/09/2021
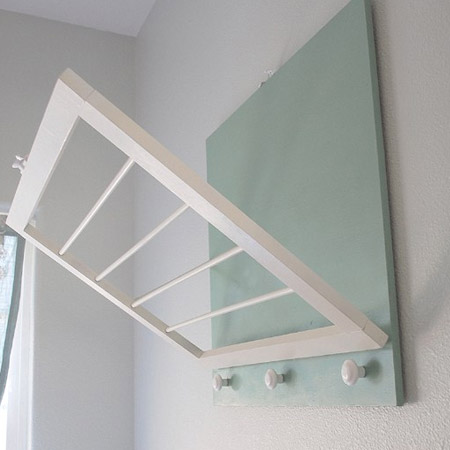
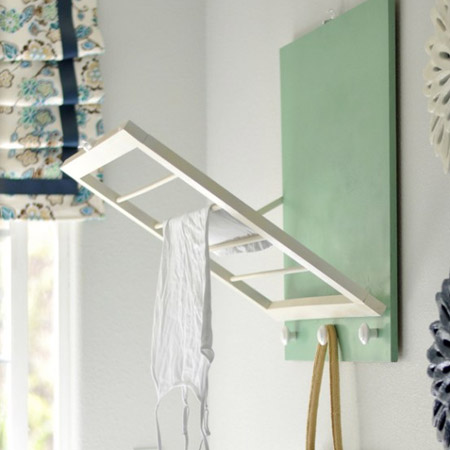
What a wonderful project for occasional washing that you don't want to put outside. This simply folding drying rack is mounted onto the wall and easily pops down for towels, delicates and undies! When open, it has four rungs for drying several layers of clothing and when not in use, it folds up flush with the wall, with the help of the sash lock on top.
YOU WILL NEED:
Pine board cut to 600 x 600mm
2 of 22 x 50mm pine cut to 600mm length
2 of 22 x 50mm pine cut to 500mm length
2 of 8mm dowels of 2,4m length
Sash lock and screws
2 of hinges and small screws
Hangers for mounting on wall
Bracketed hinge for side (or chain with small screw eyes)
4 of pine knobs
Primer for wood
Rust-Oleum Painters Touch - Granite and Heirloom White
TOOLS:
Drill-Driver with 8mm drill bit and screw bit
Wood nails
Jigsaw or hand saw
Hammer and rubber mallet
Alcolin fast set wood glue
HERE'S HOW:
1. With your 8mm drill bit, drill holes for your precut dowel rods. Drill to a depth of 5mm on either side. Use a piece of masking tape on the drill bit so that you do not drill too deep. Pour a small amount of wood glue into the drilled holes and use a mallet to hammer dowel rods into predrilled spots.
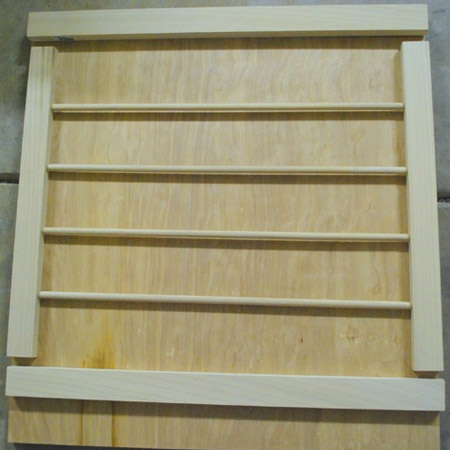
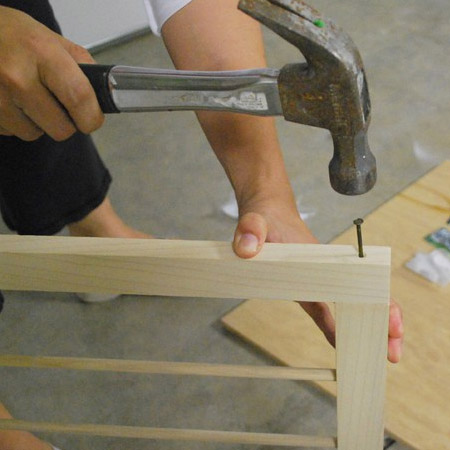
2. Finish assembling your rack with wood glue and wood nails.
3. Prime your wood drying rack, then paint with your colour of choice. I used a spray primer, then once it was dry, I applied Rust-Oleum Painters Touch to the back. Once the back was dry, I covered it with newspaper, and painted the dowel rods and frame with Rust-Oleum Heirloom White.
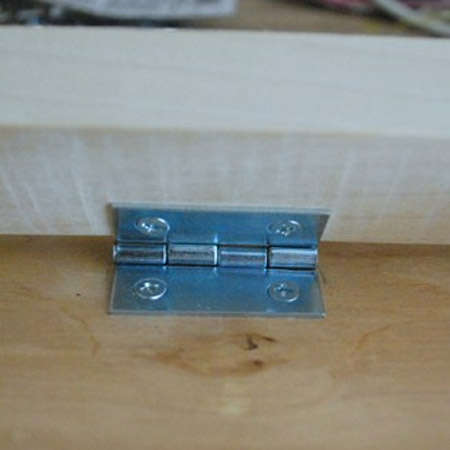
4. Place the frame against the board and use a pencil to mark the bottom. Attach your hinges to the bottom of the frame and the board using screws and a cordless screwdriver.
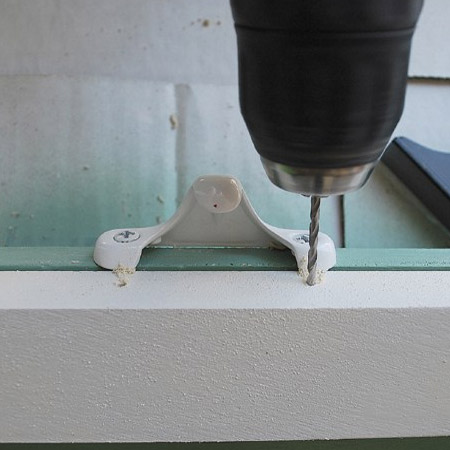
5. Attach the sash lock to the top of your drying rack. It’s a good idea to drill pilot holes first so that when you drive your screws in, you have a much better chance of avoiding any visible split in your wood.
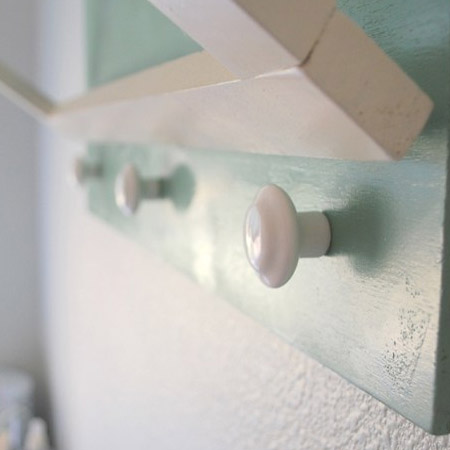
6. Drill holes and attach the knobs.
7. Attach a hinged bracket, or a chain with screw eyes, to keep your drying rack at your desired angle when open. Attach hangers to the back, and hang on your laundry room wall.