
How to Refinish Wood Furniture
Over time, the finish on wood furniture might need to be restored or refinished and there are ways to repair and restore without having to strip the existing finish.
28/07/2019
There is nothing quite as beautiful as wood furniture, particular antique, vintage or reproduction pieces of wooden furniture that tell a story. The amazing detail that was applied using hand tools, the intricate joints that let you know the age of a piece, and the care that was given to pieces to ensure that they last a lifetime.
To ensure that any wood furniture stays looking beautiful and isn't marred by stains, scratches and dents, you will need to restore and finish from time to time. Stripping wood furniture is a messy business and there are plenty of tricks that you can use to restore and refinish furniture without stripping. We share a few expert methods that you can try for yourself if you need to refinish a beautiful piece of wood furniture.
Determine the finish on wood furniture
Too many people look for advice on YouTube and end up stripping furniture with results that were not what you expected. In fact, it's amazing how many people claim to be experts all of a sudden, and yet, none have any actual training or experience in woodworking.
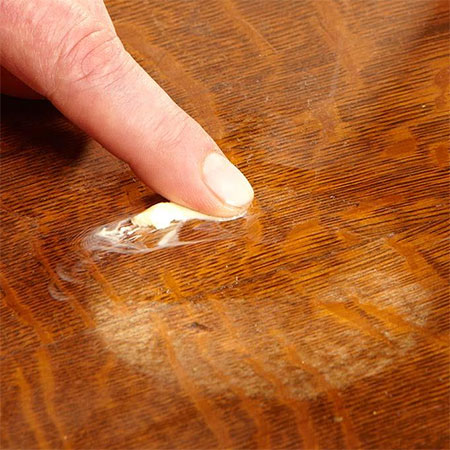
The first step in any restoration or refinishing project is to determine the finish that is on the piece. The best way to determine what needs to be done is to apply mineral spirits (mineral turpentine) to the finish. By applying mineral spirits to the surface will temporarily reveal any defects. If the finish looks great after applying mineral turpentine, you can simply re-apply sealer or varnish or your choice of finish. If the finish doesn't look that great when wetted with turpentine, we offer some ideas below on how to proceed to the next step.

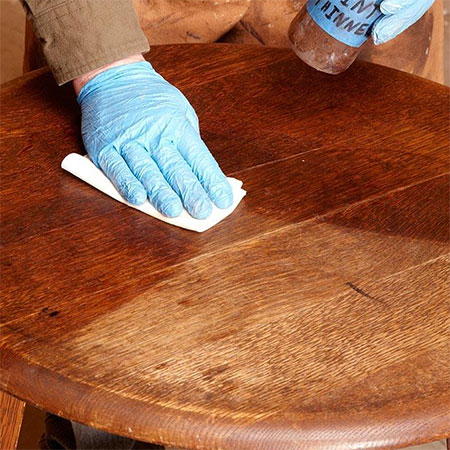
Clean before refinishing
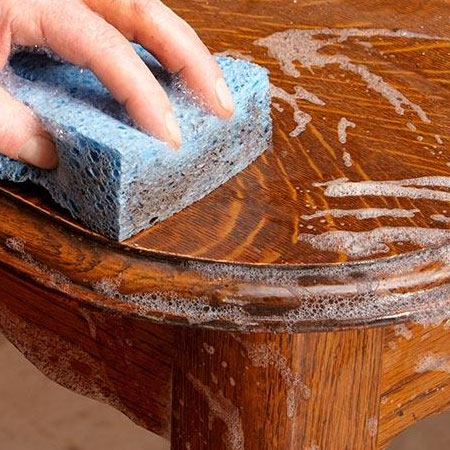
Before any refinishing takes place, it is important to remove all the dirt and grime that has built up over the years. You don't need any special products for this step, just some mild dishwashing liquid - or saddle soap - and clean water. Use a sponge to wipe down the surface as this helps to get into all the nooks and crannies and any detailed areas. Don't use the sponge sopping wet - squeeze out most of the water before you wipe down.
GOOD TO KNOW: Where there are carvings or relief details on the piece, use a paintbrush to get into these areas.
After cleaning, wipe down with the sponge and clean water and dry with a soft towel or cloth.
Remove paint spatters
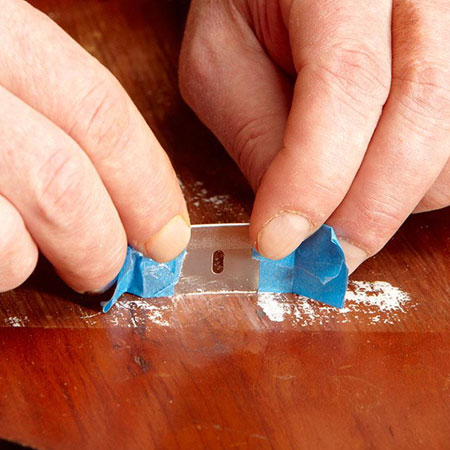
On older furniture you regularly come across paint spatters. These can be easily removed using a utility knife (carpet cutter) or razor blade - and you don't damage the finish. Wrap masking tape around the ends of the blade to protect your fingers and gently curve the blade. The masking tape also helps to slightly elevate the blade so that you won't scratch the finish of the wood and let's you gently remove paint spatters.
The masking tape holds the blade slightly off the surface so you can knock off paint spatters without the blade even touching the wood. Tilt the blade at a slight angle to adjust the depth.
Fill splits and cracks in wood
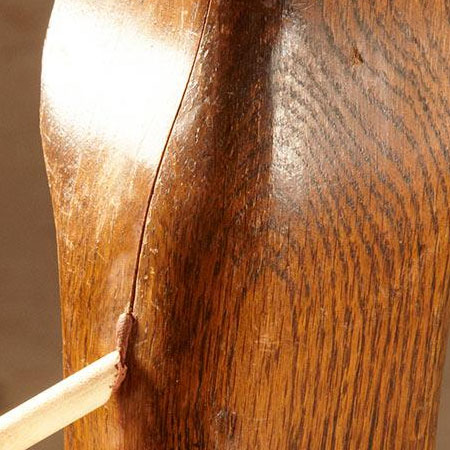
Wood filler is ideal for filling any splits or cracks in wood furniture. Do buy a tinted wood filler that will match the final finish to be applied. You can also use a putty finish fill stick or wax sticks if you can't find the right tint of wood filler or don't need to apply sealer or varnish and just want to cover up and fill scratches.
Fill dents and gouges
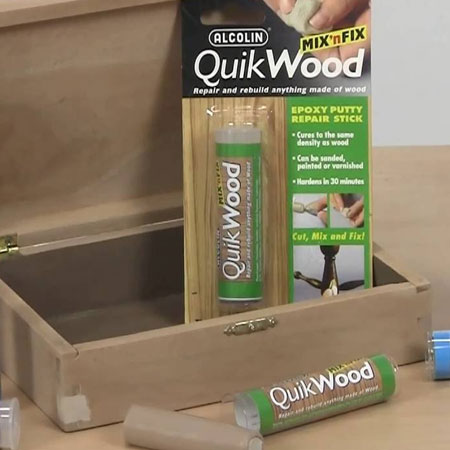
Where there are gouges or missing pieces, particularly on a veneer finish, you can use Alcolin QuikWood to fix these. Keep in mind that you might need to colour the epoxy putty to match the final finish colour, and you can use a small quantity of artists oil paint to do this.
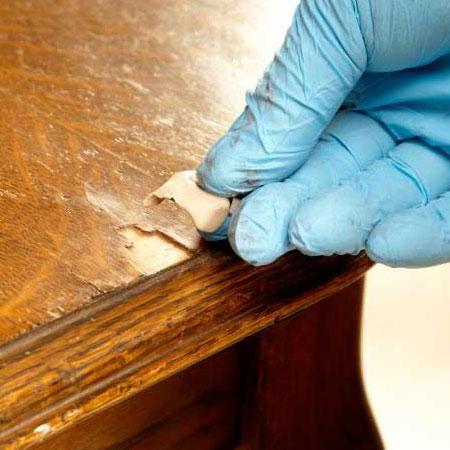
Use a sharp craft or utility knife to slice off a piece of epoxy putty (QuikWood), wet your fingers and knead the putty to a consistent colour. Work quickly, as the putty starts to set once combined.
GOOD TO KNOW: Only slice off small sections at a time, so that you can work before the putty starts to harden.
The epoxy putty sets rock hard in about 5 to 10 minutes, but do any light sanding to blend the area before the putty sets too hard. After application and once set hard, buff with a soft cloth.
Bring back the natural beauty of wood
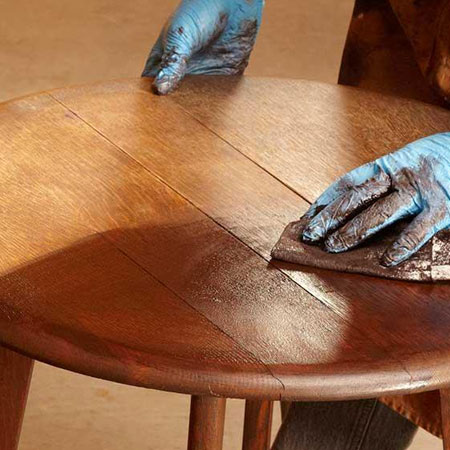
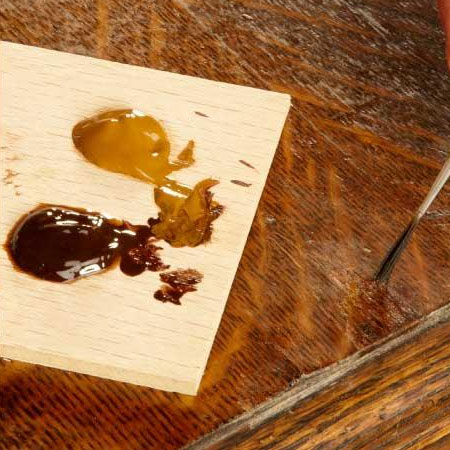
Sometimes all that is needed to restore the natural beauty of wood is to apply a finish. It is amazing what a coat of furniture wax, oil, sealer or varnish can do. If the natural wood colour has faded over the years or the original finish has worn away, apply a rich wood stain, tinted sealer or varnish. Follow the recommended instructions for proper application and a successful finish.
You may also discover that by doing this, any hairline scratches or blemish will be covered up and you don't need to do anything else to refinish the furniture.
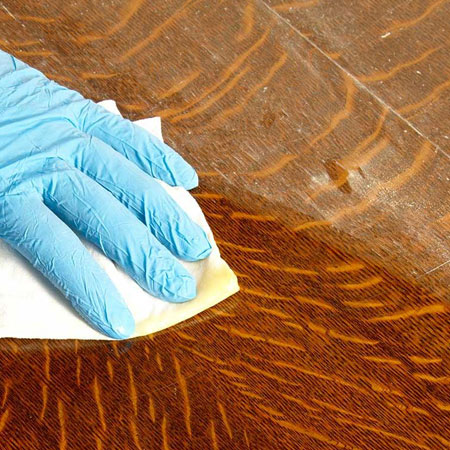
Regular wipe-on treatments
After all the repairs have been done, you can instantly renew wood furniture with the application of a wipe-on treatment. Your local Builders or hardware store will have a variety of products on the shelf that can be used to restore lost sheen and offer protection.
Wipe-in finishes are easy to apply but do need to be applied regularly, or as soon as your wood furniture starts to dull. Use a soft cloth to apply your choice of wipe-on treatment. Howard have a range of products that will bring out the beauty of your wood furniture and extend its lifespan.
images: family handyman