
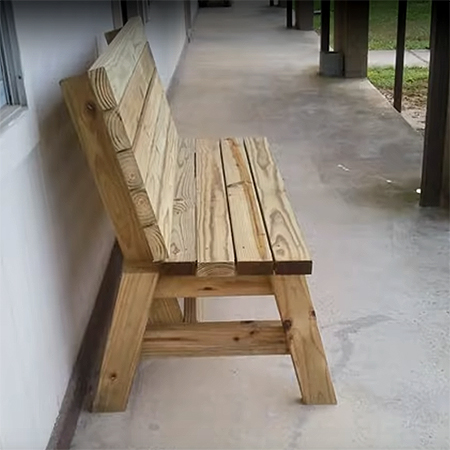
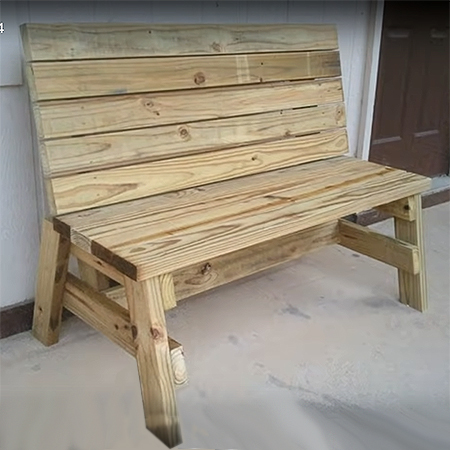
Make a Pine Garden Bench
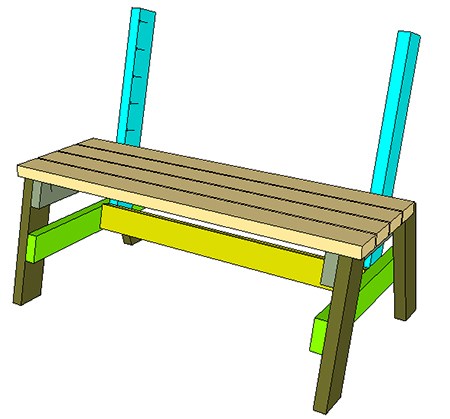
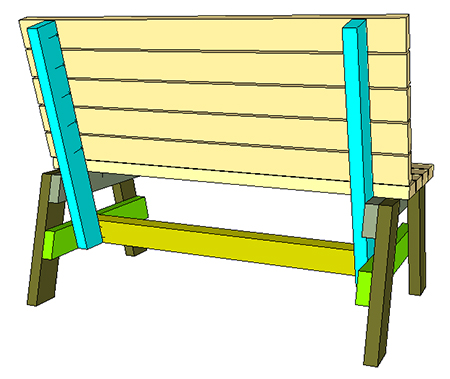
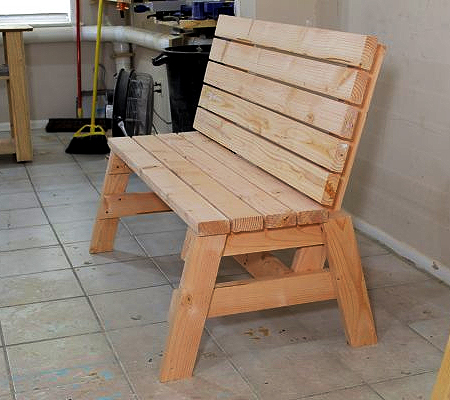
This pine garden bench offers the perfect seating for on a deck or patio, or even when placed under a shady spot in the garden.
17/10/2021
Anything made with pine is going to be affordable when compared to the cost of other hardwoods, and this pine garden bench is just one example of how you can use ordinary PAR pine that you will find at your local Builders store. Pine is classed as softwood and that means it is not only affordable but very easy to work with non-specialist power tools. If you have a drill/driver, jigsaw, sander and Kreg pocket-hole jig, you can easily make this pine garden bench.
One thing you must keep in mind, especially for outdoor furniture and particularly for pine, is that whatever you make must be protected from the elements. Pine even more so because if left untreated the wood will eventually rot, warp and bend. There are many finishing options to consider, but none as good as the Woodoc range of products. Use an exterior sealer such as Woodoc 50 or Woodoc 55 (for coastal regions) to provide protection and apply this regularly as and when required, usually every 18 months or so.
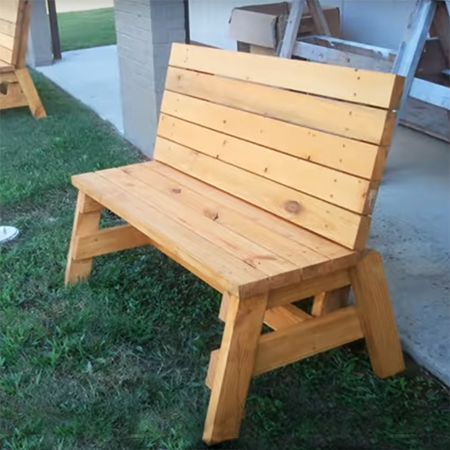
This pine garden bench easily sits two people and is a simple project to make. So simple you may even want to make more than one bench. After assembling the bench, you can stain and seal or paint in your choice of colour using exterior-grade acrylic paint or water-based enamel. If painting, do apply a quality wood primer before applying the paint finish as this will ensure longevity of the finish.
YOU WILL NEED:
8 of 32 x 94mm x 2400mm PAR pine
32mm Coarse-thread pocket-hole screws
4 x 40mm cut screws
Exterior wood glue
Choice of finishing ESSENTIAL
TOOLS:
Drill/Driver plus assorted bits
Kreg pocket-hole jig
Jigsaw
Orbital Sander plus assorted sandpaper
Tape measure and pencil
Safety gear
HERE'S HOW:
Step 1
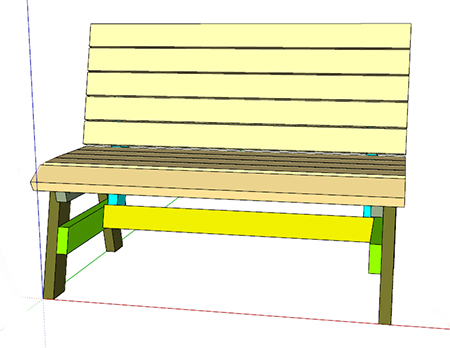
Use the cutting list below to cut all the pieces required for the garden bench. You can use a jigsaw, or you can cut with a mitre saw, circular saw, table saw or hand saw. The cutting list also denotes the angles that need to be cut on the various pieces.
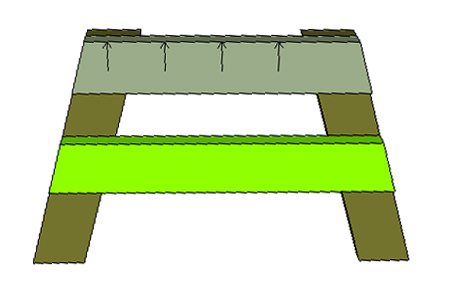
After cutting all the pieces you need. check both sides to see which is the better finish and place these face down on a flat surface. This is to ensure that the good side will face out since the project is made inside-out so that screws will not be visible.
CLICK ON IMAGE FOR ENLARGED VERSION

Step 2
The above diagram also indicates the approximate location for drilling pocket-hole in order to assemble the garden bench. These are not accurate but simply indicate how many pocket-holes you need to drill and the location. Drill pocket-holes on the Upper Horizontal Legs (508mm) and Back Supports (787mm). Don't forget to mirror the cuts for the left and right pieces so that the pocket-holes are in the correct position.
Step 3
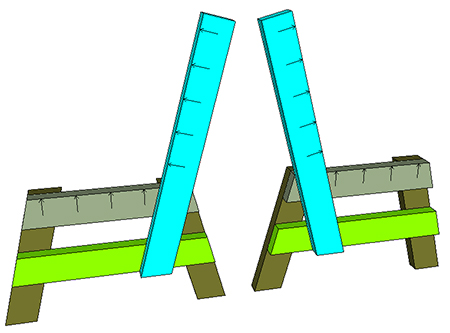
Using the diagram below, start assembling the left and right Leg Assemblies. Place the Vertical Legs on a flat surface and place the horizontal supports as shown below, marking the location with a pencil.
Start with the Top Horizontal Support (508mm) and secure with exterior wood glue and 40mm screws. These screws will be visible but are underneath the bench so it's ok. Use 3 screws per end arranged diagonally for better support. Now place the lower Horizontal Support on the pencil marks and secure in the same way.
Step 4
In this step, you will attach the Back Support, again as shown in the diagram below. Be careful not to drive in screws where these are located on the Leg Assemblies. Use glue and 40mm screws to secure the Back Supports.
Step 5
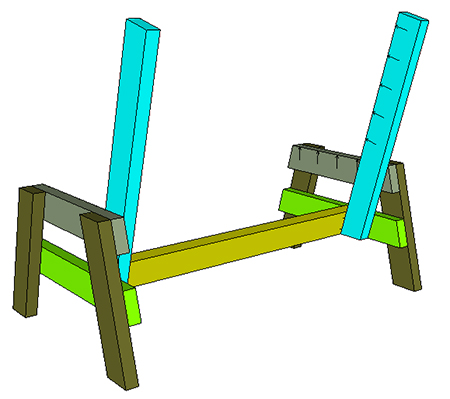
In this next step, you are adding the Cross Support that holds the Left and Right Leg Assemblies in place. Fit the Cross Support so that it fits against the Back Support on one side - it is better to start on one Leg Assembly and then align everything to attach to the other Leg Assembly. Use wood glue and pocket-hole screws to secure the Cross Support in place.
Step 6
To attach the Seat Slats, double-check that the best side is facing forwards before securing the first Seat Slat firmly against the Back Support. You will need to lift the assembly in order to secure with pocket-hole screws underneath.
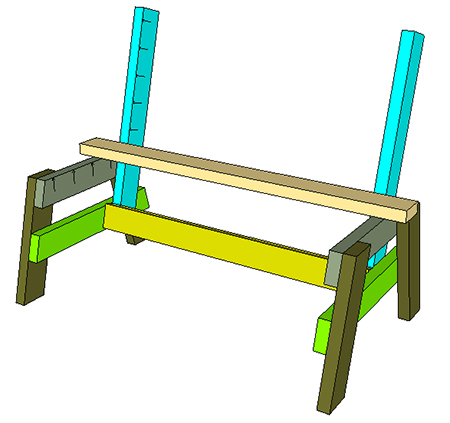
Test fit all the remaining Seat Slats and mark the location with a pencil, allowing an equal gap between all the slats. Secure these to the Leg Assemblies in the same way as for the first Seat Slat. Don't forget to make sure the best side is facing up.
Step 7
Follow Step 6 to secure the Back Slats onto the Back Support by using the pocket-holes along the Back Support. Use exterior wood glue and pocket-hole screws to complete the assembly.
Finishing
As mentioned before, it is essential that you finish off the pine garden bench with an exterior-grade clear or tinted sealer or exterior acrylic PVA. Sand well before you finish and wipe away any traces of dust.
Thanks to jayscustomcreations.com for this simple project that you can make in a day.