
Handy Wall-Mounted Desk
This handy wall-mounted desk is great for a workshop or craft space where you need to set up a place to work.
16/12/2018
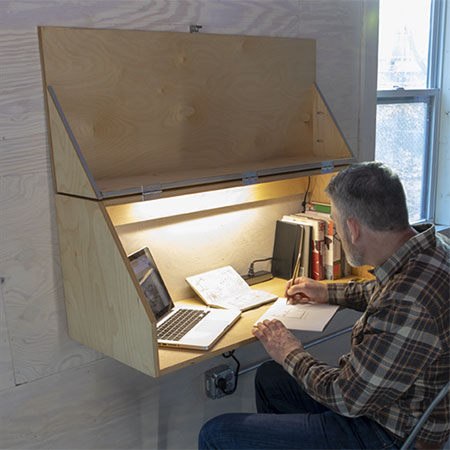
This handy wall-mounted desk from Build Something is perfect for a workshop or hobby room. It takes up hardly any space and the flip-top allows for a laptop or small PC and office essential while keeping dust and dirt out. Now you can keep your craft and project plans organised and easy to find when you need them.
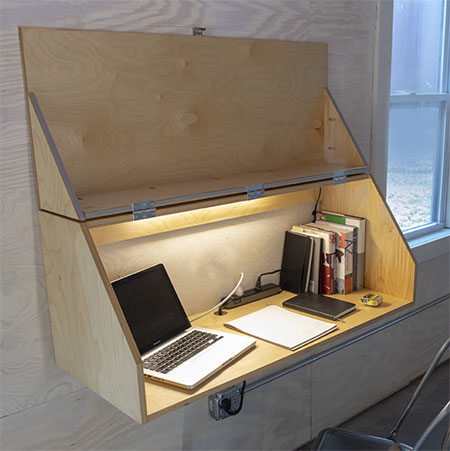
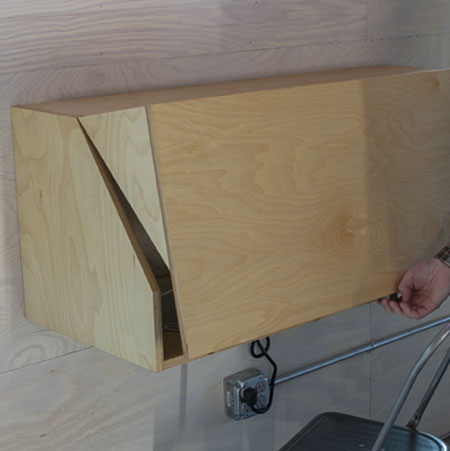
The wall-mounted desk has a flip-top that allows you to close when not in use, protecting your office equipment and supplies. Made using 16mm pine plywood, this is an easy project you can complete in a day.
YOU WILL NEED:
1 of 1105 x 460mm 16mm plywood - desk base
2 of 460 x 438mm 16mm plywood - desk sides/lid sides
1 of 1105 x 230mm 16mm plywood - desk top
1 of 1105 x 100mm 16mm plywood - cleat
1 of 1105 x 230mm 16mm plywood - lid top
1 of 1137 x 438mm 16mm plywood - lid front
Wood glue
25mm pocket hole screws
3 of butt hinges and 16mm screws
3 of nylon wall plugs and screws
OPTIONAL: Pocket hole plugs to fill holes
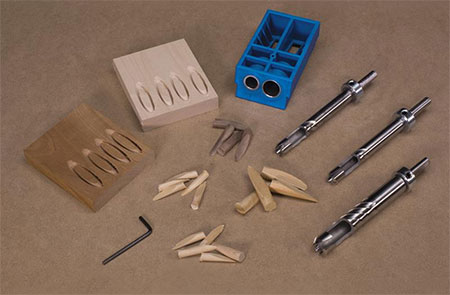
TOOLS:
Drill/Driver plus assorted bits
Kreg pocket hole jig
Mitre saw or jigsaw
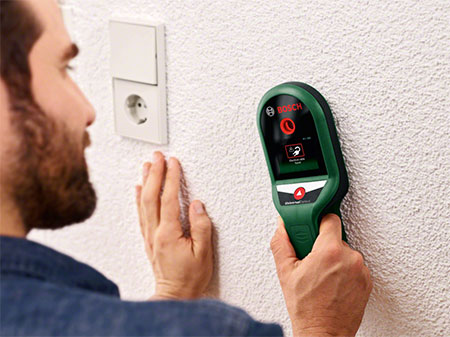
Digital detector
Tape measure and pencil
Not responsible for errors or omissions
HERE'S HOW:
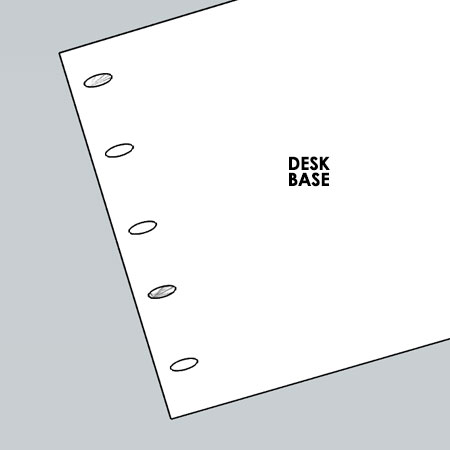
Set up your Kreg pocket hole jig for 16mm thick material.
1. Drill [5] pocket holes along both sides of the Base.
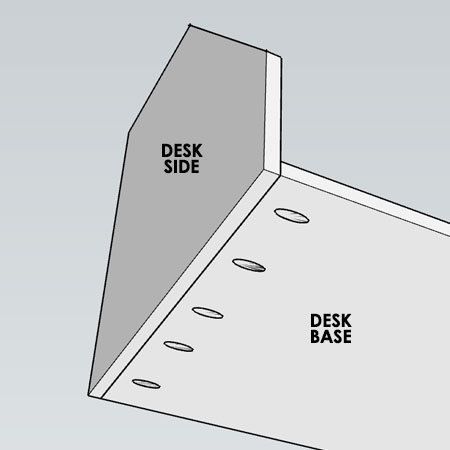
2. Cut the sides sections into two pieces: a Desk Side and a Lid Side. The design accommodates the 3mm-wide blade thickness when cutting with a mitre saw or jigsaw.

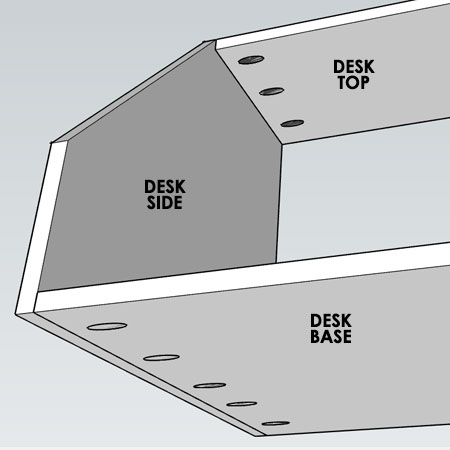
3. Attach the Desk Sides onto the Base with wood glue and 25mm pocket hole screws.
4. Drill [3] pocket holes along both ends of the Desk Top and secure this to the sides with wood glue and 25mm screws.
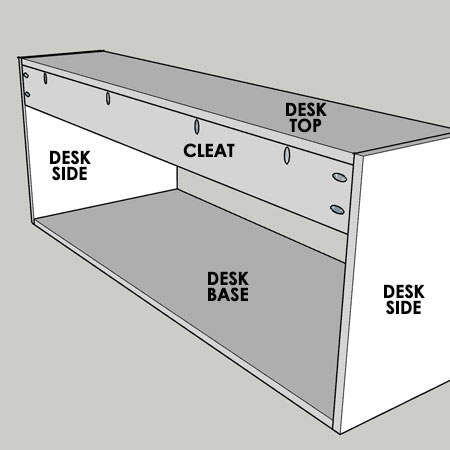
GOOD TO KNOW: The cleat at the back of the desk supports the weight of the desk when mounted onto a wall. Since it needs to bear a lot of weight, make sure to apply glue to all three sides.
5. Drill [2] pocket holes at both ends of the Cleat and [4] pocket holes along the top edge. Secure the Cleat to the Desk Sides and Desk Top with 25mm screws.
GOOD TO KNOW: When mounting the desk to the wall, drill through the Cleat to mount with nylon wall plugs and screws.
6. On both Lid Sides drill [2] pocket holes along the front angle, as shown below. Secure the Lid Sides to the Lid Top with wood glue and 25mm screws.
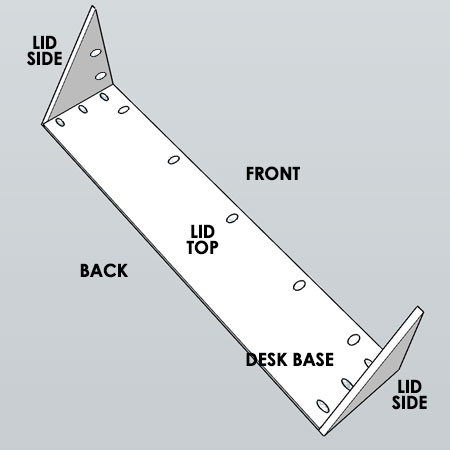
7. Position the Lid Front so that it is flush along the top and side edges. Secure to the Lid Sides and Lid Top with wood glue and 25mm screws.
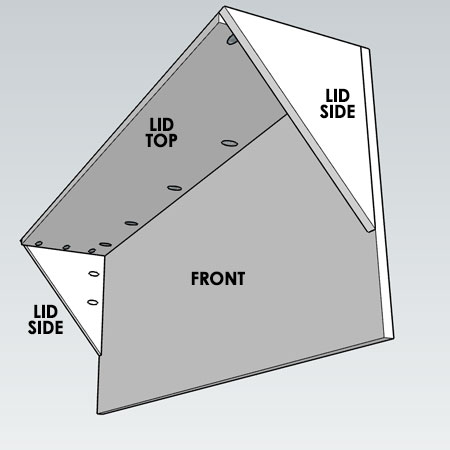
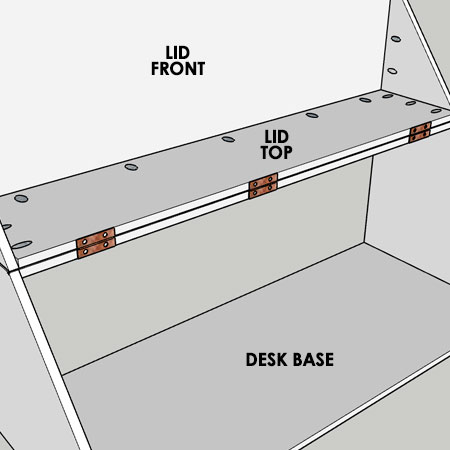
8. Place the Lid on top of the desk and attach butt hinges along the edges to join together. Make sure the barrel (pin) of the hinge is in the centre gap and that the Lid and Desk sections are flush along the edge.
Finishing
Sand all the edges and wipe clean before you apply your choice of finish. A nice finish for pipe plywood is to use Rust-Oleum Ultimate Polyurethane for a finish that is totally matt and very natural looking, or apply a satin or gloss finish if you prefer this. A finish is essential if you want to be able to keep your new desk clean.
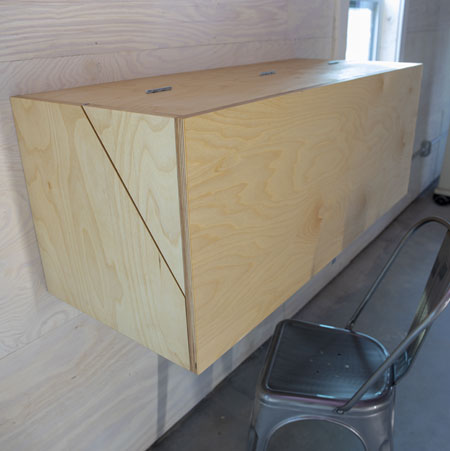
Installing the Desk
When mounting the desk onto a wall you should always use nylon wall plugs and screws. Drill holes through the clear and transfer the measurement onto the wall to drill holes for the wall plugs. Screw through the back cleat to secure in place.