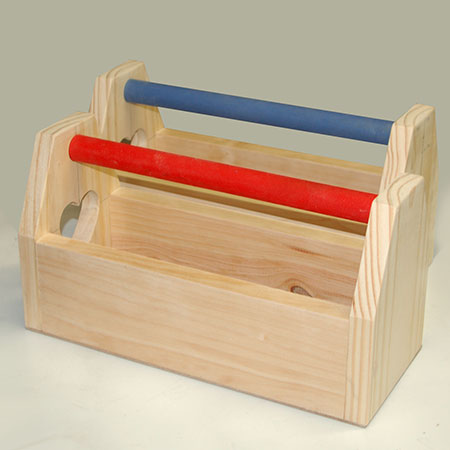
His and Hers Tool Caddy
With Valentine's Day just around the corner I thought it might be nice to do a his and hers project. A tool caddy is handy for carrying your tools around and we made a his and hers tool caddy!
30/01/2018
Our His and Hers Tool Caddy was made using some leftover pieces of pine, and you can make them as small or as large as you want.
YOU WILL NEED:
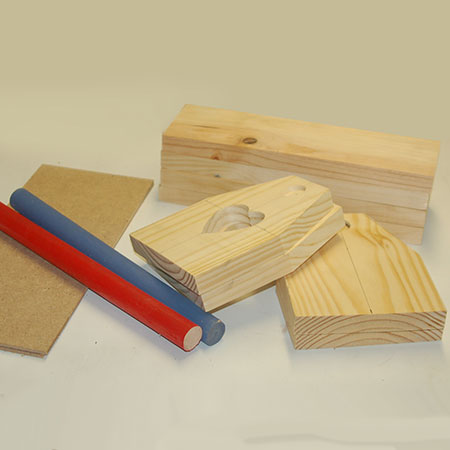
2 of 144 x 180mm pine - ends
2 of 94 x 300mm pine - sides
1 of 25mm dowel 310mm in length - handle
4 x 40mm screws [4]
1 of 3mm Masonite/Evowood base, cut to fit
Wood glue
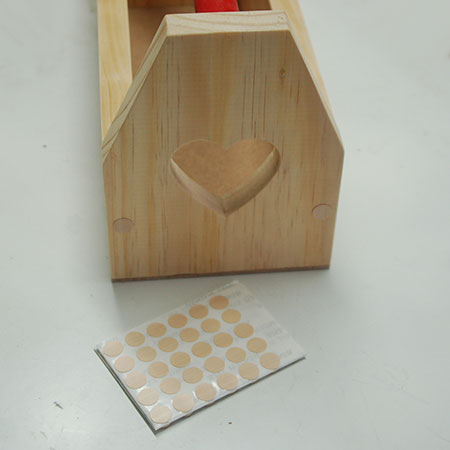
Screw covers
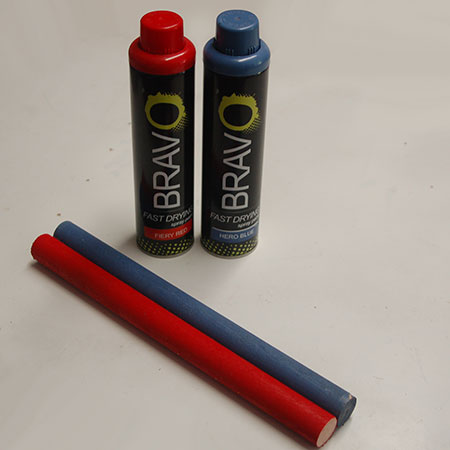
Bravo spray paint in red and blue
TOOLS:
Drill / Driver plus assorted bits
Jigsaw and/or mitre saw or table saw
35mm Forstner, MAD or spade bit
Sander plus 180-grit sanding pads
Bosch Tacker, heavy-duty staple gun or hammer and panel pins
Tape measure and pencil
Buy everything you need for this project at your local Builders.
HERE'S HOW:
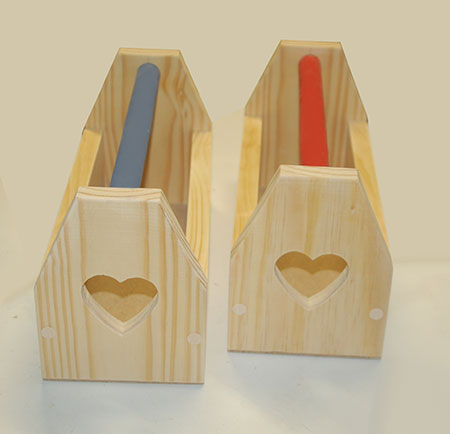
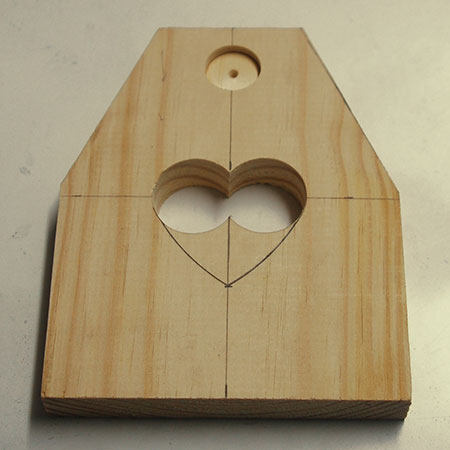
1. Use a jigsaw, mitre saw or table saw to cut the corners off both the end pieces. The bottom of the cut should be 94mm up from the bottom and leave a 70mm width at the top for mounting the handle.
2. Before assembly, sand all the pieces smooth and spray paint the handles. We used Bravo spray paint in Fiery Red and Hero Blue. Brave spray paint is available in 14 gloss and matt colours at your local Builders. If you have any difficulty sourcing the product get in touch with www.spraymate.co.za
2. Mark and draw the location for the heart cut-out. We drew a line from the bottom of the angled cut on the sides and centred in the middle of the side. Cut out the curved tops of the heart shape with a 35mm Forstner, MAD or spade bit and the remaining with a jigsaw.
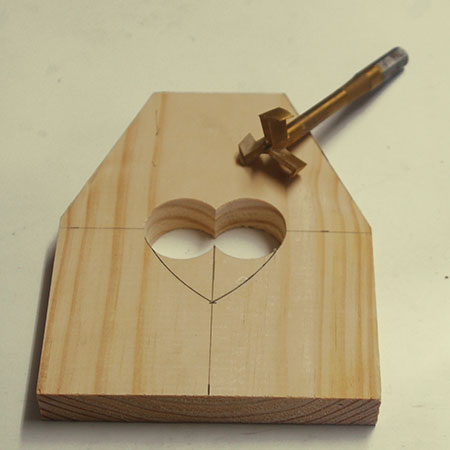
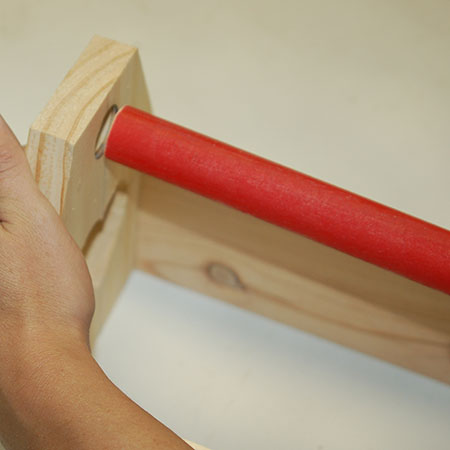
3. Also drill a hole for the 25mm dowel. The depth is 5mm on both sides.
4. Use wood glue to attach a side piece to each side. Don't join these together just yet.
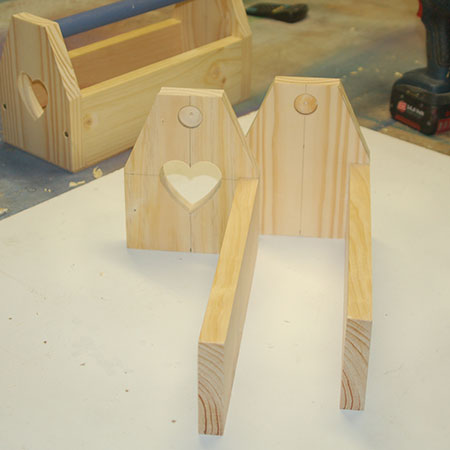
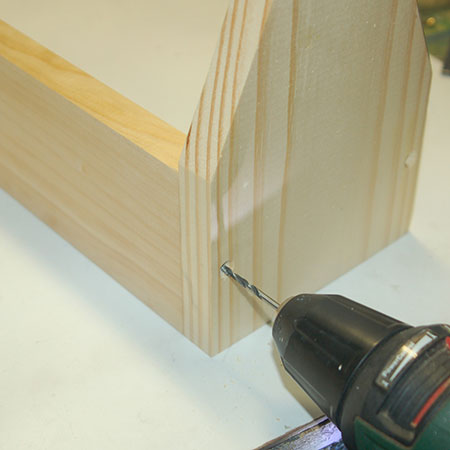
5. Drill a countersunk pilot hole through each end into the side and secure with 40mm screws.
6. Before joining the two ends insert the dowel. Apply wood glue to the ends of the sides and push the two sections together.
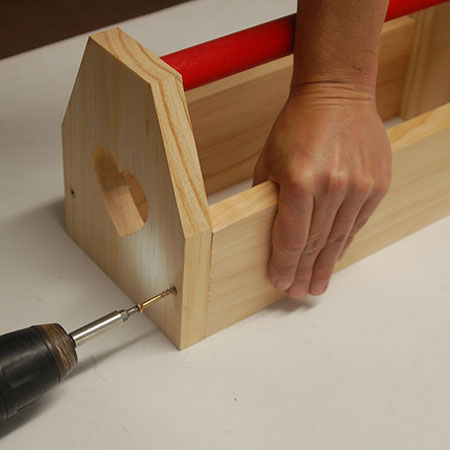
7. Drill countersunk pilot holes and secure with 40mm screws.
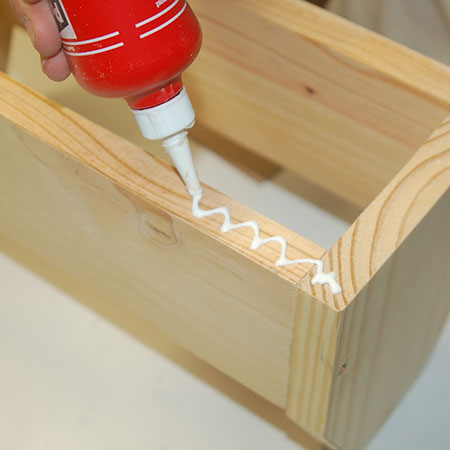
8. Turn the caddy upside down and apply a bead of wood glue around the bottom edge.
9. Cut a piece of 3mm Masonite/Evowood to fit.
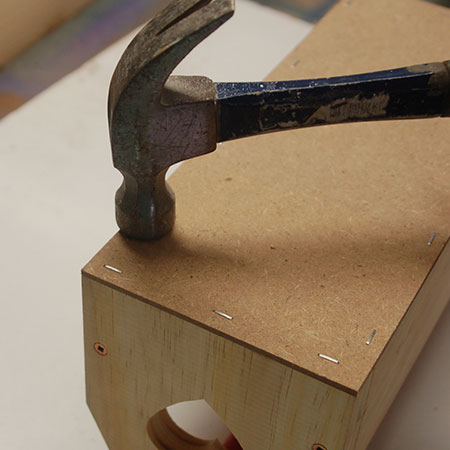
10. Secure the base onto the caddy with a Bosch Tacker, heavy-duty staple gun, or hammer and panel pins.
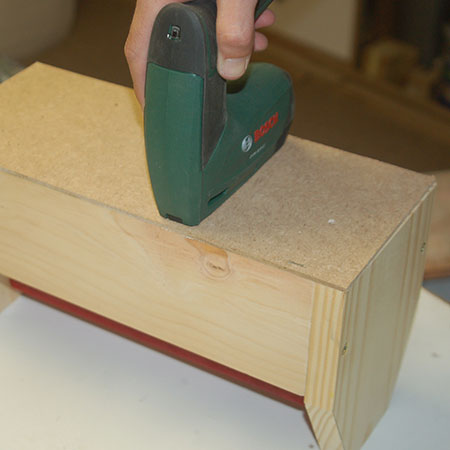
GOOD TO KNOW: Use a hammer to tap in any staples that are not flush with the base.
GOOD TO KNOW: Self-adhesive screw covers are perfect for hiding screws.