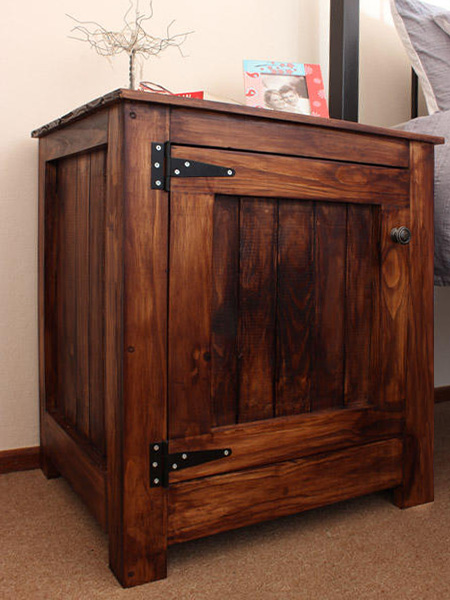
Affordable bedside cabinet using pine tongue and groove
Pine tongue and groove is inexpensive and allows you to make affordable projects with timber that are rustic and practical. This bedside cabinet is easy to make and won't cost you a fortune at around R450 for the materials.
This project was featured in The Home Handyman magazine and the new offer an online version of the magazine for those of you who prefer to view a digital version.
YOU WILL NEED:
1 of 610mm x 2400mm laminated pine shelving cut to sizes:
- 4 of 667mm x 38mm
- 4 of 667mm x 63mm
- 2 of 324mm x 50mm
- 2 of 324mm x 90mm
- 2 of 432mm x 63mm
- 2 of 432mm x 90mm
- 2 of 428mm x 63mm
- 2 of 347mm x 63mm
- 1 of 520mm x 400mm particleboard
20 of 1100mm knotty pine planks
3 x 25, 4 x 30mm and 4 x 35mm screws
2 hinges and screws
Knob of your choice
Woodoc 5 matt sealer
Woodoc Gel Stain – Imbuia
Wood glue
Disposable or rubber gloves
TOOLS:
Drill / Driver plus assorted bits
Kreg pockethole jig set
Mitre saw
Circular saw, jigsaw or table saw
Orbital sander plus 120- and 240-grit sandpaper
Carpenter's square
Tape measure and pencil
Quick and spring clamps - as many as possible
Buy all the supplies that you need for this project at your local Builders Warehouse.
HERE'S HOW:
Step 1
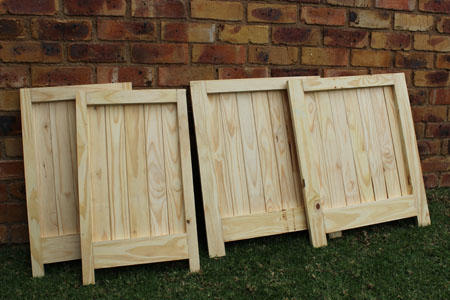
The design of the bedside cabinet comprises four frames: two sides, a front and back. Start with 2 of 667mm x 38mm pieces, 1 of 324mm x 50mm and 1 of 324mm x 90mm piece. Use a pockethole jig to attach the 324mm piece between the two 667mm pieces. Also attach the 324mm x 50mm pieces flush with the top of the two 667mm pieces, while the 324mm x 90mm pieces go 50mm up from the bottom of the 667mm pieces. Secure with wood glue and 25mm screws.
For the remaining 667mm x 38mm, 324mm x 50mm and 324mm x 90mm pieces, put the pieces together exactly the same as the first one. The 667mm x 63mm, 432mm x 50mm and 432mm x 90mm are put together the same way as the sides. The only difference with these is that they are a bit wider.
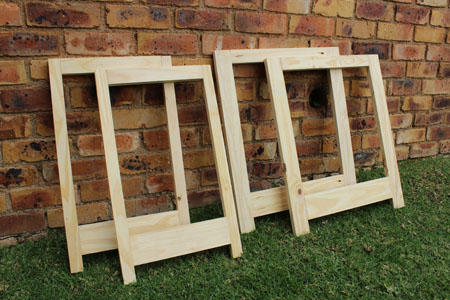
Step 2
Attach the knotty pine planks on the inside of the frames (where the pocket holes were drilled). The two frames for the sides take five pieces of knotty pine, while the back frame takes seven pieces. Knotty pine isn’t fitted to the front frame as it gets a door later on. Cut the knotty pine pieces 520mm long to allow an overlap to secure to planks to the frames with 30mm screws.
GOOD TO KNOW
Drill 3mm pilot holes
through the tongue and groove planks to prevent
any splitting when attaching the planks to the
door frame.
Step 3
To assemble the frames place the sides between the front and back (edge to face). Place the back frame and a side upright on your workbench. Apply wood glue all the way down the edge of the side frame. Clamp the edge of the side frame to the inside face of the back frame. Make sure the two are flush all the way to the bottom.
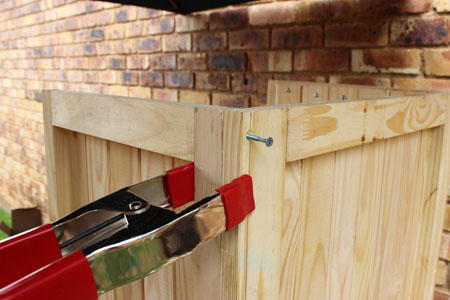
GOOD TO KNOW
You need to get your
hands on as many clamp as possible. Pine has a
reputation for being warped and you will need to
apply pressure to glue everything in place.
Step 4
Once you are satisfied that everything is flush, drill 3mm pilot holes at the top, middle and bottom, countersink and screw the frames together with 35mm screws. Continue to fasten the other side frame to the back frame in the same way. Lastly, attach the front frame to the sides.
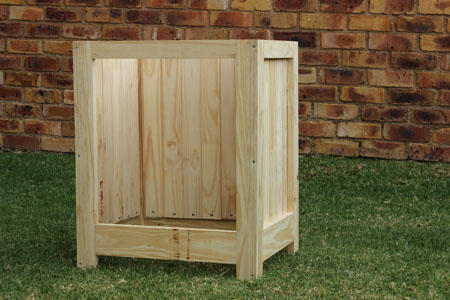
Step 5
Drill pocketholes at each corner of the base. Put the base in place and measure all the way around to make sure it is level. Secure in place with 35mm screws.
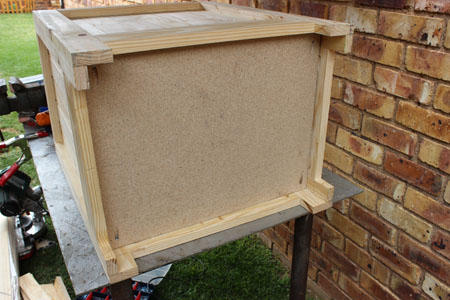
Step 6
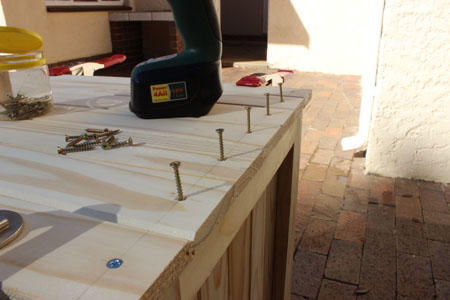
Cut 7 pieces of tongue and groove measuring 580mm each, trimming the ends of each plank. Make sure the planks are flush on both sides. The top is 20mm longer than the frame to allow you to overlap 10mm on each side. Place the top on the assembled frame and position it flush at the back with a 10mm on the sides and a 10mm overlap at the front. Drill 3mm pilot holes through the top and into the frame and secure with 35mm screws.
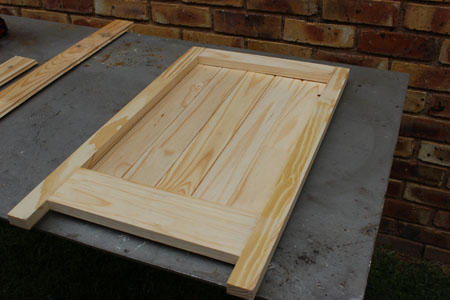
Step 7
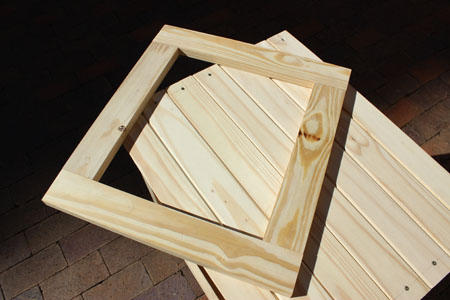
Construct the door using 2 of 428mm x 63mm and 2 of 347mm x 63mm pieces. Place the 347mm piece between the 428mm pieces and join them edge to edge using pocketholes. Cut and fasten 5 planks to the inside of the door frame.
Step 8
Sand the entire cabinet to remove any rough or uneven edges. Start with 80- or 120-grit and then sanding 180- or 240-grit for a smooth finish.
Step 9
Don your gloves and stain the entire cabinet with Woodoc gel stain. The reason imbuia was used was to get the pine as dark as possible.
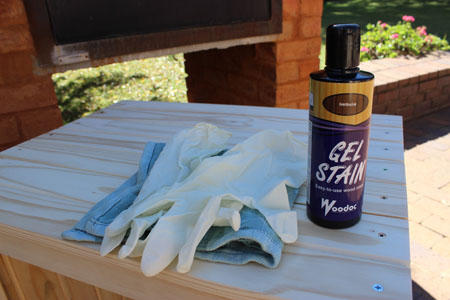
Step 10
Woodoc 5 was used to sealed the cabinet. Woodoc 5 is an interior polywax sealer that dries to a natural matt finish. If you’re not a fan of gloss finishes, this product is the way to go. Apply three coats according to the manufacturer's instructions on the tin.

Step 11
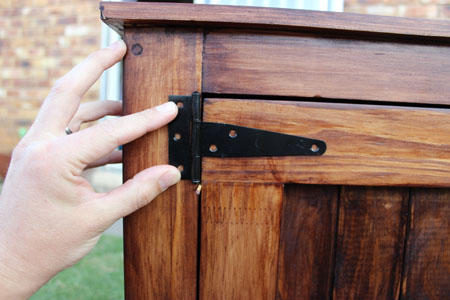
To fit the door use a few matches to ensure an even gap all the way around to keep the door in place while you mark where you need to drill the holes for the hinges. Once the door is hung, you can attach the door knob or handle.