
Make a server or sideboard for a dining room
Dishware, serving pieces, table linens - a sideboard packs a whole lot of storage space into a relatively small footprint, making it a handy addition to any household.
A sturdy, high-quality one can leave a hefty dent in your finances, but you can enhance a few stock kitchen base cabinets with moulding, furniture feet, and knobs to produce a handcrafted piece for a fraction of the cost of buying one ready-made.
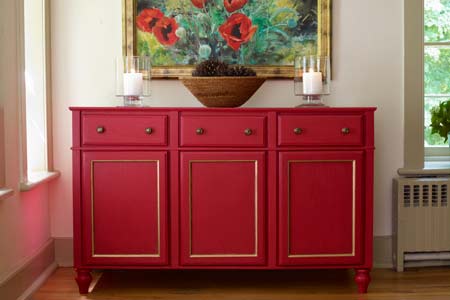
Turned feet and mouldings will lend your finished piece some decorative flair. You'll find all the materials you need at any large home centre or hardware store.
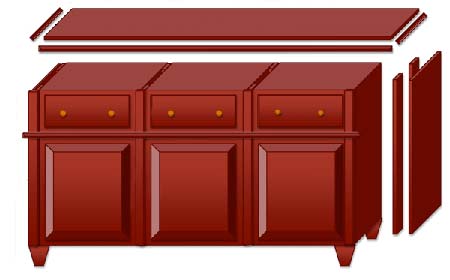
You will need:
1 Sheet of 12mm Supawood
3 Base cabinets
Lattice and moulding strips
3 Push door latches
6 Knobs
4 Furniture feet
4 Corner foot plates
Here's how:
1. Remove the kickplate
If the cabinets are fitted with a kickplate, and to shorten each cabinet to accommodate feet, draw a line that is flush with the bottom edge of the face frame to the kickplate, sides, and back of each cabinet using a combination square. Remove the excess material using a hand saw.
2. Fasten the cabinets together
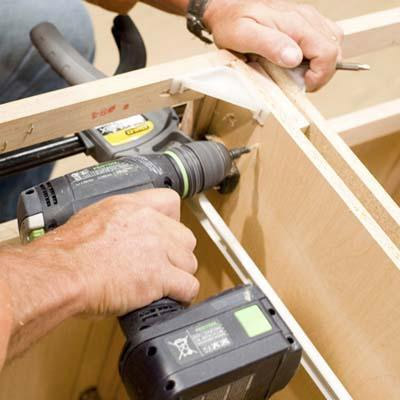
Sandwich two strips of supawood between the cabinets vertically to act as spacers. Using a drill/driver and cut screws, fasten the cabinets together along the length of the strips, sinking the screws from both sides for added strength.
3. Cover the ends
Nail two strips of supawood vertically to the unfinished ends of the joined cabinets, front and back. If the edge of the face frame extends beyond the side, set the front furring strip behind it, as shown here.
Using a circular saw, cut two pieces of supawood to cover the full sides of the joined cabinets. Use finish nails to secure them to the strips. Together, the strips and the supawood on the sides build out the ends of the cabinets enough to match the space between them.
4. Clad the front
Cut a lattice strip 2cm longer than the width of the joined cabinets. Attach it horizontally, on edge below the drawers, using panel pins and wood glue. To cover up the spacers and exposed supawood edges between the cabinets and at the ends, attach vertical stiles cut to size above and below the strip you just attached.
5. Attach foot plates
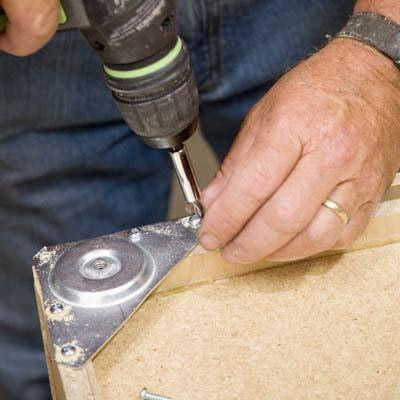
Screw foot plates to the bottoms of the cabinet corners.
Thread the feet onto the plates until they sit snugly. Carefully flip the piece upright, standing it on its feet.
7. Add the knobs
Drill two holes for the knobs in each drawer, making sure they're centered vertically. Hold each knob in place as you tighten the screw from the inside of the drawer.
8. Mount the door latches
Inside each cabinet, toward the top, nail a block against the back of the face frame where the push latch will go. Screw the latch into place so it's flush with the front of the frame, then screw the corresponding magnetic plate to the inside of the door.
DIY Tip:
To position the magnetic plate properly on the inside of the door, colour the back of the plate with a chalk, lipstick, or a felt-tipped marker, then affix the plate to the latch, the marker side facing out. When you close the door, the inked plate will leave a slight mark on the inside of the door where the plate should be positioned.
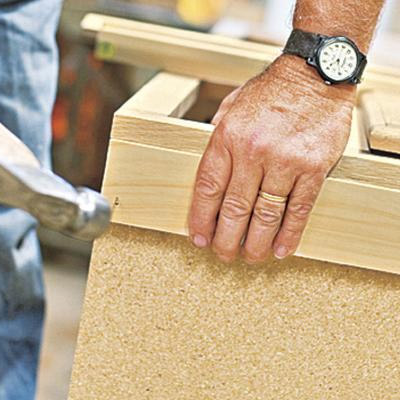
9. Make the top
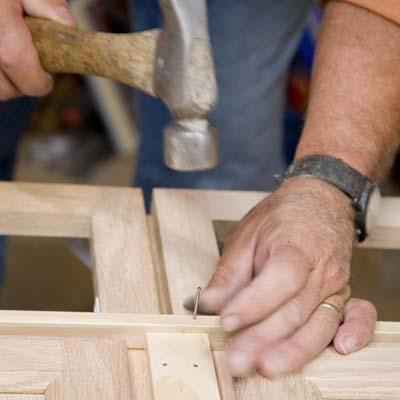
Using a circular saw guided by a straightedge fence, cut a piece of supawood to the full width and depth of the piece, including the stiles on the front and the finished sides. Secure the top through the frame of each cabinet using a hammer and panel pins. Set the nails below the surface of the wood with a nail set.
10. Trim the top
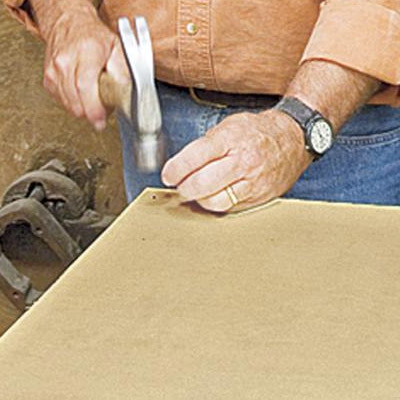
Affix moulding, mitred at the corners, to the side and front edges of the top of the sideboard, using panel pins.
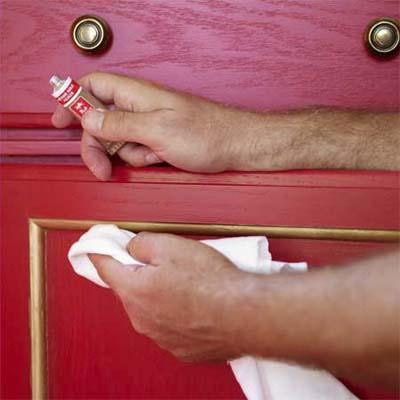
Fill any seams and fastener holes with wood filler using a putty knife.
11. Sand and paint the piece
Sand the surface of the sideboard smooth with 240-grit sandpaper. You can use Woodoc Gel Stain - Dawn Red - too apply colour, and then seal with Woodoc 5 or 10 interior sealer. Or you can paint the cabinet with acrylic paint - finishing off with 2 coats of waterbased sealer for added protection.
Highlight details with Guilders Paste - Gold.
via this old house magazine